Uncategorized
How to Grow Spinach from Seed the Easy Way (No Lights, No Stress, Just Results)
How to Grow Spinach from Seed the Easy Way (No Lights, No Stress, Just Results)

…🗒️Rooted Field Note: 37
❄️ I Planted Spinach in the Snow… and It Didn’t Care
I remember standing there in February, breath hanging in the air, snow still packed around the edges of the yard… and I’m holding a cut-up milk jug like I’ve finally lost it 😅
My son’s inside, probably thinking I’m doing something important.
Truth is… I just didn’t want to wait anymore.
So I filled that jug with soil, sprinkled in spinach seeds, snapped the lid shut, and set it right outside in the cold.
No lights.
No heat mats.
No perfect timing.
And if you’re being honest with yourself… you’ve probably been there too. That point where you want to grow something, but everything online makes it feel like you need a full setup just to start.
Here’s what surprised me the most:
Spinach didn’t just survive that… it preferred it.
🌱 Why Growing Spinach from Seed Feels So Hard (Until It Doesn’t)
Spinach has this reputation of being “easy,” but that’s only half the truth.
It’s easy… if you stop trying to grow it like everything else.
Most of us bring seeds inside, crank the heat, baby them under lights, and then wonder why spinach refuses to cooperate. It sits there, patchy, uneven, or just never shows up at all.
And when it does grow?
The second things warm up, it bolts like it’s trying to escape you.
That’s the part nobody really says out loud:
Spinach is a cold crop pretending to be difficult.
Once I stopped fighting that… everything got simpler.
🥛 The Milk Jug Wasn’t a Hack… It Was a Reset
That milk jug wasn’t some clever trick I found scrolling late at night.
It ended up being something better—a way to step back and let nature handle the parts I was overcomplicating.
I cut it open just enough to create a little hinge. Not perfect. Not measured. Just enough so it could open and close. Poked a few holes in the bottom with whatever I had nearby, filled it with soil, and gave it a good soak before adding seeds.
That soil mattered more than I expected.
Not in a complicated way… just in the sense that it needed to breathe. Spinach doesn’t like being trapped in heavy dirt. It wants something light enough to push through but still hold onto moisture.
👉 [ Seed Starting Mix Calculator + My Exact Blend]
(This is the same mix I use when I don’t want to guess and risk losing a tray of seedlings.)
After that, I sprinkled seeds across the surface. No ruler. No spacing grid. Just a natural scatter, like you’d toss seed in the wild. A light dusting of soil on top, and that was it.
Then I closed the jug… and walked away.
🧊 The Waiting Is the Hardest Part (And the Most Important)
Nothing happens at first.
That’s where most people give up.
You check it.
Then check it again.
Then start thinking maybe you did something wrong.
But inside that jug, something’s happening you can’t see yet. The temperature shifts. The moisture cycles. The seeds are doing exactly what they’re supposed to do—waiting for the right moment.
And that’s the part I think hits deeper than gardening.
Because we’re not good at waiting anymore.
We want signs right away. Growth right away. Proof that we didn’t mess it up.
But spinach doesn’t care about your timeline.
It waits… and then one day, it shows you.
🌞 The First Sprouts Change Everything
The first time I saw those tiny green leaves pushing up through the soil, it felt different than starting seeds inside.
They weren’t weak.
They weren’t reaching for light.
They weren’t struggling.
They looked like they belonged there.
Because they did.
No hardening off.
No transplant shock waiting around the corner.
No guessing if they’re ready for the outside.
They were already part of it.
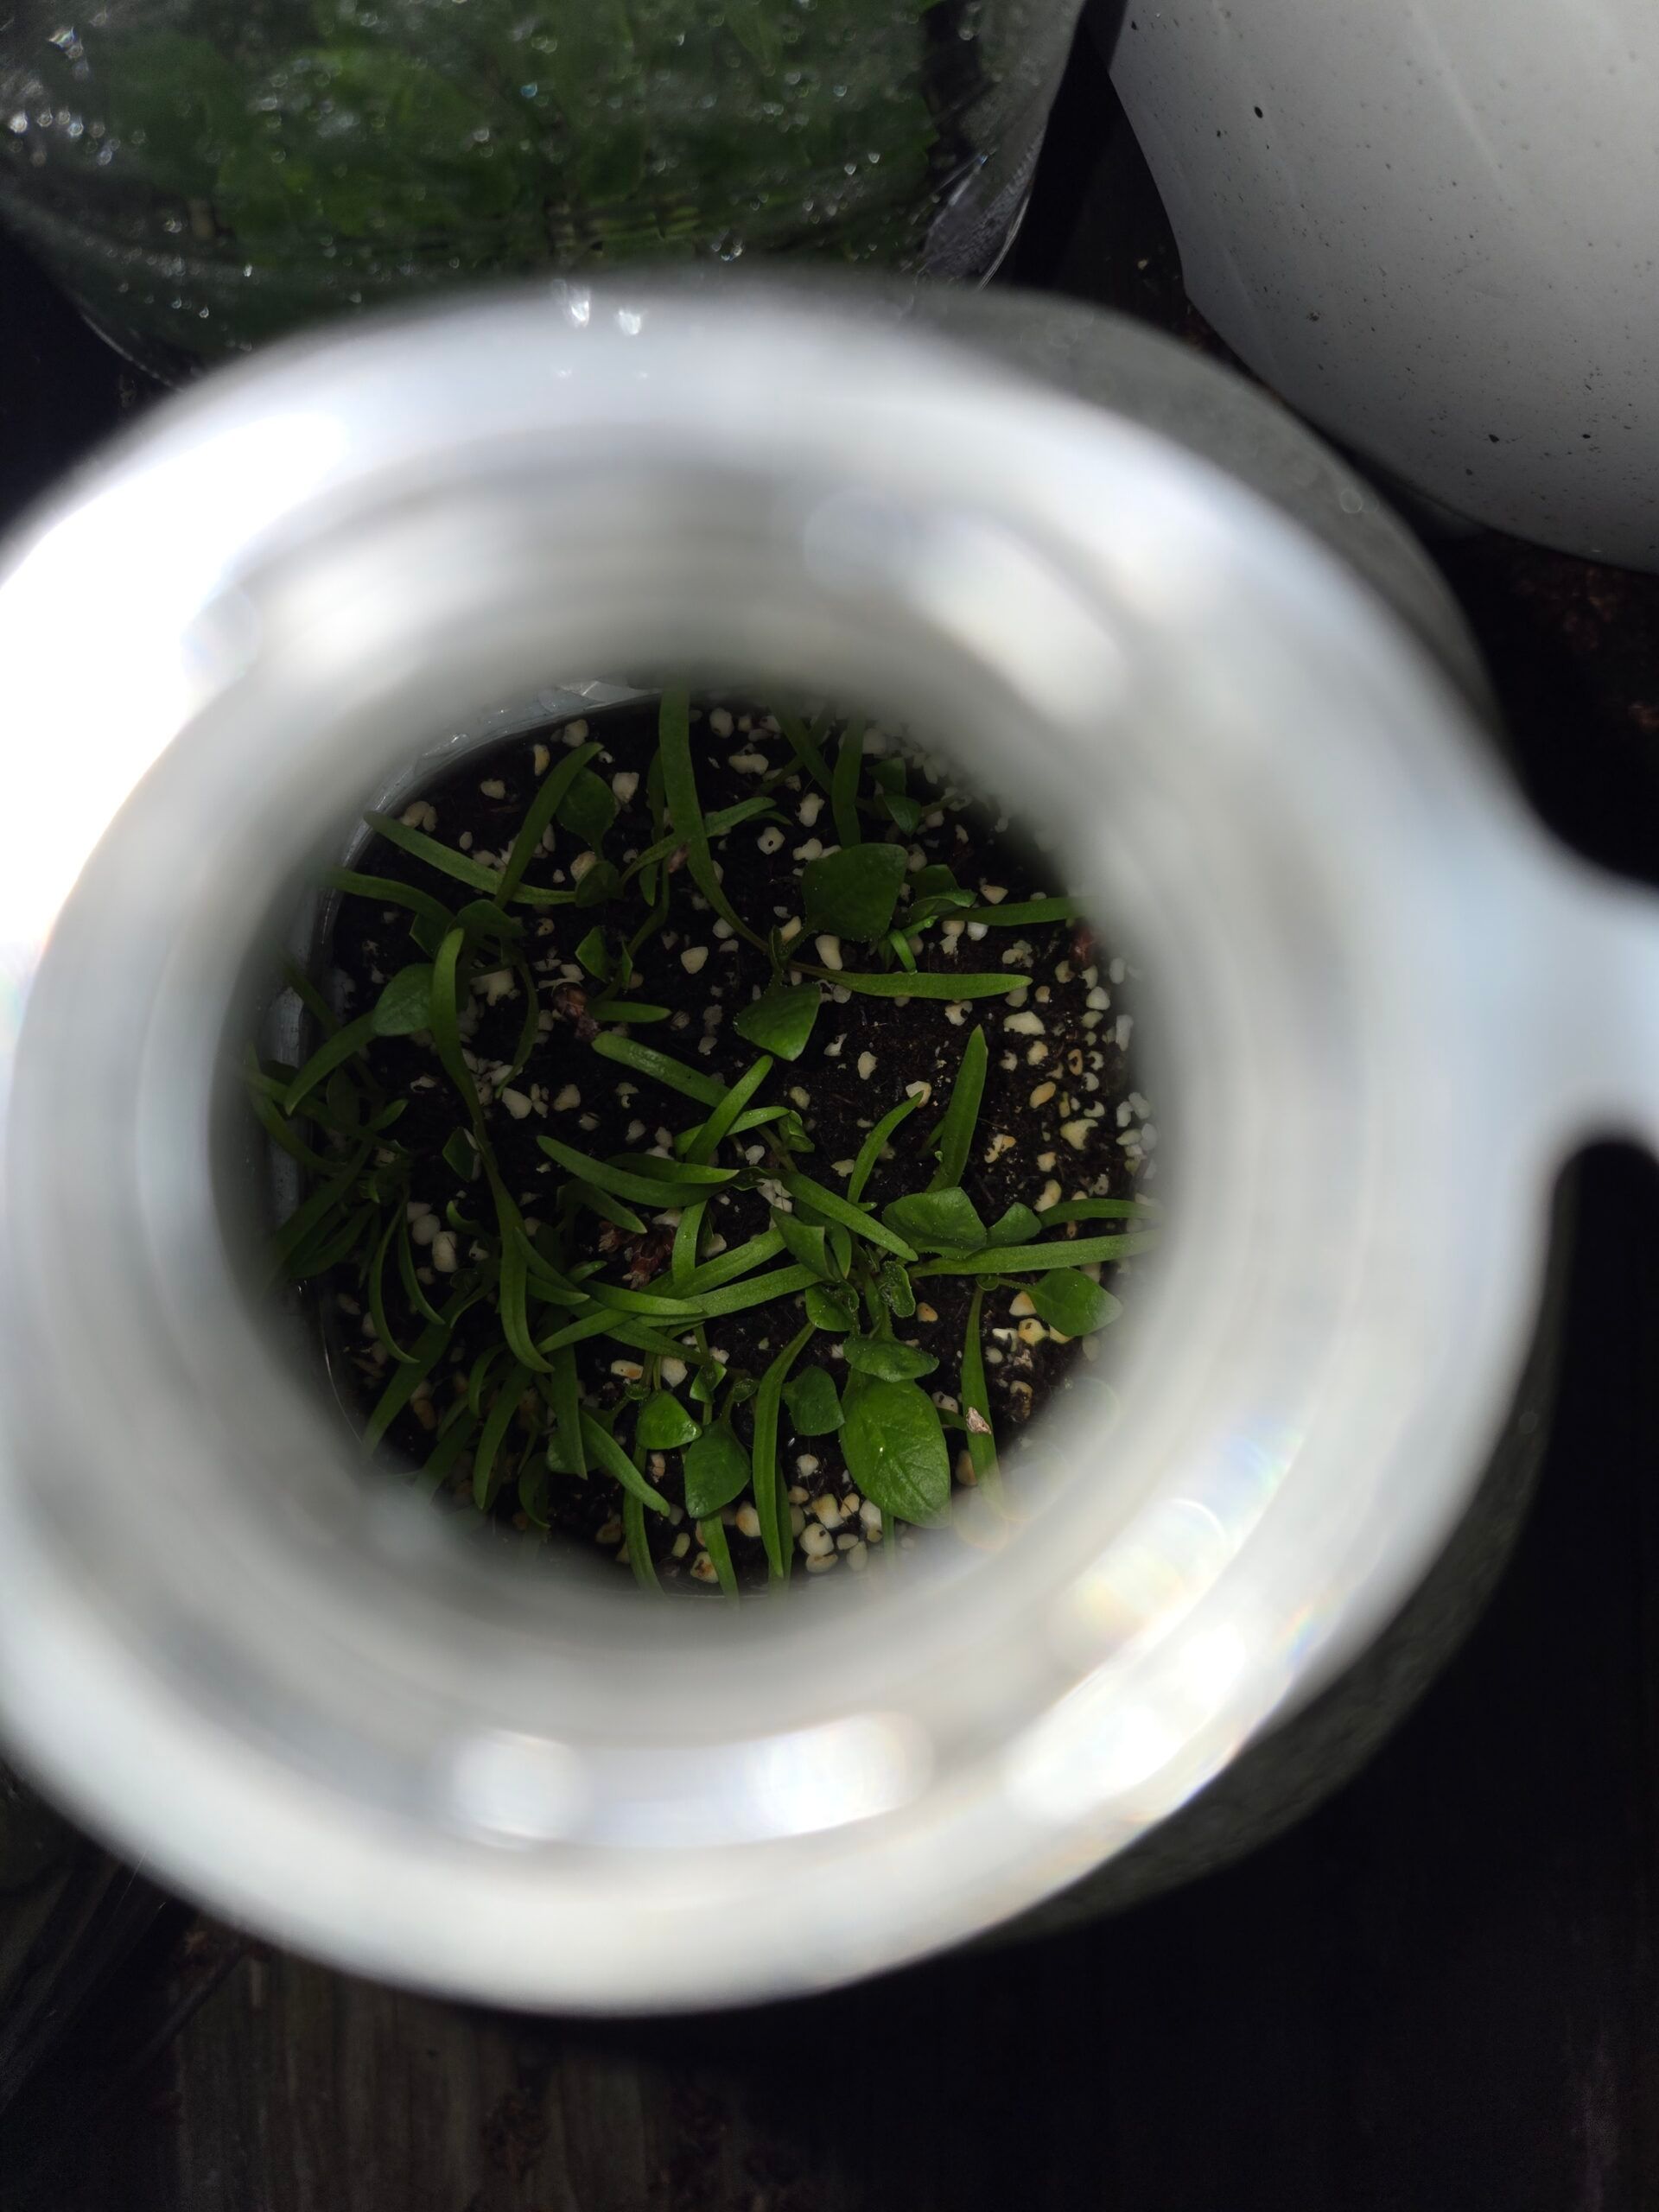
I planted spinach seeds in a recycled milk jug in February and let nature do the work. This simple winter sowing method makes growing spinach from seed easy. 🌱
🌿 Letting Go of Control (Just Enough)
As the days started warming up, I noticed condensation building inside the jug. Little drops forming, running down the plastic, keeping everything alive without me touching it.
That’s when I started opening it a bit during the day. Not on a schedule… just when it felt right.
🥗 Harvest Feels Different When You Didn’t Force It
When the leaves got big enough to pick, I didn’t pull the whole plant. I just took what I needed and left the rest.
And it kept growing.
That’s when it really clicked for me—this wasn’t just about growing spinach from seed.
It was about building something that keeps giving instead of something you have to restart over and over again.
😅 If You’re Just Starting… Read This
If you’ve never grown anything before, or you’ve tried and it didn’t work… this is one of those places I’d point you to without overthinking it.
You don’t need the perfect setup.
You don’t need to understand everything.
You just need to start.
And if it doesn’t work?
You lost a milk jug and a handful of seeds.
That’s a pretty low price for learning something real.
🌱 Where This Leads
This one little experiment opened the door for a lot more. Cold crops, winter sowing, letting nature handle the heavy lifting instead of trying to recreate it indoors.
And I’ll be tying this back into soil too—because that’s honestly where most success comes from.
👉 Don’t forget to check the Seed Starting Mix Calculator when you want to dial that in without wasting time.
🪴 Final Thought From the Homestead
That milk jug sitting out in the snow didn’t look like much.
But it reminded me of something I think we all need to hear a little more often:
Growth doesn’t need perfect conditions.
It just needs the right environment… and a little patience.
And sometimes, the best thing we can do is stop trying to force it… and let it happen.
What the Broccoli Sprout Research Made Me Do at Home
What the Broccoli Sprout Research Made Me Do at Home
There was a point where I started looking at food a little differently…
🗒️Rooted Field Note: 36
Not just as something to fill a plate… but as something that might actually help us handle the world we’re living in.
Because let’s be honest — we’re surrounded by things our bodies were never exactly designed to deal with. Plastics. Pollution. Chemical exposure. The kind of junk that quietly piles up in the background while we’re just trying to live our lives and feed our families.
And once I started reading more about broccoli sprouts, I kept coming back to the same thought:
If I can grow something this simple on my counter that may help support the body’s own detox pathways… why wouldn’t I?
That’s what sent me down the broccoli sprout rabbit hole.
🌱 Why I Started Paying Attention to Broccoli Sprouts
What caught my attention wasn’t hype. It wasn’t some trendy wellness claim floating around online.
It was the fact that researchers have actually studied compounds from broccoli sprouts in relation to the body’s detox systems.
The big compound people talk about is sulforaphane, which comes from broccoli sprouts and is tied to the plant’s natural protective compounds. Broccoli sprouts are especially interesting because they can contain a lot more of the precursor compounds than mature broccoli.
That doesn’t mean broccoli sprouts are magic. And it definitely doesn’t mean I’m claiming they somehow vacuum plastic particles out of the human body.
But it does mean they may help support the body’s own detox machinery, which is exactly why I thought this was worth turning into something practical for people.
🧪 What the Research Pushed Me Toward
Once I started reading the research, I realized something pretty fast:
Even when the science is interesting, most normal people are still left wondering what they’re actually supposed to do with it.
That’s the gap I wanted to close.
I didn’t want to just talk about broccoli sprouts in some vague “healthy superfood” way.
I wanted to create something that helped answer the real questions:
- How much should I actually plan to grow?
- How many seeds would I need?
- What if I’m growing for more than one person?
- What if I’m trying to keep a steady daily habit going instead of just eating a random handful once in a while?
That’s why I made the calculator.
Not because I think a calculator can magically measure your exact sprouts.
It can’t.
But it can give you a practical planning tool based on research-inspired numbers, and for me that felt a whole lot more useful than just saying, “Yeah… maybe eat some sprouts.”
⚠️ The Honest Part: This Is an Estimate
This part matters, and I wanted to be very clear about it inside the calculator too.
There is no way for the calculator to know the exact amount of beneficial compounds in your particular batch of sprouts.
Seed genetics matter. Growing conditions matter. Sprout age matters. Handling matters.
So instead of pretending there’s one exact, magical number, I built the calculator around a nominal range.
That means it gives you a practical estimate — not a lab test.
To me, that’s the honest way to do it.
🥗 Why I Wanted This to Be Useful for Real Families
One thing I didn’t want was a tool that only made sense for one perfect adult eating one perfect serving in one perfect wellness fantasy kitchen.
That’s not how life works around here.
Sometimes you’re growing for yourself.
Sometimes you’re growing for your whole household.
Sometimes you’ve got children involved too, and you’re trying to think through what makes sense for real people and real portions.
So I built the planner to account for:
- Adults
- Children
- Days of planning
- Estimated fresh sprout amount
- Estimated seed amount
- A broader planning range so people can see what “weaker” or “stronger” sprouts might change
That’s the kind of thing I would want if I were trying to actually use this in my own kitchen instead of just reading about it and moving on.
🌿 How to Grow Broccoli Sprouts at Home
🧰 What You Need
- 🥦 Broccoli sprouting seeds
- 🫙Mason jars (or any clean glass jar)
- 🧵 A mesh lid, sprouting lid, or even a cloth + rubber band
- 💧 Clean water
🌊 Step 1: Soak the Seeds
🚿 Step 2: Drain and Rinse
🌬️ Step 3: Let Them Breathe
- lets excess water drain out
- allows air to move through the sprouts
🔁 Step 4: Rinse Daily
- fill the jar with water
- swirl it around
- drain it completely
🌿 Step 5: Watch Them Grow
☀️ Optional Step: Add Light at the End
🥗 Step 6: Eat and Restart
- salads
- sandwiches
- eggs
- or just eat them straight
📏 Why the Calculator Matters More Than Just Guessing
I know some people will just toss seeds in a jar and wing it.
And honestly, if that gets them started, I’m not mad about it.
But for the people who want something a little more intentional, the calculator is there to help bridge that gap.
It helps answer things like:
- How much should I plan per adult?
- How much might make sense per child?
- How many seeds would I need for a week?
- What might I want to buy for a full month if I’m trying to stay consistent?
To me, that’s where this becomes useful.
It turns broccoli sprouts from a neat idea into something you can actually plan around.
🫙 The Countertop Part Is My Favorite Part
I love garden projects. I love big plans. I love building things out over time.
But I also really love the small wins.
Broccoli sprouts feel like one of those small wins.
A jar on the counter.
A few rinses a day.
A little bit of intention.
And suddenly you’re growing something fresh, living, and genuinely useful right in the middle of everyday life.
That’s the kind of thing I always want more of around here.
🧠 Why I Made This for the Reader
I made this calculator because I didn’t want people to get excited about broccoli sprouts, search around for five minutes, and then give up because nobody translated the research into something usable.
I wanted to make it easier for somebody to say:
“Okay… this makes sense. I can actually do this.”
That’s really the heart of it.
I’m not trying to make this feel mysterious.
I’m trying to make it feel possible.
👇 Try the Broccoli Sprout Planner
If you want help figuring out how much to grow for yourself, your kids, or your whole household, I made the planner for exactly that.
Use the calculator below to estimate:
- daily fresh sprout amounts
- weekly planning totals
- seed amounts
- kitchen-friendly seed estimates
- 30-day buying estimates
Countertop planning sheet
🥦 Broccoli Sprout Research Planner
I made this to turn the broccoli sprout research into something a real person can actually use. Instead of leaving you guessing, this planner helps estimate how many fresh sprouts and how many seeds you may want to grow for a steady daily routine.
🥗 Balanced adult daily target
🧒 Balanced child daily target
📏 Nominal adult range
👨👩👧👦 Household daily amount
📦 Total sprouts for this cycle
🌱 Balanced seed estimate
🌿 Nominal seed range
🥄 Balanced seed amount per day
🥄 Seed amount per day (tablespoons)
🫙 Jar planning hint
🛒 30-day seed buying estimate
📝 Printed Planner Note
🌿 Join the Rooted Crew
🔬 Research Links I Used While Building This
If you like seeing where this stuff comes from, here are the studies and research pages I used as part of the thinking behind this project:
- Clinical trial on broccoli sprout beverage and detoxification of airborne pollutants
- PubMed version of the broccoli sprout detox study
- Dose-dependent broccoli sprout beverage study
- Study on sulforaphane bioavailability from broccoli sprouts
- Review discussing glucoraphanin variability in broccoli sprouts
🌻 Final Thought
I like tools that help people do something real.
That’s what this one is for.
Not perfection.
Not pretending we can measure every molecule in a jar on the counter.
Just a practical way to grow something useful, plan it better, and make the whole thing easier to stick with.
And honestly, that’s the kind of help I’m always trying to build around here.
What Is a Sweet Potato Slip? (Simple Explanation for Beginners)
What Is a Sweet Potato Slip? (Simple Explanation for Beginners 🥔🌱)
🗒️Rooted Field Note: 35
🌿 What Is a Sweet Potato Slip?
👉 rooting those slips
👉 planting them in warm soil
🌱 Where Do Slips Come From?
- Grow into vines 🌿
- Develop leaves 💚
- Can be removed and used as slips
✂️ What Makes Something a “Slip”?
- It has a section of vine
- It has leaves
- It can be removed from the sweet potato
💧 What Happens After You Remove a Slip?
- It is placed in water
- Roots begin forming from the stem
- It becomes a self-sustaining plant
☀️ When Is a Slip Ready to Plant?
- Roots are visible and growing
- The plant looks stable and healthy
- Outdoor conditions are warm (no frost risk)
🌡️ Why Temperature Matters
- Cold soil slows or stops growth ❄️
- Warm soil encourages rapid growth 🔥
👉 soil temperatures reach about 65°F or higher
🔄 How Many Slips Can One Sweet Potato Produce?
- 10+ slips from a single potato
- Sometimes much more depending on conditions
🌿 Why Slips Are Important
- Allow you to multiply plants easily
- Provide a strong, established start
- Reduce the need to buy plants
🧭 Want Help With Timing?
🌱 Simple Way to Think About It
👉 not a root
👉 not a cutting from another plant
Growing Sweet Potato Slips in a Jar (and Why I Let Mine Go Completely Wild)
Growing Sweet Potato Slips in a Jar (and Why I Let Mine Go Completely Wild 🥔🔥🌿)
🗒️Rooted Field Note: 34
🌿 What Are Sweet Potato Slips?
Sweet potato slips are vine cuttings that grow from a sweet potato and can be rooted and planted to grow new plants.
Instead of planting seeds, growing sweet potato slips means taking these shoots, rooting them in water, and then planting them in warm soil once they’re established.
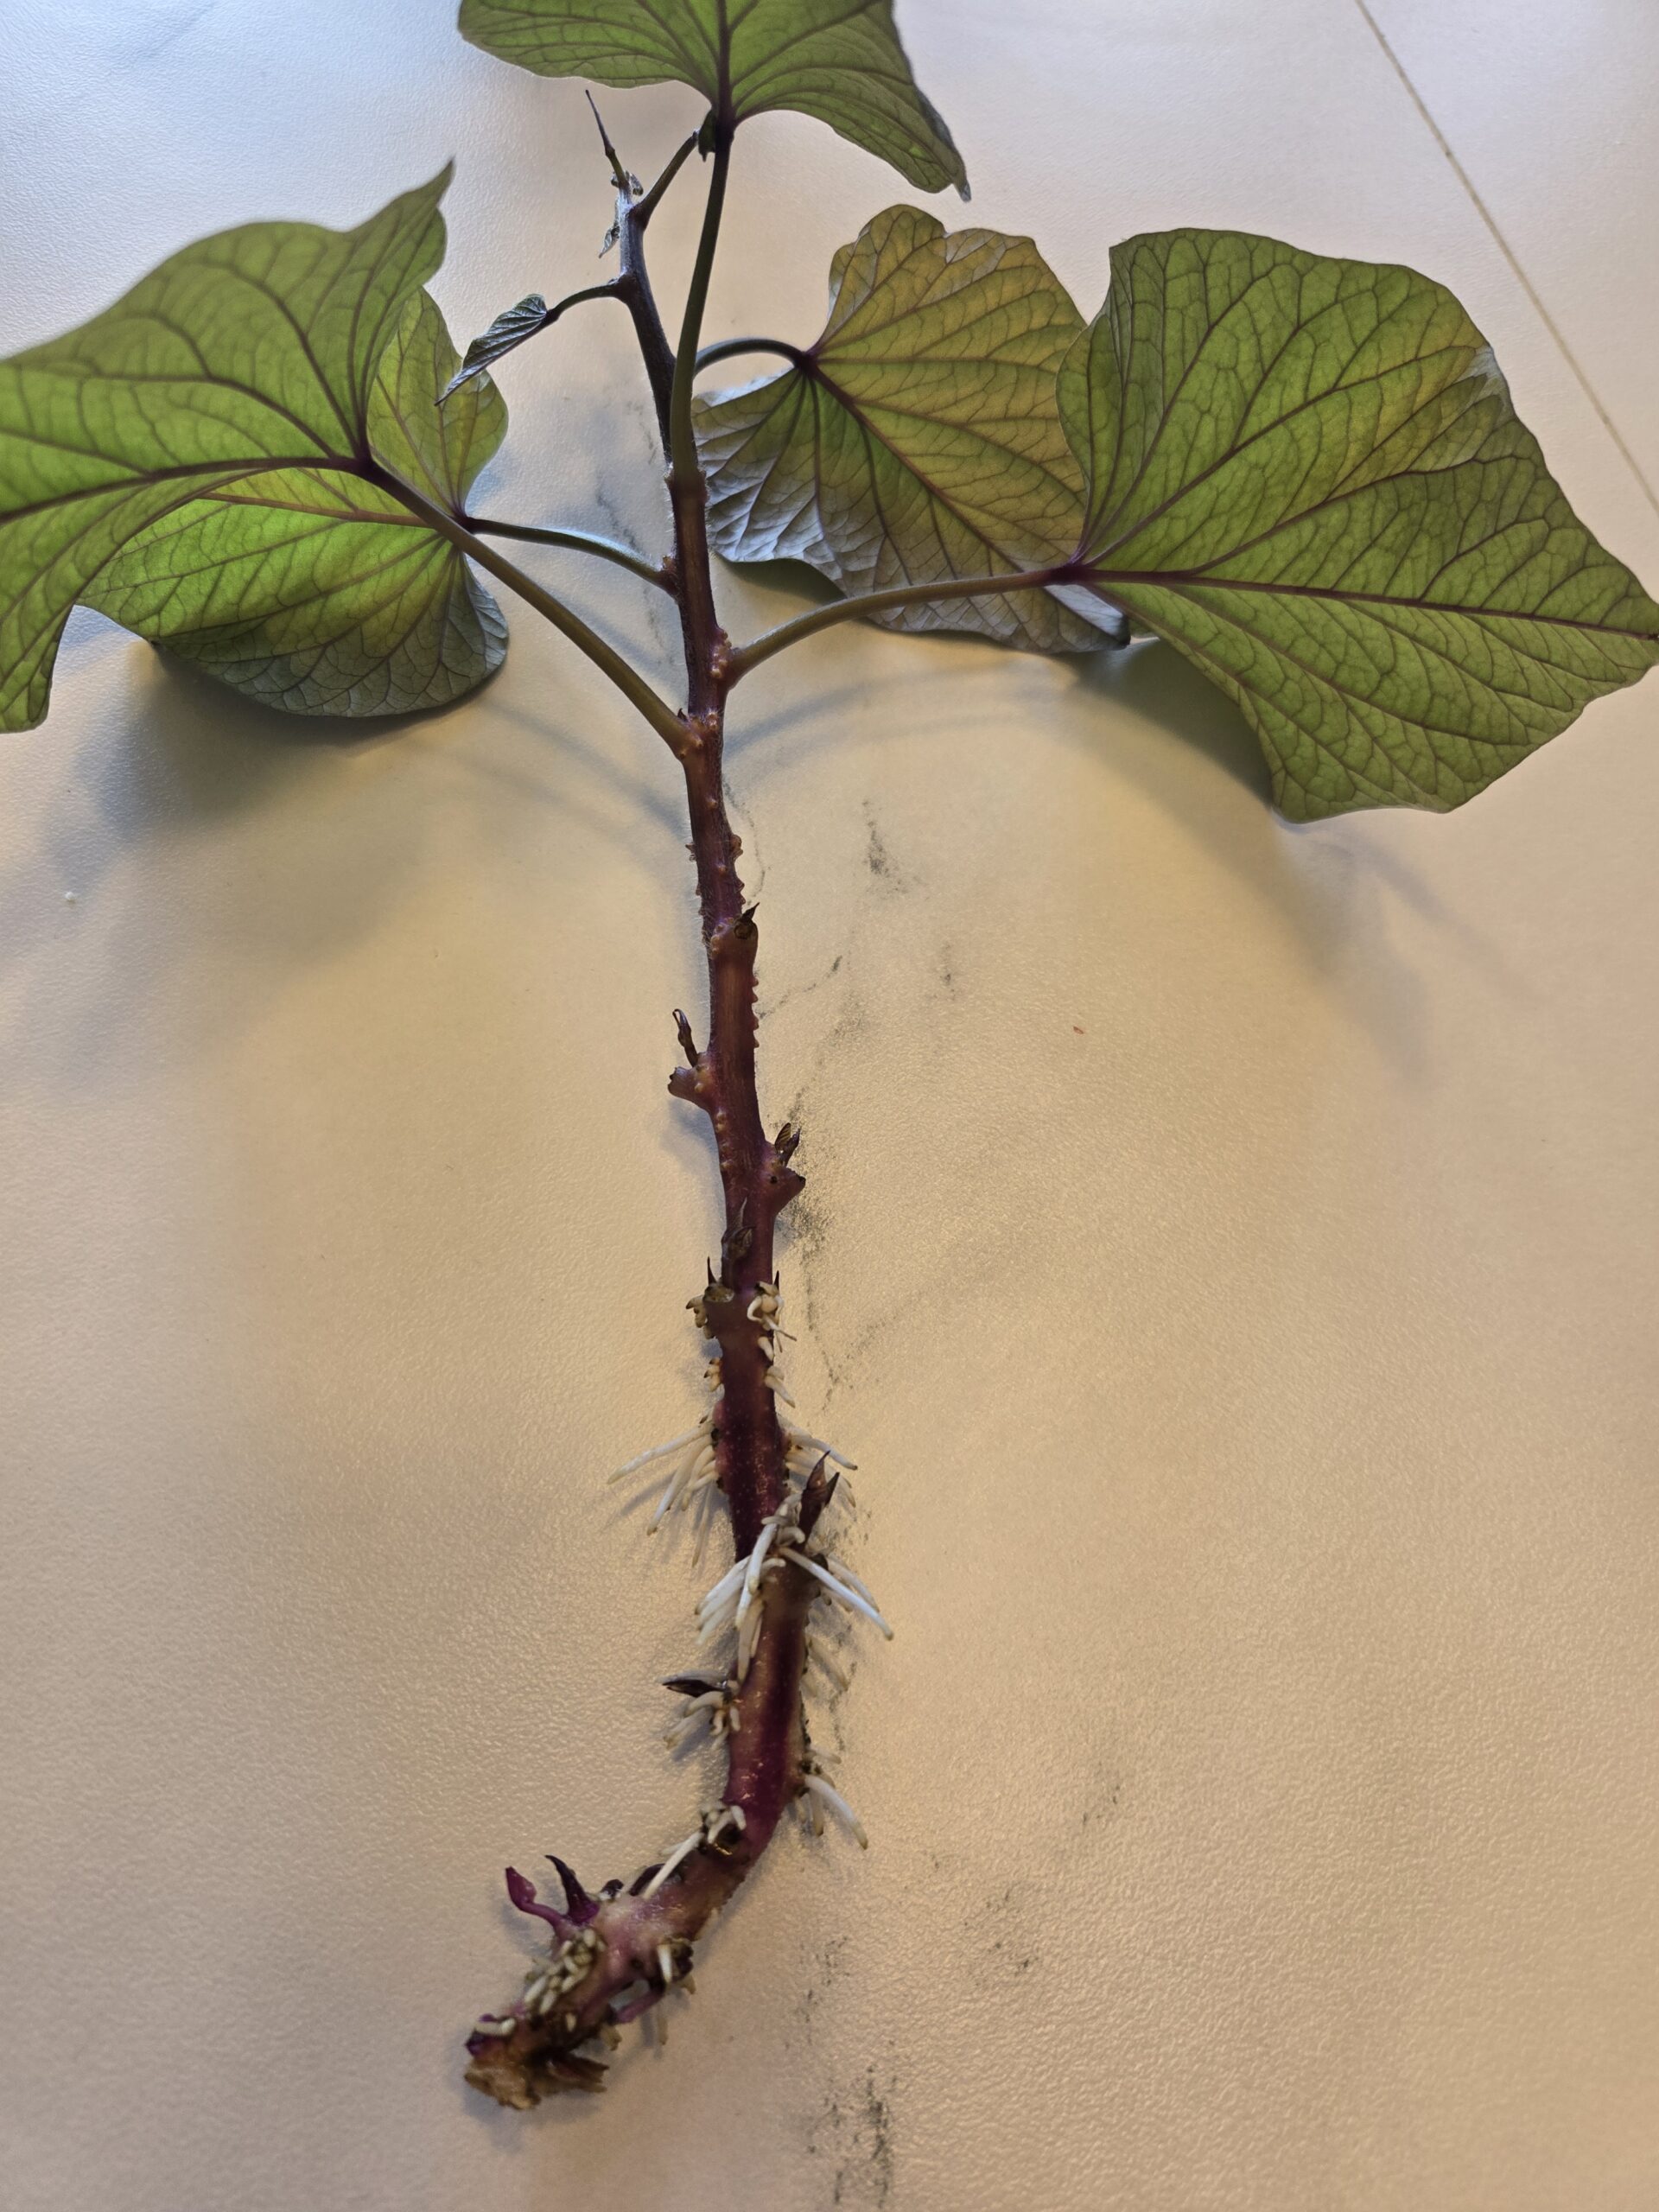
A rooted sweet potato slip starting to form strong roots before going into soil 🌱
I never set out to grow sweet potato slips by the book.
My mission was simple: grow as many as possible 😄
That was the whole goal.
Forget those tidy, postcard-perfect slips posing in a jar like seed packet models. I wanted chaos instead🌿🔥 I wanted vines to climb, leaves to pile up, and a wild tangle of slips overflowing by planting time.
Because every time I’ve tried to keep things neat in the garden… I end up wishing I had just let it run a little wilder 😅
So that’s what I did.
And if you’re here, you’re probably thinking about trying this, or maybe you already have a potato sitting in a jar and are wondering if you’ve accidentally started a science experiment 🧪🥔
Either way, you’re in the right place 👍
At the beginning, it feels like nothing is happening.
You set the sweet potato in water, maybe prop it up a little, maybe not, and then you wait… and wait just a little longer than you expected ⏳
The jar sits there, almost too quiet. Suspiciously quiet 🤨
But then something shifts.
A tiny bump appears. Then another. Suddenly, a vine stretches out, testing the air as if it’s waking up to possibility 🌱
And before you know it, that one potato starts acting like it has something to prove 💪
That’s the moment I stopped thinking, “Is this working?”
and started thinking…
👉 “How far can this actually go?” 🔥
And that question changed everything.
Because once that first vine stretched out, it didn’t stop.
It kept reaching.
Then another one joined it.
Then another.
Suddenly, the jar no longer feels like just a container. It starts to feel like a launchpad 🚀
There’s a moment when you realize you’re not just growing a plant…
You’re watching something multiply.
Not fast like weeds.
Not slow like seeds.
Something in between… something deliberate 🌿
The vines start overlapping.
Leaves stack on top of each other.
New growth shows up before you even decide what to do with the old growth.
And instead of stepping in to manage it, I stepped back.
I let it build.
Because every time I reached toward the jar, I noticed something.
Where one vine grew, two more weren’t far behind.
Where a leaf formed, a new shoot wasn’t far underneath it.
It felt less like something fragile, and more like something that wanted to expand 🌱🔥
So instead of thinking, “When should I take slips?”
I started thinking…
👉 “What happens if I wait just a little longer?”
And the answer was always the same.
More.
More vines.
More growth.
More chances.
When I finally did start pulling slips off, it didn’t feel like cutting something back.
It felt like I was harvesting pure potential ✂️🌿
Each piece I took had already lived part of its life attached to that potato.
Already stretched.
Already proven it wants to grow.
And now it was getting a chance to become something on its own.
I dropped those slips into water, starting the whole adventure over again, only this time on a smaller scale. 💧
And just like before, they adjusted.
Then they rooted.
Watching roots form teaches a whole new kind of patience.
Because this time, the growth isn’t reaching outward, it’s anchoring down 🌱
Little white roots push out, almost as if the plant is deciding, “Yeah… I’m staying.”
And once that happens, everything changes again.
Because now it’s not just a cutting.
Now it’s a plant.
That’s when I move them into soil.
Not because the calendar says so.
Not because a guide says “day 10.”
But because they look ready 👀
And when they hit soil, that’s when I finally start giving them more direct sunlight through the window ☀️
Not as a shock.
Not as a jump.
Just another step forward.
Before moving them fully outside, I ease them into it. (Hardening Off Phase)
I’ll set them outside for a little while at first, then bring them back in. Then a little longer the next day. Just letting them get used to real sun, real air, and the outside world gradually 🌤️
That transition matters more than it seems. It’s the difference between a plant that struggles… and a plant that takes off once it hits the ground 🌱🔥
If you don’t have that kind of window light, grow lights step into that role easily 💡
Nothing complicated.
Just steady light, somewhere in that 12 to 16 hour range, and they’ll keep moving forward like they were always meant to.
At some point during all of this, the question of “am I doing it right?” just disappears.
Because the plant answers it for you.
It grows 🌱
That’s it.
And once you see that, really see it, you stop trying to control every part of the process.
You start paying attention instead.
You notice when something is ready.
You notice when something wants more time.
You notice when something is about to take off.
And that’s when this stops feeling like a method, and starts to feel like a rhythm you can move with. 🔄🌿
By the time planting season gets close, I’m not counting slips.
I’m looking at options.
Which ones look strongest.
Which ones I want to give space to.
Which ones I might push just a little further.
That’s a different position to be in.
And it all started with a potato in a jar.
If you’re trying to line this up with the rest of your garden, especially timing it with when your soil actually warms up, that part can sneak up on you fast. 🗓️
That’s exactly why I built this:
👉 Planting Timeline Calculator
It helps you line everything up so your slips are ready right when it matters.
And when those rooted slips are ready for soil, and you’re wondering what to put them in, I’ve been keeping that part simple too.
Nothing fancy. Just something that drains well and lets those roots keep doing what they already started.
At the end of all this, it doesn’t really feel like you “grew sweet potato slips.”
It feels like you set something in motion and then simply stepped aside.
One potato.
One jar.
One quiet beginning.
And then…
More than you expected 🥔➡️🌱➡️🌿🔥
And if your jar starts looking a little out of control along the way?
Good 😄
That means it’s working.
Growing Celery: Why Most People Fail (And How to Finally Get It Right)
Growing Celery: Why Most People Fail (And How to Finally Get It Right) 🥬
🗒️Rooted Field Note: 33
If you’ve tried growing celery before, there’s a good chance you walked away thinking you did something wrong.
The seeds barely sprouted. The plants stayed small. Growth felt painfully slow. And at some point, it probably crossed your mind that celery just isn’t worth the effort.
But here’s the truth most guides won’t say clearly enough:
Celery isn’t difficult because it’s complicated. It’s difficult because small mistakes stack up fast.
This is exactly why I started using simple tools to remove the guesswork. Once timing and soil were dialed in, celery stopped feeling frustrating… and started feeling predictable.
The Real Reason Growing Celery Feels So Hard 🧠
Celery exposes every weak point in your setup.
It doesn’t tolerate inconsistent watering. It doesn’t respond well to poor timing. And it doesn’t reward rushed decisions.
Most beginner failures come down to three things:
- Starting seeds at the wrong time
- Using a poor seed-starting mix
- Letting seedlings dry out even once
Fix those three variables, and celery becomes far more manageable.
The Timing Mistake That Ruins Most Celery Crops ⏳
Celery is a long-season crop. That means if your timing is off, everything else becomes harder.
Most gardeners need to start celery seeds 10 to 12 weeks before their last frost date, then transplant outside about 1 to 2 weeks before the last frost.
This is where most people guess… and guessing is where things go sideways.
Instead of counting backward on a calendar and hoping it’s right, I use a tool to do it instantly.
🌱 Use the Plant Timeline Calculator here
Once your timing is correct, celery becomes a completely different experience.
The Soil Problem Nobody Talks About 🧱
If your seed-starting mix is off, celery will let you know.
Too dense? Poor germination.
Too dry? Seeds struggle or fail.
Too wet? You invite mold and weak growth.
Celery needs a mix that holds moisture while still allowing airflow.
This is exactly why I started using a mix calculator instead of guessing ratios.
🧱 Build your seed-starting mix here
When your mix is right, watering becomes easier… and celery becomes far less stressful to grow.
How to Start Celery Seeds Without Killing Them 🌱
Celery seeds are tiny, and they don’t behave like most garden seeds.
They should be surface sown or barely covered, since they need light to germinate. The soil should stay consistently moist—not soaked, not dry.
And then comes the part most people struggle with:
Waiting.
Celery can take two to three weeks to germinate, and early growth is slow. That’s normal.
When your timing and soil are already dialed in, it’s much easier to trust the process instead of second-guessing everything.
How These Tools Actually Help You 🌿
Gardening can get overwhelming fast.
You start looking up one thing, and suddenly you’re juggling frost dates, seed timing, soil mixes, and transplant schedules all at once.
That’s where these tools come in.
- 🌱 The Plant Timeline Calculator removes the guesswork from when to start celery
- 🧱 The Seed Mix Calculator helps you build a mix that actually supports seedlings
- 🌿 Together, they give you a system instead of a guessing game
Instead of asking, “Am I doing this right?”
You start asking, “Did I follow the system?”
That shift changes everything.
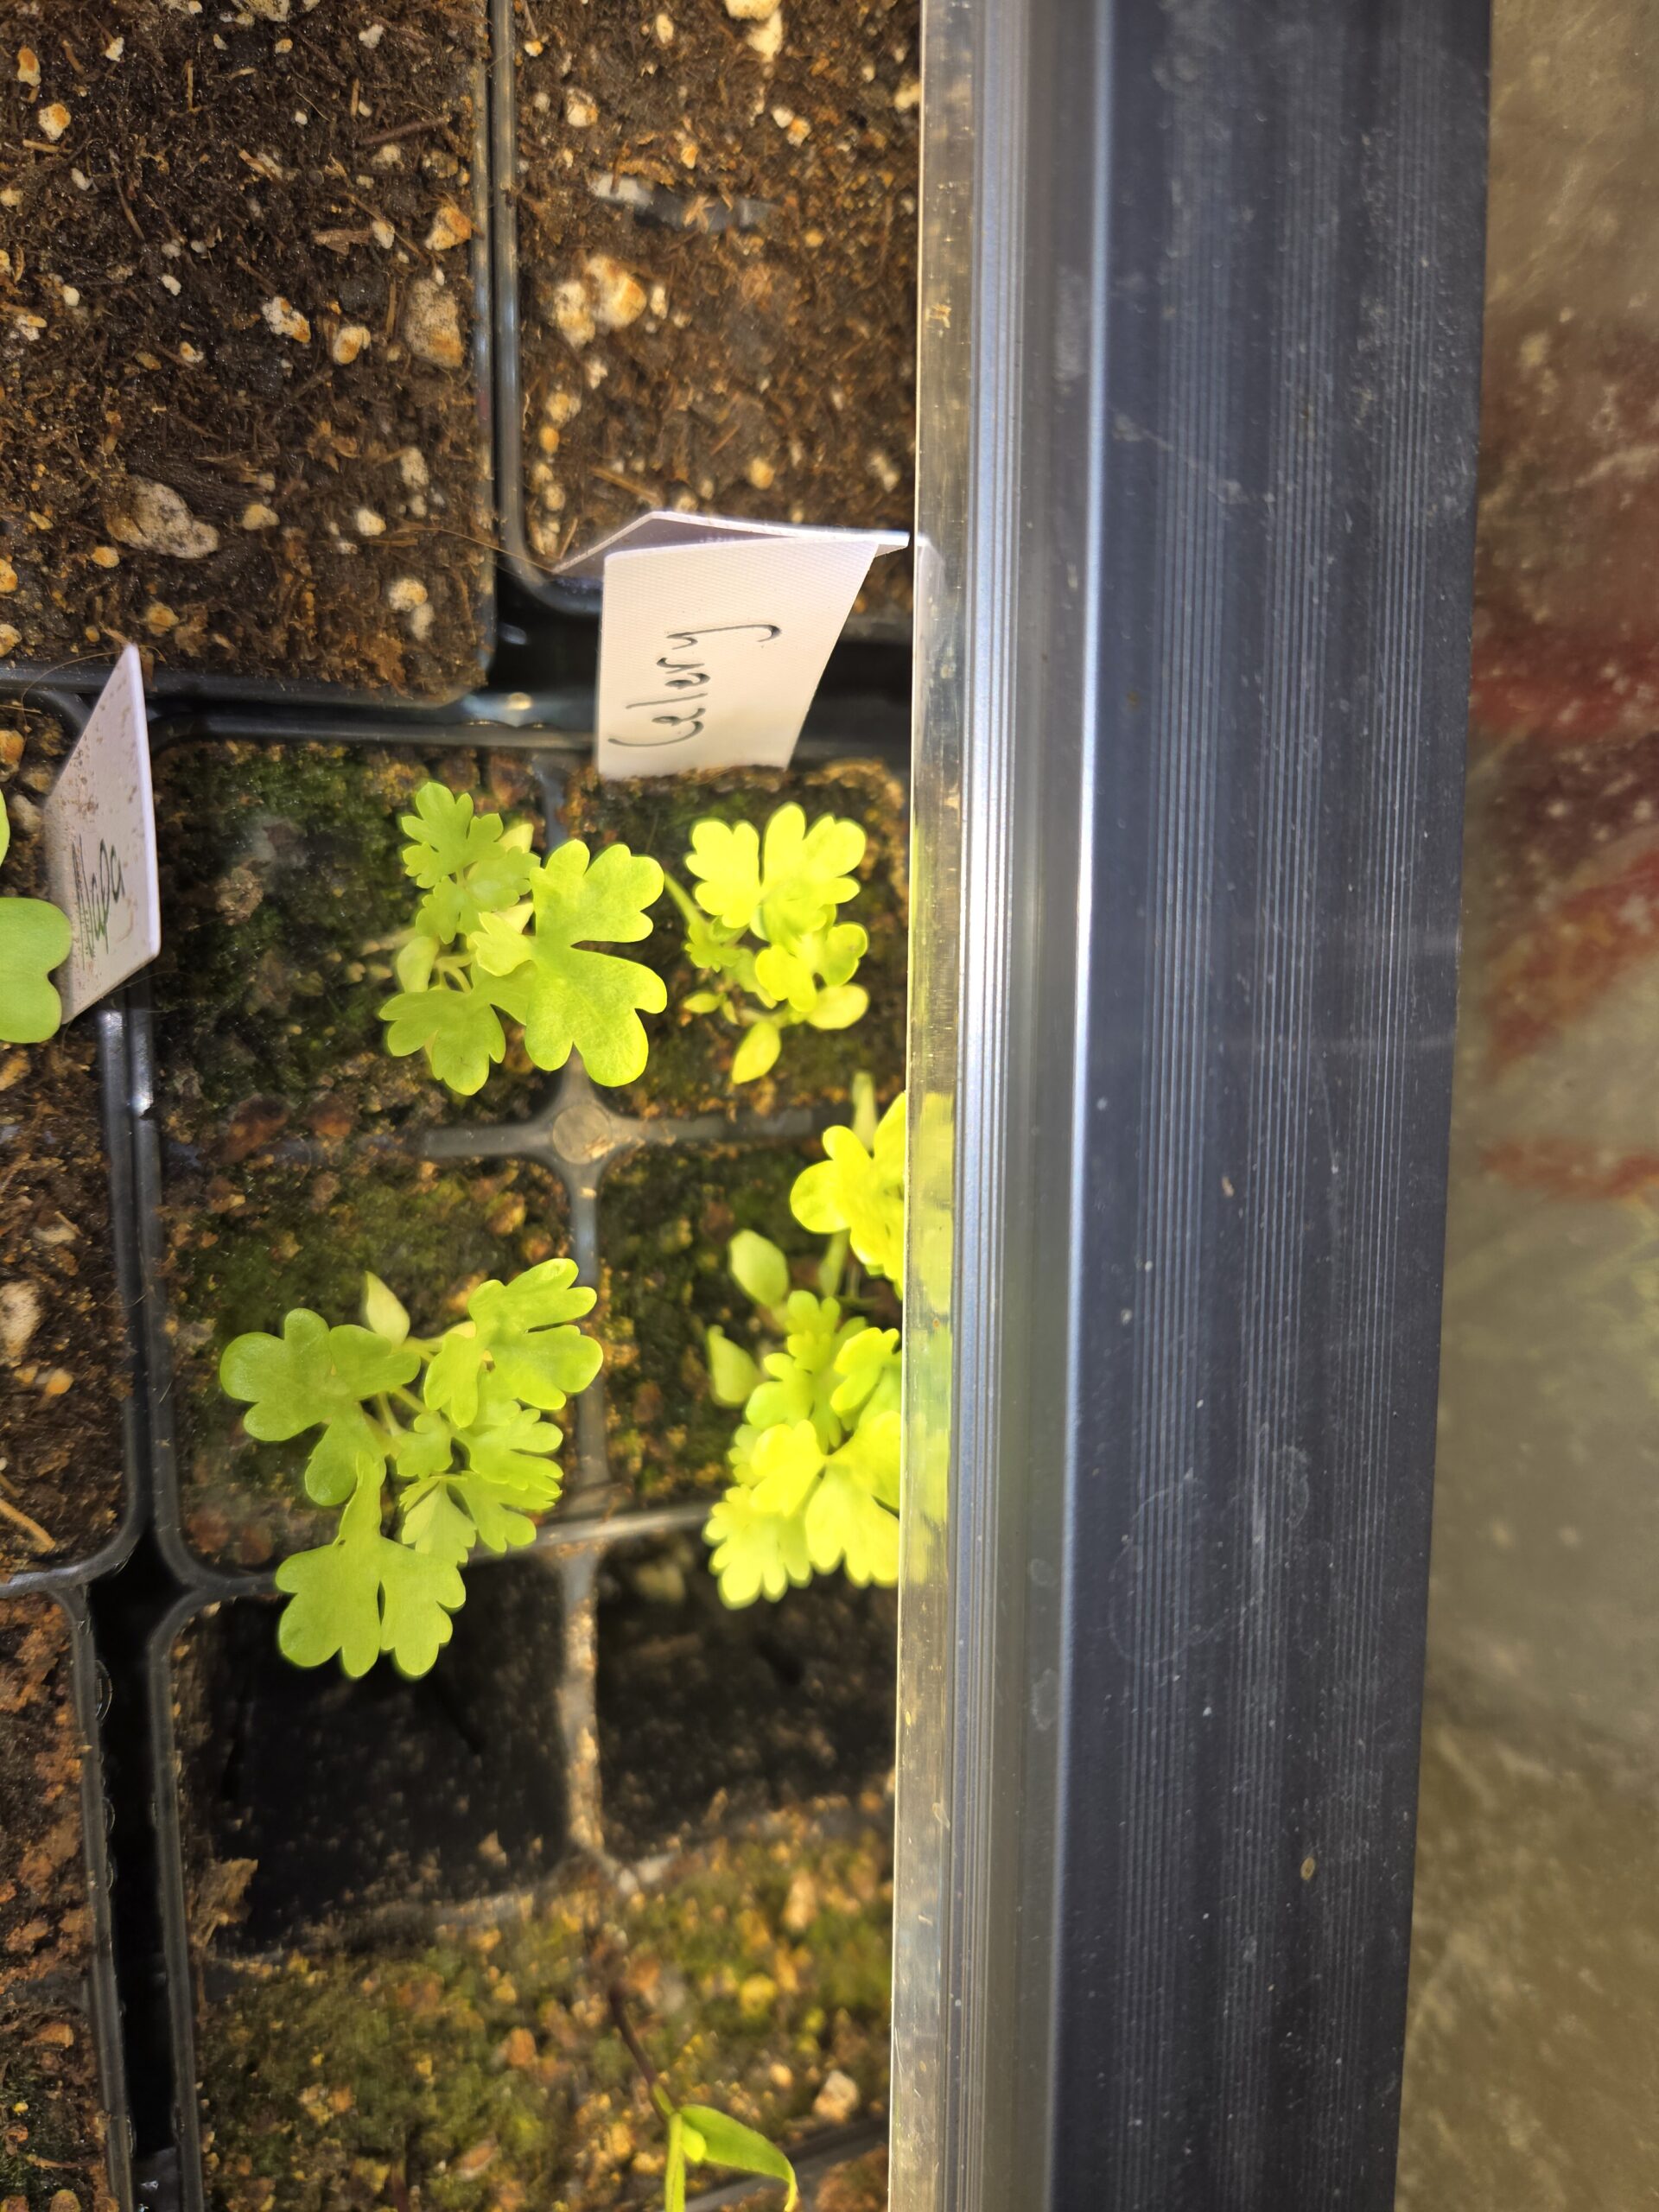
Celery starts slow, but once it gets going, everything changes. This is right around the stage where most people think they messed up.
Struggling to time this stage right? Use the Plant Timeline Calculator to dial it in.
What Happens After Germination 🌞
Once celery sprouts, the goal is consistency.
Steady moisture. Good light. Moderate temperatures. No extreme swings.
Celery doesn’t grow fast early on, but once it establishes, it becomes much more reliable.
This is where patience pays off.
Transplanting Without Stunting Growth 🌤️
Celery can go outside earlier than many warm-season crops, but it still needs to be hardened off.
If you’ve used the timeline calculator, you’ll already know when that window opens.
That removes one of the biggest stress points for beginners—guessing when it’s safe.
The Truth About Growing Celery 🥬
Celery has a reputation for being difficult.
But most of that reputation comes from people starting without a clear system.
When your timing is right and your soil is right, celery stops feeling like a gamble.
It starts feeling repeatable.
Where to Start Today 🚀
If you want to make growing celery easier on yourself, start here:
🌱 Open the Plant Timeline Calculator
🧱 Open the Seed Starting Mix Calculator
Once those two things are dialed in, you’re no longer guessing.
You’re growing with a plan.
How to Grow Cucumber From Seed Using a Simple System (No More Guessing)
How to Grow Cucumber From Seed Using a Simple System (No More Guessing🥒
🗒️Rooted Field Note: 32
There’s something about cucumbers that feels like summer showed up early.
Not tomatoes.
Not peppers.
Cucumbers.
They don’t wait around politely… they explode out of the soil like they’ve got somewhere to be.
And if I’m being honest, I didn’t always get them right.
The first time I tried growing cucumbers from seed, I overwatered them, used the wrong soil, and ended up with leggy little plants that looked like they were asking for help.
Now it’s one of the easiest things I grow.
And most of that came down to one simple shift:
👉 I stopped guessing… and started using my own system.
🧱 Step 1: I Start With the Same Mix Every Time
Before the seeds even come out of the packet, I build my soil.
This is where I think a lot of beginners get tripped up.
They grab whatever bag of mix is sitting at the store and hope it works.
I don’t really do that anymore.
I use my peat-based seed starting mix — the same one from our calculator.
Because once that part is dialed in, everything else gets easier.
- 🌿 Peat moss (or coco coir)
- 🌱 Perlite
- 🪱 Worm castings or compost
But the part that changed things for me was this:
I stopped eyeballing it.
Now I run it through the Seed Starting Mix Calculator and let that tell me how much I need for the containers I’m using.
No wasted materials.
No weird ratios.
No mystery tray of soggy regret.
👉 Try the Seed Starting Mix Calculator here: [Calculator]
🌱 Step 2: How I Plant Cucumber Seeds
Once the mix is ready, the actual planting part is simple.
Cucumber seeds are big, easy to handle, and beginner-friendly.
Here’s what I usually do:
- 📏 Plant them about ½ inch deep
- 🪴 Use bigger cells or small nursery pots
- 🌱 Drop in 1 to 2 seeds per hole
Then I water them in just enough to get everything evenly moist.
Not soaked.
Not muddy.
Just moist enough to wake the seed up.
One thing I learned the hard way is that cucumbers really don’t love having their roots disturbed.
So I don’t start them in tiny little cells anymore unless I absolutely have to.
I either start them in slightly larger containers… or I direct sow them once the weather finally starts acting right.
🌡️ Step 3: Warmth Changes Everything
If you want better germination, warmth matters more than people think.
Cucumber seeds are not in a hurry to sprout in cold soil.
They’ll just sit there. Quietly. Doing nothing.
Once I started paying attention to temperature, my results got much better.
- 🔥 Warm soil helps them germinate faster
- ⏳ Cold soil slows everything down
- 🌱 Warmth gives you stronger, more even starts
That’s why I either start them indoors somewhere warm or wait until outdoor conditions are actually ready instead of planting just because I’m impatient.
🗓️ Step 4: Timing It Right Instead of Guessing
This is one of the biggest mistakes I see with cucumbers.
People plant them too early, then wonder why nothing is happening.
Cucumbers are warm-season plants. They want warmth, not hope.
So instead of guessing, I use the Plant Timeline Calculator.
I plug in my last frost date, choose cucumbers, and it tells me:
- 📅 When to start seeds indoors
- 🌿 When to direct sow
- 🪴 When to transplant outside
That tool removes a lot of beginner confusion fast.
👉 Use the Plant Timeline Calculator here: [Calculator]
☀️ Step 5: Light, Water, and Something to Climb
Once cucumbers sprout, they don’t really mess around.
They grow fast.
Sometimes shockingly fast.
After germination, this is what I focus on:
- ☀️ Plenty of light
- 💧 Consistent moisture
- 🪜 A trellis, fence, or support system
I almost always give my cucumber plants something to climb.
That one move makes a big difference.
The plants stay cleaner, airflow is better, and harvesting is way easier when the fruit isn’t hiding in a jungle on the ground.
🪴 Step 6: Transplanting… or Just Direct Sowing
If I start cucumbers indoors, I try not to baby them too long.
I let them get established, then move them carefully once conditions outside are warm enough.
👉Hardening off guide
But honestly, a lot of the time I prefer direct sowing.
Less transplant stress.
Less root disturbance.
Less fuss.
Sometimes simpler really is better.
🥒 What Changed for Me
Once I switched to using the calculators and stopped doing everything by feel alone, cucumbers got a lot less frustrating.
I had better germination.
Stronger seedlings.
Less wasted soil.
And a much better idea of when I should be doing things.
That was the real shift for me.
Not becoming some perfect gardener.
Just building a system that made it easier to repeat what worked.
🌱 If You’re Brand New, Here’s Where I’d Start
If you’re just learning how to grow cucumber from seed, I’d keep it simple:
- Use a good seed starting mix
- Don’t guess your ratios — use the calculator
- Wait for warmth
- Give the plants light, moisture, and support
That alone will put you way ahead of where most people start.
🌻 Final Rooted Thought
I used to think growing from seed was complicated.
Now I think it’s more about removing friction than chasing perfection.
That’s a big part of why we built these tools in the first place.
Not to make gardening feel more technical… but to make it feel more doable.
So if you’ve been wanting to grow cucumbers from seed but felt a little unsure, start simple.
Use the mix calculator.
Use the timeline tool.
Follow what works.
And let the cucumbers do what cucumbers always seem to do once they’re happy…
Take off running. 🌱🥒
🔗 Helpful Tools From Our Homestead:
Most People Grow Tomatoes the Hard Way… Here’s How to Grow Tomato Plants from Seeds the Way Nature Intended
Most People Grow Tomatoes the Hard Way… Here’s How to Grow Tomato Plants from Seeds the Way Nature Intended 🍅
🗒️Rooted Field Note: 31
If you’re here trying to figure out how to grow tomato plants from seeds, you’re basically standing right next to me in my basement garden.
Every spring the same thing happens around here.
I pull out the seed trays, mix up some soil, and set everything under the grow lights 🌱.
For a few days it looks like nothing is happening. Just trays of dirt sitting quietly.
Then one morning you notice something.
A tiny green hook pushing its way out of the soil.
The first tomato sprout.
The first time my son saw one pop up he leaned over the tray like we had just discovered some new species of plant.
“Dad… it’s alive.”
And honestly… that’s exactly what it feels like.
Because learning how to grow tomato plants from seeds takes something that looks like dust in your hand and turns it into a plant that eventually fills your kitchen with tomatoes. 🍅
Once you watch that transformation happen a couple times, it becomes one of the most satisfying parts of gardening.
Why I Started Growing Tomatoes From Seeds
For years I just bought tomato plants from the garden center.
And there’s nothing wrong with that.
But once I started learning how to grow tomato plants from seeds, I realized something pretty quickly.
The tomato world suddenly gets a lot bigger.
Instead of choosing from the handful of plants on a nursery shelf, you suddenly have hundreds of varieties to pick from.
Cherry tomatoes that taste like candy.
Huge slicing tomatoes for sandwiches.
Strange heirloom varieties that look like they came out of a science lab. 🍅
And the funny thing is… starting them from seed isn’t actually complicated.
You just have to give them a good start.
The Timing Part That Used to Confuse Me
One of the first things people ask when learning how to grow tomato plants from seeds is when to start them.
Tomatoes need a little head start indoors before they go into the garden.
Most gardeners plant seeds about six to eight weeks before the last frost date.
This used to trip me up every year.
Every place has a different frost date, and guessing never felt very scientific.
So eventually I built a small tool that figures it out automatically.
Now I just check the calculator and it tells me when to start my tomato seeds.
It makes life a lot easier.
The Soil I’m Using This Year 🪴
Another big piece of learning how to grow tomato plants from seeds is realizing seedlings don’t like heavy soil.
Garden soil feels logical, but it’s actually too dense for tiny roots.
Seedlings do much better in a lighter mix.
The mix I’m using right now is simple.
Peat moss or coco coir makes up most of it.
Then worm castings add life and nutrients.
A bit of perlite keeps everything loose and breathable.
When you mix it together the soil feels fluffy in your hands.
Almost like crumbly chocolate cake.
That’s exactly what tomato seedlings want.
If you ever want to mix larger batches for trays or containers, the calculator on the site helps figure out the exact amounts.
It saves you from doing bucket math in the garage.
The Moment the Seeds Go In 🌱
Tomato seeds are incredibly small.
The first time you pour them into your hand you almost wonder how something so tiny could ever become a full plant.
Planting them takes about ten seconds.
A small indentation in the soil.
Drop the seed in.
Cover it lightly.
Mist the soil.
And then the waiting begins.
Some gardeners use seed trays with humidity domes.
Others use soil blockers that form little cubes of soil.
Both work great.
What tomato seeds really want is warmth.
That’s why a lot of gardeners slide a small heat mat under the trays 🔥.
It keeps the soil warm and wakes the seeds up faster.
Sometimes the sprouts appear in just a few days.
Tomato Seed Starting Quick Chart 🍅🌱
If you like having the important details in one place, this little tomato seed starting chart makes things easy. This is the kind of thing I wish I had the first few times I tried growing tomatoes from seed.
| What to Know | Helpful Tomato Seed Info |
|---|---|
| Seed depth | Plant tomato seeds about ¼ inch deep. Think of it as giving the seed a light blanket of soil. |
| Soil temperature | 70°F – 80°F is ideal for germination. Tomato seeds sprout fastest in warm soil. |
| Germination time | Usually 5–10 days depending on warmth and moisture. |
| When to start seeds | Typically 6–8 weeks before the last frost date. Use the Planting Timeline Calculator to find the right time in your area. |
| Seed starting mix | Tomatoes prefer a light, airy mix that drains well. Use the Seed Starting Mix Calculator to get the right balance. |
| Light color (Kelvin) | 5000K – 6500K grow lights work best for seedlings. This bright white “daylight” color encourages strong growth. |
| Light hours | Tomato seedlings grow best with about 14–16 hours of light per day. |
| Light distance | Keep lights about 2–4 inches above seedlings. Lights that are too far away cause leggy plants. |
| Watering | Keep soil lightly moist but never soggy. Tomatoes dislike sitting in wet soil. |
| Common beginner mistake | Weak lighting causes leggy seedlings. Strong light close to the plants fixes this. |
🪴 Little homestead note: If you don’t want to guess on the timing or the seed mix, use the calculators above. They make the whole process much easier and save a lot of trial and error.
The Light That Makes the Biggest Difference 💡
Once the seedlings appear, light becomes the most important thing.
A sunny window might look bright to us, but seedlings need stronger light than that.
Without enough light they stretch upward and get thin and floppy.
Gardeners call this getting leggy.
A simple LED grow light placed just a few inches above the plants fixes this immediately.
The stems grow thicker.
The leaves spread wider.
And suddenly those tiny sprouts start looking like real tomato plants.
The Moment They Start Looking Like Tomatoes 🍅
After a few weeks the plants begin to change.
The little round seed leaves give way to the familiar jagged tomato leaves.
The stems thicken.
The plants start reaching confidently toward the light.
This is usually when I move them into slightly bigger containers.
Tomatoes have a strange advantage here.
If you bury the stem deeper when transplanting, the plant actually grows new roots along the buried stem.
More roots means stronger plants later.
The Day They Finally Meet the Garden ☀️
Before tomato plants move outside permanently, they need to get used to outdoor conditions.
This process is called hardening off.
For about a week the plants spend a little more time outside each day.
They slowly adjust to sunlight, wind, and temperature changes.
By the time they finally go into the garden, they’re ready.
And every year the same thought crosses my mind.
All of this… from something smaller than a grain of rice.
Once you understand how to grow tomato plants from seeds, it stops feeling complicated and starts feeling a little magical.
And before long the garden is overflowing with tomatoes. 🍅🍅🍅
Tools From the Homestead 🧰
If you’re starting tomatoes this year, these tools help a lot.
Quick Questions Gardeners Ask
How long does it take to grow tomato plants from seeds?
Tomato seeds usually germinate within 5–10 days and are ready to transplant outdoors after about 6–8 weeks.
Do tomato seeds need heat to germinate?
They germinate best when soil temperatures stay between 70–80°F.
Can you grow tomatoes from store-bought seeds?
Yes. Seeds from many tomatoes will grow, although heirloom varieties produce the most reliable results.
🪴 Dig deeper into this Rooted Field Note and explore more tools from the homestead.
How to Grow a Pepper Plant from Seed (My Basement Seed-Starting Setup That Actually Works)
How to Grow a Pepper Plant from Seed🌶️ (My Basement Seed-Starting Setup That Actually Works)
🗒️Rooted Field Note: 30
A Quick Note Before We Go Further 🌶️
This Rooted Field Note starts in my basement, where the pepper seeds are waking up under lights.
That’s where every pepper plant’s story begins. But we’re not stopping there.
Once those seedlings leave the trays and step into the garden, we’ll follow the rest of the plant’s life too — from transplanting to flowers to the moment you finally harvest your first pepper.
So if it feels like the seed-starting section wraps up early, keep reading. The rest of the pepper plant’s journey is waiting just a little further down.
The Quiet Moment When a Pepper Seed Wakes Up 🌱
There’s a strange little moment that happens when you grow a pepper plant from seed.
At first… nothing.
You fill the trays.
Pepper seed germinating from soil
You plant the seeds.
You water the soil.
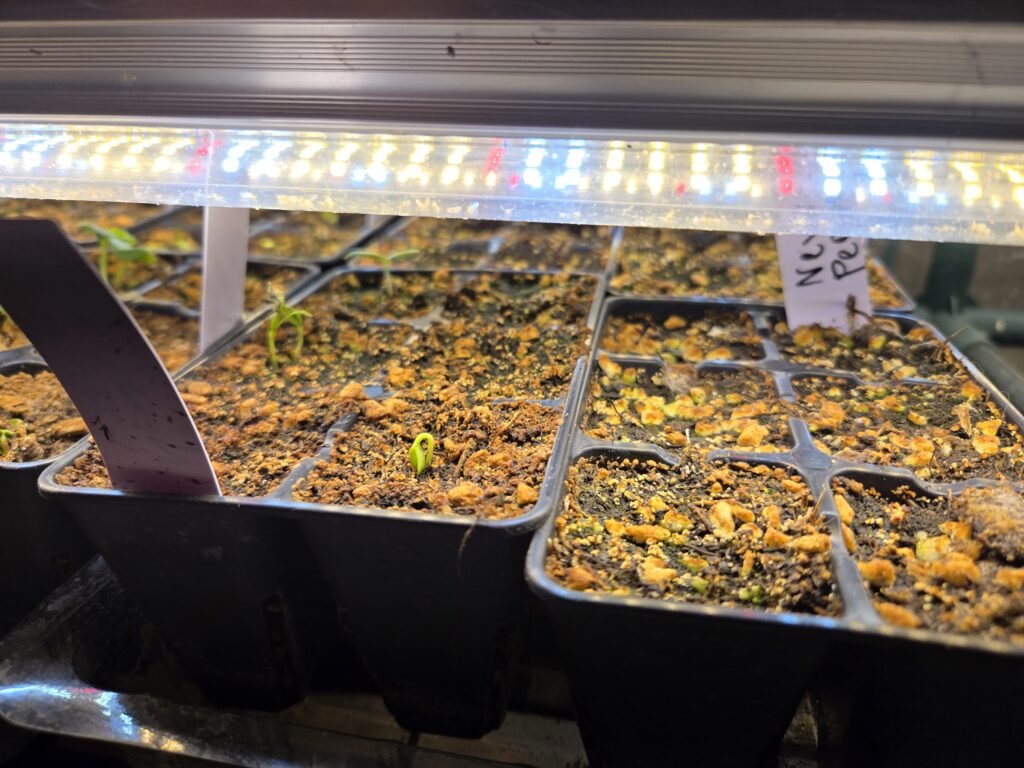
And then for several days, it just looks like a tray of dirt sitting under lights.
If you’re anything like me, you check it more often than you should. 😄
But one morning you walk by, and something is different.
A tiny green hook is pushing its way up through the soil.
That tiny sprout doesn’t look like much yet, but that little plant is the beginning of something real. Maybe it turns into jalapeños for salsa. Maybe it becomes sweet bell peppers for dinner. Maybe it ends up being the hottest pepper you’ve ever grown.
Every pepper plant starts exactly the same way — a seed waking up underground.
And after growing peppers this way for a while, I’ve learned something simple.
Pepper seeds don’t need complicated systems.
They just need the right environment early on.
That’s what I’ve been building down in my basement this season.
The Seed Starting Mix I Actually Use 🪴
One of the first mistakes I made when I started growing peppers was using regular garden soil to start seeds.
It packed down too much.
It stayed wet too long.
And the seeds struggled.
Pepper seeds really want something lighter and airy around their roots.
So the mix I’m using now is the peat-based seed starting mix we built into the seed-starting calculator.
Instead of trying to memorize ratios or scoop ingredients every time I start seeds, I just let the calculator build the mix for me depending on how many trays I’m starting.
It keeps everything consistent.
And consistency is one of the biggest secrets to growing strong seedlings.
The mix itself uses materials that hold moisture, allow airflow around roots, and give seedlings a gentle start without suffocating them.
But instead of listing exact measurements here, I’d much rather you use the calculator so it builds the mix for your trays, your containers, and the amount of seedlings you’re starting.
👉 Seed Starting Mix Calculator
That’s the exact mix the pepper seedlings in my basement are growing in right now.
Why My Pepper Seeds Are Growing in a Basement 🏡
Most people picture seed starting happening in a sunny kitchen window.
Mine happens in an unfinished basement.
Which honestly sounds worse than it is.
The room stays cool down there, and that’s actually where peppers taught me one of my first real lessons.
Peppers really don’t like cold soil.
The first year I tried starting them down there, the seeds just sat in the trays forever doing absolutely nothing.
Now those trays sit on a seed-starting heat mat with a thermostat underneath them.
That warmth tells the seeds it’s spring.
Instead of waiting weeks wondering if anything will sprout, the seeds start waking up much faster.
Because the basement itself still runs cool, I also added a small space heater in the room. Not blasting heat — just enough to keep the environment a little friendlier for seedlings.
Sometimes gardening improvements are surprisingly simple.
Just solving small problems one at a time.
The Light Setup That Changed Everything 💡
For a long time I believed what a lot of beginner guides say.
“Just put your seedlings in a sunny window.”
But peppers have other plans.
Seedlings stretch toward light like little antennas. If the light isn’t strong enough, they grow tall and thin trying to reach it.
Gardeners call those leggy seedlings, and they usually fall over later.
The fix turned out to be incredibly simple.
The peppers under my lights right now are growing beneath basic shop lights — the same ones linked in the seed starting calculator.
Nothing fancy.
Just bright light hanging close enough that the plants don’t have to stretch.
Once I switched to that setup, the seedlings completely changed.
Instead of skinny stems, they started growing thick and sturdy.
Sometimes the simplest tools are the best ones.
When to Actually Start Pepper Seeds 📅
One thing that really helps is knowing when to start your seeds.
Start too late, and peppers don’t get enough growing time.
Start too early, and you end up with giant plants inside your house.
So instead of guessing, we built a tool that calculates the timing automatically based on your location.
👉 Seed Starting Time Calculator
It figures out when you should start seeds based on frost dates and growing seasons, so you don’t have to play the guessing game.
I still check it myself every season.
Moving Peppers Outside 🌞
Eventually, those little plants outgrow the trays.
That’s when the garden starts calling them outside.
But peppers like warm nights and warm soil before they really begin growing.
Plant them too early and they just sit there… waiting for summer.
So I usually wait until the weather feels like real warmth has settled in.
Once peppers hit warm soil, though, something shifts.
They start growing fast.
The tiny seedlings from the basement suddenly become full pepper plants producing fruit.
That transformation never stops being fascinating.
The First Pepper From a Plant You Grew Yourself 🌶️
Harvesting the first pepper from a plant you started from seed feels different.
You remember planting the seed.
You remember checking the tray every morning.
And suddenly that tiny plant is producing food.
It’s one of those quiet moments gardening gives you.
A reminder that a little soil, a little light, and a little patience can turn into something real.
One Small Favor From a Fellow Gardener 🌱
If this Rooted Field Note helped you or made seed starting feel a little easier, feel free to share it with someone who’s trying to grow peppers this year.
Gardening spreads best when neighbors help neighbors.
And if you’re experimenting with peppers yourself, I’d genuinely love to hear about it.
What varieties are you growing this year?
Are you starting them indoors or direct sowing later?
You can drop a comment below — I read every one of them and it helps everyone here learn from each other.
If you’d like to go a little deeper into this stuff, we also have a small community where we share experiments, tools, and what’s actually working in our gardens each season.
Nothing fancy — just gardeners helping gardeners figure things out together.
👉 Sprouting Homestead Community (Skool)
Whether you join us there or just keep reading the Field Notes here, I’m glad you stopped by.
That’s really what this whole project is about.
Just people learning to grow things together. 🌱
What Happens After Pepper Seedlings Leave the Basement 🌞🌶️
Once the seedlings outgrow their trays and the weather starts cooperating, the next chapter of the pepper plant’s life begins.
This is the moment where those tiny basement plants officially become garden plants.
But peppers are a little dramatic about temperature.
They don’t really want to move outside until the world feels warm enough. Cool nights can make them stall out and just sit there doing nothing for weeks.
So before planting them in the garden, I let them slowly adjust to outdoor life. This process is called hardening off, and it simply means giving the plants a little sunlight and outdoor air each day before the full transplant.
Think of it like sending a kid outside without a jacket for the first warm day of spring.
At first it feels shocking.
Then suddenly it feels normal.
After about a week of that gradual exposure, the plants are usually ready to move into their final home.
Where Pepper Plants Like to Grow 🪴
Peppers are surprisingly flexible once they get past the seedling stage.
Some gardeners plant them directly in garden beds.
Others grow incredible plants in containers.
I’ve had great success using 5-gallon buckets filled with rich soil and compost. Containers warm up quickly in the sun, and peppers absolutely love warm roots.
The biggest thing peppers want is simple:
Warm soil
Good drainage
Consistent watering
Once they have that, they mostly focus on doing what they were built to do.
Grow peppers.
The Season Where Pepper Plants Really Take Off 🌿
For the first few weeks after transplanting, pepper plants tend to grow slowly.
Then suddenly something changes.
The weather warms up.
The soil warms up.
And the plant seems to flip a switch.
New leaves appear quickly.
Branches start forming.
Little white flowers begin showing up.
Those flowers are where the real magic happens.
Each one has the potential to become a pepper.
Watching that transformation from flower to fruit is one of the most satisfying parts of gardening.
When Pepper Plants Start Producing 🌶️
Eventually the flowers turn into tiny peppers.
At first they look almost comically small.
But day by day they grow larger until suddenly you’re harvesting real peppers from a plant that started as a tiny seed in a tray.
That moment never gets old.
Especially when you remember where the plant started.
A little seed.
A basement tray.
A few shop lights and some warm soil.
Harvesting Peppers (And Encouraging More Fruit)
One of the easiest ways to keep pepper plants producing is simply to harvest regularly.
The more peppers you pick, the more the plant tends to keep producing.
Some peppers are harvested green.
Others are left on the plant to ripen into red, yellow, or orange.
Both are perfectly fine.
In fact, the flavor usually gets sweeter as peppers fully ripen on the plant.
The Full Journey of a Pepper Plant 🌱➡️🌶️
Looking back, it’s kind of amazing how simple the whole process is.
A pepper plant’s life usually follows the same quiet rhythm every season:
Seed planted in warm soil 🌱
Seedling growing under lights 💡
Plant transplanted into the garden 🌿
Flowers forming 🌼
Peppers growing 🌶️
And before long you’re standing in the garden holding food that started as a tiny seed.
That transformation never really stops feeling magical.
A Small Invitation From the Garden 🌱
If this Rooted Field Note helped you feel more confident about growing peppers from seed, feel free to share it with someone else who’s thinking about starting a garden this year.
Gardening spreads best when neighbors share what they’re learning.
And if you’re growing peppers yourself, I’d honestly love to hear about it.
What varieties are you planting this year?
Are they growing in beds or containers?
You can leave a comment below and tell me how things are going in your garden.
If you’d like to dive deeper into seed starting and the tools we’ve built for gardeners, you’re also welcome to join the Sprouting Homestead community.
👉 Join the Sprouting Homestead Community
No pressure — just gardeners learning together and sharing what’s working.
Helpful Tools Mentioned in This Rooted Field Note
🌱 Seed Starting Mix Calculator
Plant Timeline Calculator
❄️ Don’t know your last frost date?
No problem — it only takes about 10 seconds to find it.
- Open the frost date tool below
- Type your ZIP code
- Look for “Last Spring Frost”
- Enter that date into the calculator on this page
This opens in a new tab so you can quickly come back and use the calculator.
🌿 Plant Timeline Calculator
Pick what you’re growing, enter your Last Frost Date, and get your seed-start window 🗓️🌱
📩 Want Your Planting Dates Saved?
I’ll send you the planting guide, seed-starting reminders, and a shortcut back to the recommended tools.
Seedling Soil Mix Calculator
🌱 Seedling Mix Calculator (5:3:2)
Peat gets lime. Coco doesn’t.
Inside Skool we unlock presets (tomatoes vs herbs), mineral options, overwatering toggles, microbe builder & batch notes.
👉 Open Advanced Calculator
_______________________________________________