Uncategorized
How Long Do Peanuts Take to Grow? Frost Dates Explained
🥜 How Long Do Peanuts Take to Grow? Frost Dates Explained
🗒️Rooted Field Note: 46
The short answer?
Usually around 100–130 frost-free days.
The stressful answer?
That timeline suddenly feels VERY short when you live somewhere like Wisconsin. 😂
The deeper I got into this peanut experiment, the more I realized that growing peanuts in northern climates isn’t really about planting…
…it’s about racing the clock before frost shows up.
And once I started tracking frost dates more closely, I realized timing matters way more than most gardening guides make it sound.
🥜 How Long Do Peanuts Actually Take to Grow?
Most peanut varieties need somewhere between:
✅ 100–130 warm frost-free days
The exact timing depends on:
* peanut variety
* soil temperature
* weather
* sunlight
* planting date
* your growing zone
Some early varieties mature faster.
Others take significantly longer and are much better suited for southern climates.
If you’re gardening in Zone 5 or colder northern regions, shorter-season varieties give you your best chance.
🌡️ Why Frost Dates Matter So Much
Peanuts LOVE warmth.
Cold weather slows them down quickly.
And frost can end the experiment entirely before the peanuts fully mature underground.
That’s why understanding your local frost dates becomes incredibly important.
You’re basically trying to answer one question:
> “Do I realistically have enough warm days left for this crop to finish?”
That’s the exact reason I started using planting calculators instead of guessing. 😂
🌱 Helpful Garden Calculators
👉 Frost Date & Planting Timeline Calculator
👉 Seedling Soil Mix Calculator
If you’re experimenting with unusual crops in colder climates, these tools make planning WAY easier.
🥜 My Peanut Experiment in Wisconsin
I planted peanuts fully aware this might fail before harvest. 😂
Wisconsin Zone 5 sits right on the edge of what peanuts usually want.
So I knew timing was going to matter from the beginning.
Then the squirrels showed up and destroyed the first planting attempt…
…which definitely didn’t help the timeline situation. 😂
👉 You can read the full story here:
Rooted Field Note #44: Growing Peanuts in Wisconsin Was Hard Enough… Then the Squirrels Found Them
Round Two involved:
✅ Soaking peanuts before planting
✅ Protecting the trays with hardware cloth
✅ Using a loose soil mix
✅ Monitoring frost timing more closely
So far?
The peanuts are actually sprouting.
Which already feels like a small miracle in Wisconsin. 😂
🌱 Soil Temperature Matters Too
A lot of people focus only on frost dates.
But soil temperature matters just as much.
Peanuts generally prefer warm soil around:
✅ 65–70°F or higher
Cold soil slows germination and early growth significantly.
That’s one reason raised beds can help in colder climates:
They usually warm up faster in spring.
🛒 Supplies Helping This Experiment Survive
These are some of the tools and supplies helping me push this experiment as far as possible before frost arrives:
🌱 Seed Starting Trays(Paid Link)
🌱 Hardware Cloth / Wire Mesh (Paid Link)
🌱 Organic Fertilizer Blend (Paid Link)
🌱 Soil & Compost Ingredients (Paid Link)
🌱 Garden Thermometer (Paid Link)
None of these magically guarantee success…
…but they definitely make northern gardening experiments easier to manage.
🥜 What Happens If Frost Comes Too Early?
That’s the gamble. 😂
If frost arrives before the peanuts mature:
❌ Smaller harvests
❌ Underdeveloped peanuts
❌ Plants shutting down early
That’s why early planting timing matters so much in northern climates.
You’re trying to maximize every warm day available.
🌻 Best Peanut Varieties for Short Growing Seasons
If you’re growing peanuts in Wisconsin or similar climates, look for:
✅ Early Spanish peanuts
✅ Valencia peanuts
✅ Short-season varieties
Long-season southern peanuts may struggle to finish before frost arrives.
🧠 Is It Still Worth Trying?
Absolutely.
Even if the harvest ends up small.
Some of the most memorable things in the garden start as experiments that probably shouldn’t work.
And honestly…
If I manage to harvest peanuts in Wisconsin after fighting frost timelines AND squirrels?
Those peanuts are going to taste legendary. 😂🥜
🌱 Related Rooted Field Notes
👉 Rooted Field Note #44: Growing Peanuts in Wisconsin Was Hard Enough… Then the Squirrels Found Them
👉 Best Soil Mix for Growing Peanuts in Raised Beds or Containers
[ADD INTERNAL LINK]
👉 Growing Peanuts in Containers: What Actually Worked for Me
[ADD INTERNAL LINK]
👉 Why Squirrels Keep Digging Up Your Garden (And What Finally Helped Mine)
[ADD INTERNAL LINK]
🌱 Join The Rooted Crew
If you’re experimenting with unusual crops, trying to extend growing seasons, building custom soil mixes, or learning as you go…
…come join us inside The Rooted Crew.
We’re building a community around gardening experiments, calculators, homesteading projects, and figuring things out season by season.
👉 Join The Rooted Crew on Skool
Inside you’ll find:
✅ Gardening experiments
✅ Seasonal planting discussions
✅ Soil-building help
✅ Garden calculators
✅ Raised bed projects
✅ Homestead discussions
✅ Behind-the-scenes Rooted Field Notes
And if these peanuts somehow beat the Wisconsin frost clock…
…you already know there’s going to be another update. 😂🥜
Can You Grow Peanuts in Wisconsin? (Zone 5 Peanut Growing Guide)
🥜 Can You Grow Peanuts in Wisconsin? (Zone 5 Peanut Growing Guide)
🗒️Rooted Field Note: 45
At first glance…
Growing peanuts in Wisconsin sounds slightly ridiculous. 😂
Peanuts are usually associated with hot southern climates, long growing seasons, and warm sandy soil.
Meanwhile here in Wisconsin?
We’re over here trying to outrun frost dates while squirrels actively sabotage the garden.
So naturally…
…I decided to try growing peanuts anyway.
And after a lot of research, experimenting, and rebuilding beds after squirrel attacks, I’ve learned something important:
Yes — you actually can grow peanuts in Wisconsin.
But there are a few things that matter A LOT if you want a realistic chance at harvesting anything before frost hits.
🌱 Can Peanuts Really Grow in Zone 5?
Technically?
Yes.
Comfortably?
That’s another story. 😂
Most peanut varieties need around 100–130 frost-free days depending on the type.
Wisconsin Zone 5 usually sits right on the edge of that growing window.
That means timing becomes incredibly important.
You’ll want to:
✅ Start as early as possible
✅ Use the warmest part of your yard
✅ Grow in loose soil
✅ Protect young plants from squirrels
✅ Monitor your frost dates carefully
If your season starts late or frost arrives early, you may not get mature peanuts before cold weather shuts everything down.
But if conditions cooperate?
You absolutely have a chance.
🥜 My Wisconsin Peanut Experiment
This year I decided to test it myself.
And the squirrels immediately declared war. 😂
The first planting got completely destroyed.
So for Round Two, I changed a few things:
✅ Soaked peanuts before planting
✅ Added squirrel protection screens
✅ Used a looser soil blend
✅ Started monitoring frost timing more closely
So far…
…the peanuts are actually sprouting.
Which already feels like progress in Wisconsin. 😂
👉 You can read the full story here: [🥜 Growing Peanuts in Wisconsin Was Hard Enough… Then the Squirrels Found Them]
🌡️ Frost Dates Matter More Than Almost Anything
If you’re growing peanuts in northern climates, frost timing can make or break the experiment.
That’s why I started using planting calculators instead of trying to guess dates in my head while standing in the garden wondering if I’m already too late. 😂
🌱 Helpful Garden Calculators
👉 Frost Date & Planting Timeline Calculator
👉 Seedling Soil Mix Calculator
👉 Living Soil Calculator
These tools make planning WAY easier if you’re experimenting with unusual crops in colder climates.
🥜 Best Soil for Growing Peanuts
Peanuts grow underground, so soil texture matters more than many people realize.
Heavy compacted soil makes development harder.
Loose, fluffy soil gives the pegs room to grow and form peanuts properly underground.
My mix leans toward:
✅ Compost
✅ Peat moss or coco coir
✅ Sand or drainage material
✅ Bark fines for airflow
You want soil that drains well while still holding enough moisture to support steady growth.
🛒 Helpful Supplies for Growing Peanuts in Wisconsin
These are some of the things helping this experiment survive so far:
🌱 Seed Starting Trays(Paid Link)
🌱 Hardware Cloth / Wire Mesh (Paid Link)
🌱 Organic Fertilizer Blend (Paid Link)
🌱 Soil & Compost Ingredients (Paid Link)
None of these magically guarantee success…
…but they definitely make weird gardening experiments easier. 😂
🐿️ The Squirrel Problem Nobody Warned Me About
Apparently squirrels LOVE freshly planted peanuts.
Which makes sense in hindsight.
The first planting lasted about five minutes before they dug everything up.
What finally helped was covering the trays with hardware cloth until the seedlings emerged.
👉 I’ll probably write a full squirrel-defense field note soon because this turned into an entire side quest. 😂
🌻 What Peanut Varieties Work Best in Northern Climates?
If you’re trying this in Wisconsin or other colder zones, early-maturing peanut varieties give you the best chance.
Look for:
✅ Short-season peanuts
✅ Early Spanish varieties
✅ Fast-maturing Valencia peanuts
Long-season southern varieties may struggle to finish before frost arrives.
🧠 Is Growing Peanuts in Wisconsin Worth It?
From a practical standpoint?
Maybe not. 😂
From an enjoyment standpoint?
Absolutely.
There’s something incredibly satisfying about trying crops people assume won’t grow where you live.
Even if the harvest ends up small…
…the experiment itself becomes part of the fun.
And if these peanuts actually survive long enough to produce?
They’ll probably taste ten times better because of how hard the squirrels tried to stop them.
🌱 Join The Rooted Crew
If you’re experimenting with unusual crops, testing weird garden ideas, building better soil, or trying to figure things out season by season…
…come join us inside The Rooted Crew.
We’re building a community around gardening experiments, homesteading projects, calculators, soil building, and learning as we go.
👉 Join The Rooted Crew on Skool
Inside you’ll find:
✅ Gardening experiments
✅ Seasonal planting discussions
✅ Soil mix help
✅ Calculator tools
✅ Raised bed projects
✅ Homestead discussions
✅ Behind-the-scenes Rooted Field Notes
And if these Wisconsin peanuts actually make it to harvest…
You already know there’s going to be another update. 😂🥜
Related Rooted Field Note:
Growing Peanuts in Wisconsin Was Hard Enough… Then the Squirrels Found Them
🥜 Growing Peanuts in Wisconsin Was Hard Enough… Then the Squirrels Found Them
🗒️Rooted Field Note: 44
There’s something about growing peanuts in Wisconsin that feels slightly unhinged…
…and that’s probably why I wanted to try it so badly. 😂
Most people around here are planting tomatoes, peppers, beans, and corn.
Meanwhile I’m outside soaking peanuts in buckets and building squirrel defense systems like a backyard engineer preparing for battle.
And somehow… that’s become one of my favorite parts of gardening.
🐿️ The Squirrels Absolutely Wrecked My First Planting
I expected squirrels to mess with the peanuts a little.
I did not expect a full-scale coordinated attack.
The first planting barely stood a chance.
They dug through the soil, ripped everything apart, and treated my raised bed like an all-you-can-eat buffet.
So this became Round Two.
And instead of quitting, I changed the strategy.
🌱 What I’m Doing Different This Time
This round, I soaked the peanuts for about 24 hours before planting, and started them in seedling trays.
The goal was to help them wake up faster and push through the soil before the squirrels had time to destroy everything again.
After planting, I covered the trays with a homemade screen sifter setup to block digging until the seedlings emerged.
And surprisingly…
…it actually worked. 😂
Instead of waking up to destroyed trays every morning, I started seeing tiny green shoots pushing through the soil.
That felt like a major win.
📸 My Peanut Setup Right Now
🥜 The seedling trays that I started them in with the protection
(Hoping this finally keeps the tiny backyard bandits out 😂)
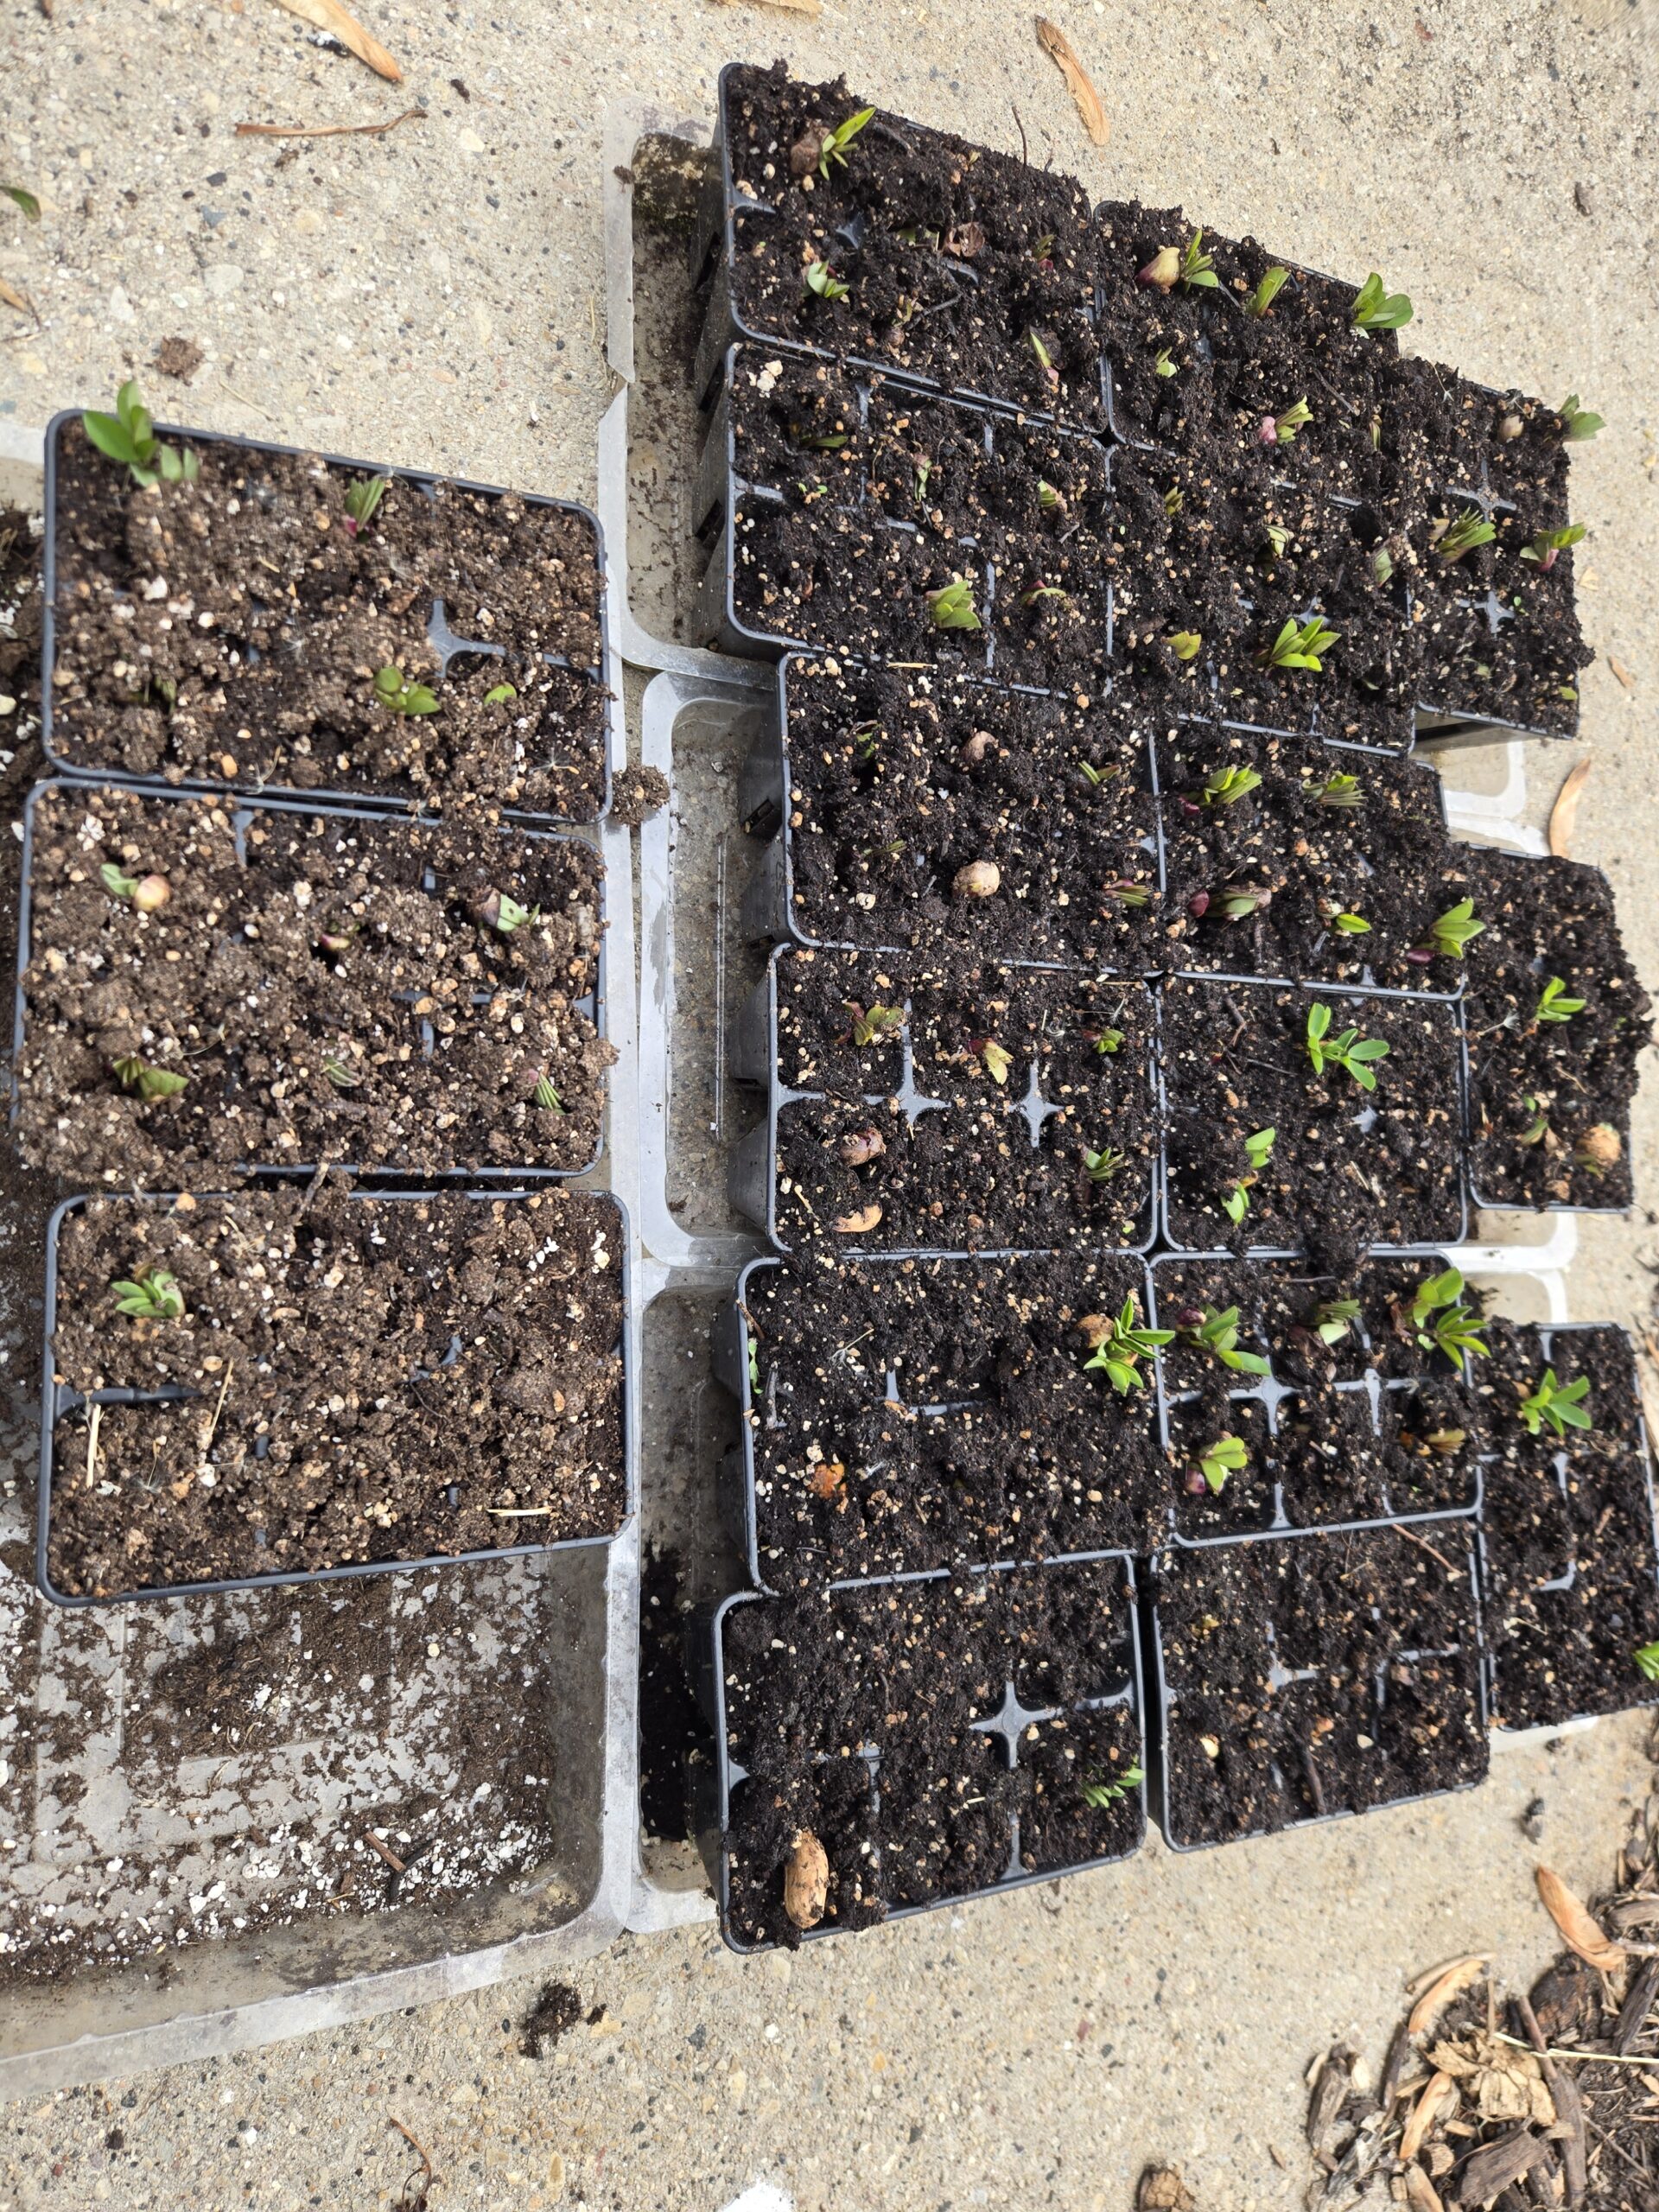
Round Two of the Wisconsin peanut experiment is officially alive. 😂🥜
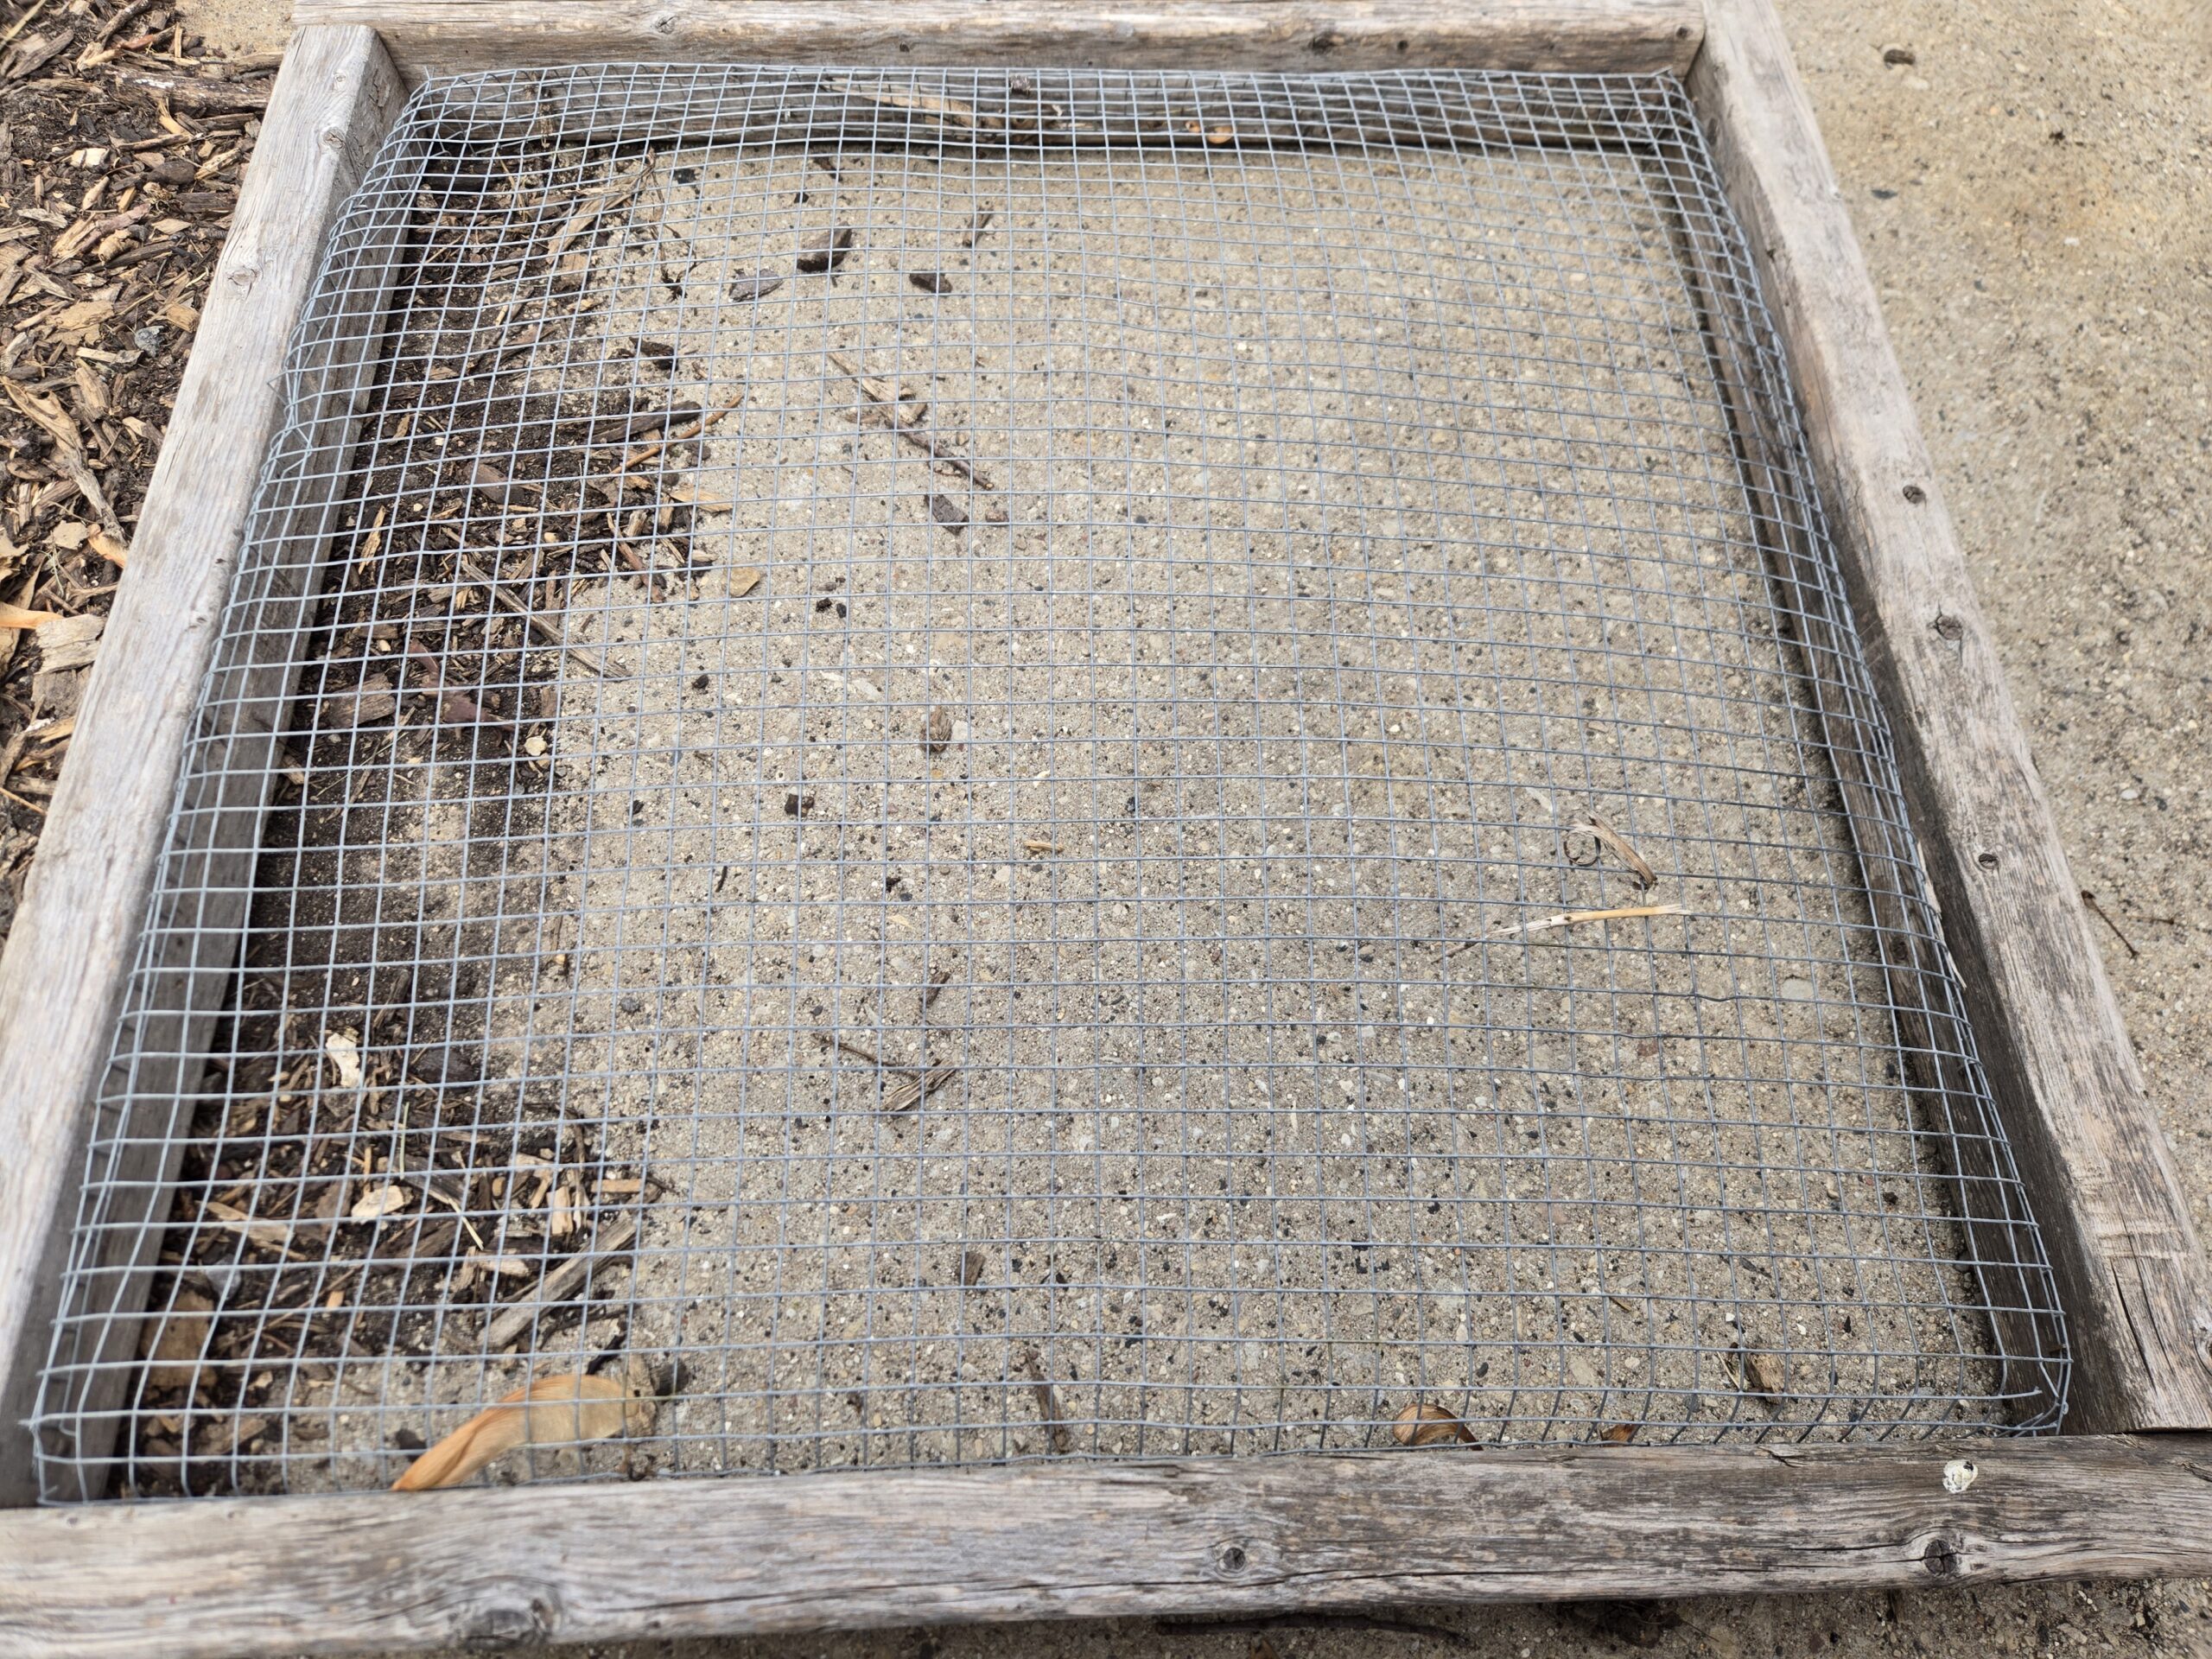
This was the moment the peanut experiment turned into a full-scale war against squirrels. 😂🐿️
🌱 First peanut sprouts finally pushing through the soil after soaking overnight
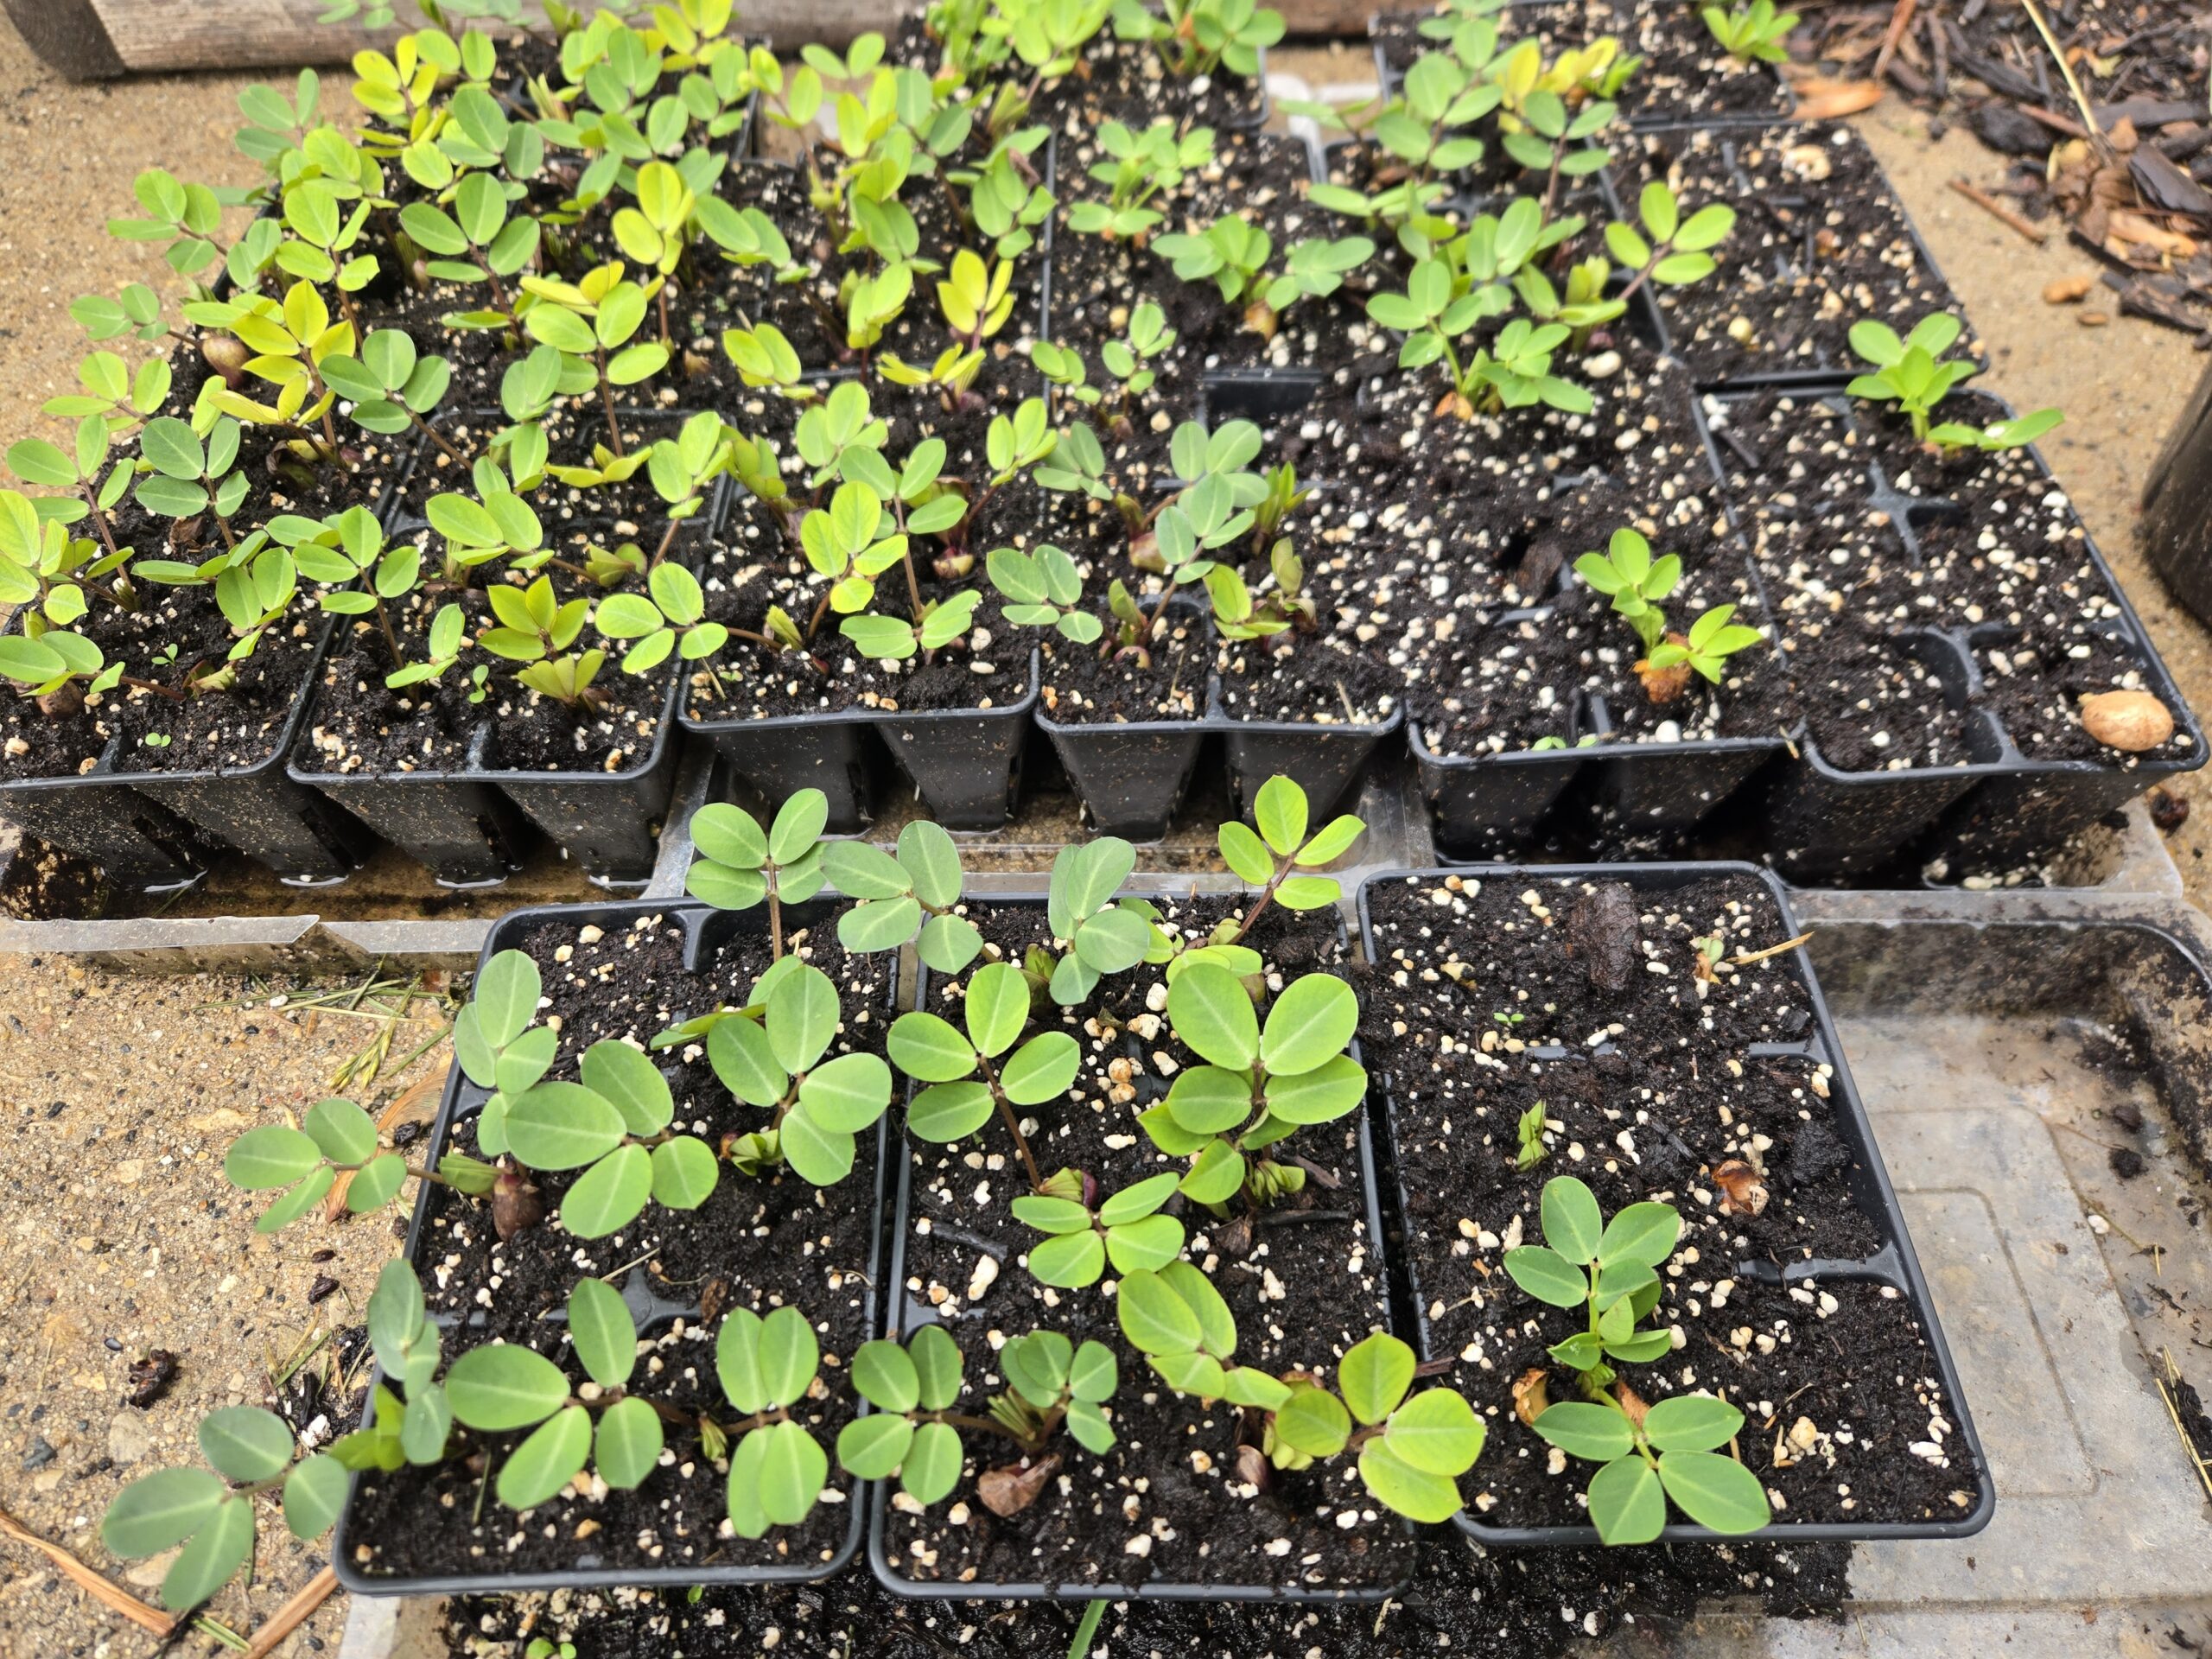
The peanuts are finally starting to look like actual plants instead of squirrel snacks. 😂🥜
📊 Trying to figure out whether Wisconsin gives me enough warm days before first frost hits
👉 I’ve been using the frost date calculator here: [https://sproutinghomestead.com/plant-timeline-calculator/ ]
🧠 Why I’m Still Trying Even If Frost Might Beat Me
Peanuts usually need around 120 frost-free days.
And Wisconsin Zone 5 isn’t exactly peanut country.
So there’s a very real chance I run out of season before harvest.
But I planted them anyway.
Because gardening isn’t always about guaranteed success.
Sometimes it’s curiosity.
Sometimes it’s learning.
Sometimes it’s just seeing if something can be done.
And if I manage to harvest even a small bowl of peanuts after fighting squirrels, weather, and Wisconsin timing…
…I already know they’ll taste better because of it. 😂🥜
🥜 The Soil Mix I’m Using
Peanuts need loose, soft soil so they can develop underground properly.
Heavy compacted soil makes life much harder for them.
My mix leans toward:
✅ Compost
✅ Peat moss or coco coir
✅ Sand or drainage material
✅ Bark fines for airflow
The goal is fluffy soil with good drainage while still holding enough moisture to support growth.
🧪 The Calculators That Help Me Build Soil Mixes
Once I started experimenting with crops like peanuts, ginger, turmeric, sweet potatoes, and medicinal plants…
…I realized soil math gets annoying fast. 😂
That’s why I built the calculators on Sprouting Homestead.
Instead of guessing ratios while standing in Menards holding bags of peat moss, you can calculate everything in minutes.
🌱 Helpful Garden Calculators
👉 Seed Starting Soil Mix Calculator
👉 Living Soil Calculator
👉 Frost Date & Planting Timeline Calculator
If you’re building raised beds, mixing container soil, or experimenting with unusual crops, these tools make the process way easier.
🛒 Garden Gear I’m Using For This Peanut Experiment
These are some of the tools and supplies helping me keep this project alive:
🌱 Seed Starting Trays(Paid Link)
🌱 Hardware Cloth / Wire Mesh (Paid Link)
🌱 Organic Fertilizer Blend (Paid Link)
🌱 Soil & Compost Ingredients (Paid Link)
A lot of these are simple upgrades, but they save time, protect crops, and make weird gardening experiments much easier to manage.
🧠 One Thing Gardening Keeps Teaching Me
The “perfect” garden almost never exists.
The squirrels eat things.
The weather shifts.
Plants fail.
You plant too early.
You plant too late.
And somehow…
…you still come back next season and try again.
That might be my favorite thing about gardening.
It’s not just about growing food.
It’s about becoming someone who keeps planting anyway.
🌻 If You’re Trying Something Weird This Year…
I hope you go for it.
Maybe it’s peanuts.
Maybe it’s ginger.
Maybe it’s some medicinal herb nobody else around you is growing.
Some of the best stories in the garden start as experiments that probably shouldn’t work.
And sometimes those become the projects you remember forever.
🌱 Join The Rooted Crew
If you’re experimenting with unusual crops, building custom soil mixes, testing garden systems, or learning as you go…
…come join us inside The Rooted Crew.
We’re building a community of growers who like experimenting, learning, and figuring things out together season by season.
👉 Join The Rooted Crew on Skool
Inside the community you’ll find:
✅ Gardening experiments
✅ Soil building discussions
✅ Calculator tools
✅ Seasonal planting help
✅ Raised bed projects
✅ Homestead discussions
✅ Behind-the-scenes field notes
And if these peanuts survive long enough to actually produce a harvest…
You already know there’s going to be another Rooted Field Note about it. 😂🥜
Related Rooted Field Note:
🥜 Can You Grow Peanuts in Wisconsin? (Zone 5 Peanut Growing Guide)
How to Grow More Basil Than You Know What To Do With
🌿 How to Grow More Basil Than You Know What To Do With
🗒️Rooted Field Note: 43
How to Grow Basil and End Up With More Than You Know What To Do With
There’s something about basil that makes a garden feel alive.
Maybe it’s the smell when you brush past it during a hot summer evening.
Maybe it’s the way fresh basil instantly upgrades homemade meals.
Or maybe it’s because basil is one of the few plants that makes beginners feel successful FAST.
Honestly… I think everybody should grow at least one basil plant.
And if you do it right?
One plant somehow turns into armfuls of pesto, jars of dried herbs, freezer bags full of basil cubes, and random extra plants you start giving away to neighbors by August. 😂
That’s basically what happens to me every year here in Wisconsin Zone 5.
☀️ Basil Loves Warmth More Than Almost Anything
The biggest mistake people make with basil?
Planting too early.
Basil absolutely hates cold soil.
If tomatoes are uncomfortable, basil is already planning its funeral. 😂
I usually wait until nights stay consistently warm before transplanting outside. Once summer settles in, basil grows unbelievably fast.
Most of mine starts indoors under simple grow lights using my homemade seed-starting mix.
Switching from soggy bargain potting soil to a proper seed-starting mix made a HUGE difference in germination and root health.
👉 If you’re mixing your own seed-starting soil, the Seed-Starting Mix Calculator helps figure out exactly how much coco coir, peat moss, compost, perlite, and lime you actually need based on your trays or containers.
Because trying to do soil math in the garage surrounded by half-open bags gets old real quick. 😂
🌱 Seed-Starting Mix Calculator (Free Tool)
🪴 The Way I Start Basil Seeds
I keep basil simple.
Seed tray. Warmth. Light. Humidity dome.
That’s basically the entire system.
I usually sprinkle multiple seeds into each cell because basil germinates pretty easily when warm. Once they sprout, I thin weaker seedlings later.
🌱 My Simple Basil Seed Setup
- Seed trays with humidity domes (Paid Link)
- LED grow lights (Paid Link)
- Heat mat with thermostat (Paid Link)
- Fine mist sprayer (Paid Link)
You genuinely do NOT need an expensive setup to grow basil successfully.
That’s one reason I recommend basil to beginners so often.
You get visible progress fast — and that builds confidence.
🌿 Basil Gets Better The More You Harvest It
This surprises a lot of people:
The more you harvest basil correctly…
…the BIGGER it gets.
Instead of plucking random leaves, I pinch right above leaf sets. That encourages branching and turns one skinny stem into a thick bushy plant.
Once summer hits full stride, basil can become ridiculous.
Some years I’m:
- Making pesto
- Drying herbs
- Rooting cuttings
- Freezing basil cubes
- Giving away extra plants
- And somehow STILL ending up with too much basil. 😂
That’s part of why I love growing herbs for homesteading.
A tiny plant can turn into real abundance surprisingly fast.
🍅 Basil + Tomatoes = The Ultimate Garden Combo
I almost always grow basil near tomatoes.
Partly because they grow well together…
…but mostly because grabbing tomatoes and basil at the same time makes dinner ridiculously easy. 😂
Most years I grow indeterminate tomatoes in 5-gallon buckets using a bark-heavy living soil mix. Then I tuck basil nearby in containers or raised beds.
If you’re building soil for containers, grow bags, or raised beds, the Living Soil Calculator on Sprouting Homestead makes things WAY easier.
Instead of guessing how much compost, bark fines, aeration, or amendments you need…
…it calculates everything for you automatically.
Honestly, that calculator probably saves me more time than any gardening tool I own.
🪴 Living Soil Calculator (Free Tool) – Coming Soon
💧 Basil Doesn’t Want Swamp Soil
One thing I learned the hard way:
Basil likes moisture…
…but it absolutely hates sitting in constantly wet soil.
Overwatering is one of the fastest ways to make basil struggle.
I’ve had much better results using lighter, better-draining mixes with:
Once roots get oxygen, herbs behave completely differently.
Especially basil.
If your basil constantly looks droopy or pale…
…it might actually need LESS water, not more.
✂️ Don’t Let Basil Flower Too Early
Once basil flowers heavily, the plant shifts energy away from leaf production.
So I usually pinch flower buds off early.
That said…
Toward late summer I let some flower intentionally because pollinators LOVE basil flowers around here.
The bees hit them nonstop.
And if you let flowers mature fully, you can save seeds for next season too.
🌿 My Favorite Thing About Basil
Basil makes a garden feel useful.
Not just decorative.
Useful.
You don’t need a giant homestead either.
You can grow basil in:
- Raised beds
- Buckets
- Containers
- Window boxes
- Greenhouses
- Tiny backyard gardens
And one simple plant turns into:
- Pesto
- Pizza toppings
- Pasta sauce
- Dried herbs
- Herbal butter
- Frozen basil cubes
- Gifts for friends
- New propagated plants
That’s a pretty incredible return from one herb.
🌱 If You’re Building Your Garden This Year…
If you’re just getting started, these have honestly made gardening WAY simpler for me:
🌱 Seed-Starting Mix Calculator (Free Tool)
🪴 Living Soil Calculator (Free Tool)
🌿 Sprouting Homestead Community on Skool (Free Community)
Inside the community, we’re sharing:
- Garden experiments
- Soil recipes
- Seed-starting setups
- Pest problems
- Wins
- Failures
- Harvest updates
- Homestead projects
Basically…
…it’s a place for people trying to learn this stuff together without pretending they already know everything.
That’s probably my favorite part.
👉 Join the Sprouting Homestead Community on Skool
🛒 Basil Growing Supplies I Actually Use
🌱 Seed Starting Setup
- Seed trays with humidity domes (Paid Link)
- LED grow lights (Paid Link)
- Heat mat with thermostat (Paid Link)
- Basil seeds (Paid Link)
🪴 Soil Mixing Supplies
- Coco coir (Paid Link)
- Perlite (Paid Link)
- Compost thermometer (Paid Link)
- 5-gallon buckets (Paid Link)
✂️ Harvest & Preservation
- Herb drying string (Paid Link)
- Glass jars for dried basil (Paid Link)
- Food processor for pesto (Paid Link)
Maybe what you’ve been searching for is waiting in the soil — and you don’t have to figure it all out alone. 🌱
Inside the Sprouting Homestead community, we’re building gardens, testing ideas, learning from mistakes, and helping each other grow food and skills that actually matter.
Because honestly…
Most of us are still learning as we go.
And maybe that’s the best part.
The Radish Gardening Hack That Makes Gardening Feel EASY (And Why Every Beginner Should Grow Them)
🌱 The Radish Gardening Hack That Makes Gardening Feel EASY (And Why Every Beginner Should Grow Them)
🗒️Rooted Field Note: 42
For the longest time… I completely underestimated radishes.
I thought they were one of those “filler crops” people planted while waiting for the REAL vegetables to grow.
Then one spring I tossed a few seeds into the soil almost as an afterthought…
…and less than a month later I was harvesting crisp bright red radishes while the rest of my garden was still barely waking up from winter.
That’s when everything changed.
Because radishes taught me something important:
👉 Gardening does NOT have to feel slow.
And honestly?
If you’re new to growing food, radishes might be the fastest way to build confidence in the garden.
🥬 Why I Think Radishes Are the PERFECT Beginner Crop
Most vegetables test your patience.
Radishes reward you FAST.
They germinate quickly. Grow quickly. Harvest quickly.
Sometimes in as little as 3–5 weeks.
That fast progress completely changes your motivation because instead of staring at empty dirt wondering if anything is happening…
You’re actually harvesting food.
And once you experience pulling your first radish from the soil…
…it becomes weirdly addictive. 😅
That’s why I plant them every single season now.
Especially early spring and early fall.
🌞 The Simple Setup I Use for Better Radishes
After growing them for a while, I realized radishes really don’t need perfection.
But they DO need one thing:
👉 Loose fluffy soil.
That’s the secret.
Loose soil = smooth healthy radishes. Hard compacted soil = tiny cracked angry roots. 😅
Here’s the exact setup I use now:
- 🌱 Compost-rich soil
- ☀️ Full or partial sun
- 💧 Consistent watering
- 🪴 Raised beds whenever possible
- 🌿 Soft loose soil several inches deep
Honestly, I think soil texture matters more than fertilizer with radishes.
If your soil drains well and feels fluffy…
you’re already halfway there.
🪴 Why Raised Beds Changed EVERYTHING For My Garden
One of the biggest upgrades I ever made was switching more of my garden into raised beds.
The difference was immediate.
- Better drainage.
- Cleaner roots.
- Easier harvesting.
- Healthier soil structure.
And once I started building more raised beds and starting more seedlings…
I kept running into the SAME annoying problems:
“How much soil do I actually need?” “When should I plant everything?” 😅
So I eventually built a couple calculators to make the process easier for myself.
And honestly… I use them constantly now.
🌱 Seedling Soil Mix Calculator → https://sproutinghomestead.com/seedling-soil-mix-calculator/
📅 Planting Timeline Calculator → https://sproutinghomestead.com/plant-timeline-calculator/
If you’re building beds, starting seeds, or planning larger gardens, they save a ridiculous amount of guesswork and wasted time.
🌱 How I Plant Radishes (Without Overcomplicating It)
I keep my process VERY simple now.
I loosen the soil.
Make shallow rows.
Then lightly sprinkle seeds instead of obsessing over perfect spacing.
💧 The BIGGEST Mistake That Ruins Radishes
Without question:
👉 Inconsistent watering.
If radishes dry out too much, they become woody, spicy, and stressed.
That’s why I focus on keeping moisture consistent.
Not soaking wet. Not bone dry. Just evenly damp.
Especially once the roots start swelling underground.
Too much fluctuation between dry soil and heavy watering can cause splitting and harsh flavor fast.
☀️ The Secret Most Beginners Don’t Know
Radishes LOVE cool weather.
That’s why some of my best harvests happen:
- ✅ Early spring
- ✅ Late summer
- ✅ Early fall
Once intense summer heat arrives…
radishes can become overly spicy and bolt quickly.
The moment I stopped treating them like summer crops…
my harvests improved immediately.
🥕 My Favorite Garden Trick: Radishes + Carrots
This combo feels like cheating.
Carrots are notoriously slow at germinating.
Radishes explode out of the ground quickly.
So I plant them together.
The radishes mark the rows and loosen the soil while the carrots slowly get established underneath.
Then by the time carrots actually need more room…
I’m already harvesting radishes.
It’s one of the easiest ways to make smaller gardens feel more productive.
🌿 Companion Plants I’ve Had Great Results With
I’ve had especially good luck growing radishes near:
- Lettuce
- Spinach
- Peas
- Beans
- Herbs
- Carrots
- Cucumbers
Because radishes mature so quickly, they work incredibly well as a “temporary crop” while slower vegetables are still developing.
🧺 Harvesting Radishes Never Gets Old
There’s something ridiculously satisfying about pulling radishes from the soil.
Maybe it’s the speed.
Maybe it’s the bright colors.
Or maybe after winter…
you just desperately want to harvest SOMETHING edible from the garden again. 😅
I usually harvest once the shoulders start pushing above the soil surface.
And honestly?
Smaller radishes usually taste sweeter and crisper anyway.
🌱 If You Want Help Building a More Productive Garden
I’ve been sharing more of my gardening systems, raised bed setups, planting strategies, soil mixes, beginner-friendly growing guides, and homestead experiments inside the Sprouting Homestead Skool community.
Inside we talk about:
- 🏡 Beginner gardening
- 🌱 Raised beds
- 🥕 Root crops
- ♻️ Composting
- 💰 Growing food cheaply
- 🪴 Soil building
- 📅 Seasonal planting
- 🌿 Homestead-style gardening
👉 Join The Skool Community Here → https://www.skool.com/garden-4952/about
If you’re serious about growing more food while avoiding beginner mistakes, it’s a great place to learn alongside other gardeners.
And if you’re planning beds or starting lots of seeds, these tools will make your life MUCH easier too:
🌱 Seedling Soil Mix Calculator → https://sproutinghomestead.com/seedling-soil-mix-calculator/
📅 Planting Timeline Calculator → https://sproutinghomestead.com/plant-timeline-calculator/
🌞 Final Thoughts
Radishes helped me realize something important:
Gardening doesn’t need to be complicated.
Sometimes you just:
- Plant the seeds.
- Keep the soil loose.
- Water consistently.
- And let nature do the work.
Few things are more motivating than harvesting food from your own backyard only a few weeks after planting.
That feeling never really gets old. 🌱❤️
How to Grow Beets in Small Clusters for Continuous Harvests
🌱 How to Grow Beets in Small Clusters for Continuous Harvests
🗒️Rooted Field Note: 41
For the longest time, I thought learning how to grow beets meant everything had to be perfectly organized.
📏 Perfect rows.
📏 Perfect spacing.
🌱 Perfect little seeds dropped one by one into the soil like some kind of garden surgery.
But honestly?
The more I gardened, the more exhausting that approach became.
Then I discovered the clump sowing method for beets… and it completely changed how I grow them. 🥬
Now I intentionally plant beet seeds in small clusters instead of carefully spacing every single seed.
And surprisingly, my harvests actually improved. 🌿
✅ The beds fill in faster.
✅ Planting takes less time.
✅ Harvesting feels way more satisfying because you always have another beet in the cluster continuing to grow after you harvest the largest one.
If you’re trying to figure out how to grow beets without overcomplicating everything, this is easily my favorite method now. 🌱
🥬 Why I Started Growing Beets in Clumps
One thing that changed how I grow beets was realizing you don’t need to perfectly space every seed.
Instead, I plant 3 or 4 beet seeds very close together in a small cluster.
🌱 Not scattered everywhere…
🌱 Just tightly grouped in one spot.
As the beets grow, they naturally form a little clump underground.
Then when harvest time comes, I usually pull the biggest beet first and leave the smaller ones behind. 🧺
What’s cool is that once the largest beet is removed, the remaining beets suddenly have more room to expand — so over the next couple of weeks, one of the smaller beets increases in size and becomes the next harvest.
Then I repeat the process again.
It almost turns one planting spot into multiple staggered harvests instead of pulling everything all at once. 🌿
Honestly, this method made learning how to grow beets feel way easier and more productive for me because the garden stays full longer and I get fresh beets over a bigger stretch of time.
🌞 My Simple Setup for Growing Beets
If you’re learning how to grow beets successfully, the biggest thing that matters is your soil.
🌱 Loose soil = beautiful roots.
🪨 Compacted soil = weird mutant beets.
Here’s the basic setup I use now:
🛠️ My Beet Growing Setup
- 🌿 Compost-rich soil
- ☀️ Full sun
- 💧 Consistent watering
- 📏 Clumps spaced about 6 inches apart
- 🪴 Deeply loosened beds before planting
I also like using raised beds because the soil stays fluffy and drains better.
This raised garden bed has worked really well for root crops like beets:
👉 Best Raised Garden Bed Option (paid link)
For soil mixing, I also use:
- 🥥 Coco coir
- 🌿 Compost
- 🪨 Perlite
This soil mix combo makes a huge difference for beet growth:
👉 Organic Perlite for Drainage (paid link)
👉 Coco Coir Brick for Raised Beds (paid link)
🌱 How I Plant Beet Clusters
My process is honestly very simple.
I poke shallow holes about half an inch deep.
Then I drop in 3–4 beet seeds together.
That’s it.
❌ No measuring tape.
❌ No obsessive spacing.
❌ No stressing.
Then I lightly cover everything with soil and water gently. 💧
Sometimes I soak the seeds overnight first because it helps speed up germination.
These beet seeds have germinated really well for me:
👉 High Germination Beet Seeds (paid link)
If you’re serious about learning how to grow beets consistently, starting with quality seeds honestly matters more than people think. 🌱
💧 The One Tool That Made Beet Growing Easier
One thing that helped me massively was using a simple moisture meter.
A lot of beet problems come from inconsistent watering early on.
☀️ Too dry = poor germination.
💦 Too wet = rot issues.
This inexpensive soil moisture meter made watering way easier:
👉 Soil Moisture Meter (paid link)
Especially if you’re new to gardening, this saves a ton of guessing. 🤝
🌿 Why I Prefer Growing Beets This Way
The funny thing is…
I didn’t start using the clump method because I thought it was “optimal.”
I started because it felt easier.
But over time I realized there are real advantages:
🌱 Faster Planting
Dropping clusters is dramatically quicker.
🌿 Fuller Garden Beds
Everything looks lush much faster.
💧 Better Moisture Retention
The leaves naturally shade the soil.
🥬 Mixed Harvest Sizes
You get baby beets and larger storage roots together.
🧺 My Favorite Part About Growing Beets
Harvesting.
Without question.
There’s something ridiculously satisfying about pulling deep red roots from the soil after weeks of seeing only leaves above ground. ❤️
And when they’re grown in clumps?
You pull up entire bunches at once.
It feels abundant. 🌿
That’s probably the best word for it.
Not perfect.
Just abundant.
🌱 If You Want More Gardening Help 🌿
I’ve been documenting more beginner-friendly gardening methods, raised bed setups, soil mixes, and simple growing systems inside my Skool community.
If you’re trying to learn:
- 🥬 how to grow beets
- 🪴 how to build productive raised beds
- 🌱 beginner vegetable gardening
- ♻️ composting
- 🌿 soil improvement
- 🏡 simple backyard food growing
…you can join us here:
👉 [Insert Your Skool Community Link]
I share the exact tools, setups, and methods I personally use so beginners can skip a lot of frustrating mistakes. 🤝
🌞 Final Thoughts on How to Grow Beets
I think one of the biggest mistakes people make with gardening is believing everything has to look perfect.
📏 Perfect spacing.
📅 Perfect timing.
🌱 Perfect rows.
But some of the best gardening methods I’ve found came from relaxing a little and experimenting.
The clump sowing method completely changed how I grow beets now. 🥬
And every season when harvest time comes around, I wonder why I ever made it harder than it needed to be.
If you’ve struggled with how to grow beets before, maybe try simplifying the process this season.
You might end up enjoying gardening a whole lot more. 🌱❤️
How I Grew Strong Kale Without Grow Lights, Shelves, or Expensive Equipment
🌿 How I Grew Strong Kale Without Grow Lights, Shelves, or Expensive Equipment
🗒️Rooted Field Note: 40
Most people make gardening feel way more complicated than it needs to be.
Grow lights.
Seed racks.
Temperature monitors.
Hundreds of dollars in equipment before a single seed even sprouts.
But honestly?
Some of the healthiest kale I’ve ever grown started in an old gallon water jug sitting outside in freezing weather.
No fancy setup.
No greenhouse.
No complicated system.
Just a simple method that let nature do most of the work.
And after trying it myself…
I honestly don’t think I’ll ever go back.
🥬 Why Kale Is One of the Best Crops for Beginners
If you’re new to growing food, kale is one of the most forgiving plants you can start with.
Cold weather?
Usually fine.
Forgot to water for a day?
Still survives.
Random spring temperature swings?
Kale handles it better than most crops.
And once it starts producing…
It keeps going for months.
Instead of harvesting one time and being done, you can keep picking leaves over and over again.
That’s what made me fall in love with growing it.
It feels less like “farming” and more like having fresh food quietly growing in the background of your life.
🥛 The Gallon Jug Method That Changed Everything
The method is incredibly simple.
Some people call it winter sowing, but all you’re really doing is turning an old gallon jug into a tiny greenhouse.
Here’s exactly what I used:
✅ Empty gallon water jug
✅ Seed starting mix
✅ Kale seeds
✅ A little tape
✅ Drainage holes in the bottom
That’s it.
I filled the jug with soil, planted the seeds, taped it shut, left the cap off for airflow, and set it outside.
Then nature handled the rest.
No hardening off.
No moving trays in and out of the house.
No babying weak seedlings under lights.
The plants grew tougher from the start because they were raised outdoors from day one.
And honestly…
That’s one of the biggest reasons I love this method.
🌱 The Soil Mix I Recommend (And When It Makes More Sense To Make Your Own)
One thing I learned pretty quickly…
Your soil mix matters more than most beginners realize.
Especially for seedlings.
If the mix stays too wet, seedlings struggle.
Too dense? Roots don’t develop well.
Poor drainage? Germination drops fast.
For smaller seed-starting setups, honestly, buying a quality pre-made seed-starting mix is probably the easiest route.
Something like:
👉Espoma Organic Seed Starting Mix(Paid Link)
or
👉 Back to the Roots Organic Seed Starter Mix (Paid Link)
Both work well because they stay light, drain properly, and make seed starting much simpler when you’re only growing a moderate number of plants.
But once you start growing larger amounts of seedlings…
Buying bags constantly gets expensive fast.
That’s actually one of the reasons I built the 👉Seedling Mix Calculator.
Instead of guessing ratios and wasting ingredients, it helps you figure out how much compost, perlite, coco coir, peat moss, or other ingredients you need to mix your own seed-starting soil in bulk.
Which becomes a lot more affordable once you’re filling trays regularly or starting a bigger garden.
So honestly:
🌱 Starting small?
A quality pre-made mix is probably easiest.
🌿 Starting LOTS of seeds?
The calculator will probably save you money pretty quickly.
☀️ Want Stronger Indoor Seedlings? This Helped A Lot
Even though I mostly use the gallon jug method now…
I still start some plants indoors during late winter.
And the difference between weak “stringy” seedlings and thick healthy ones usually comes down to lighting.
After trying cheap weak lights that barely worked, I switched to a full-spectrum LED grow light setup and immediately noticed sturdier growth.
This one has been surprisingly solid for the price:
👉 Full Spectrum LED Grow Light(Paid Link)
If you’ve ever had seedlings stretch tall and flop over…
Bad lighting is usually why.
A decent grow light fixes that fast.
🌿 Why I Built The Soil Mix Calculator
After awhile, I got tired of guessing soil recipes and wasting ingredients.
Too much compost.
Too much perlite.
Not enough drainage.
So I built a simple soil mix calculator to make it easier to balance mixes for seed starting, raised beds, containers, and homestead growing.
Because honestly…
A good soil mix changes everything.
Especially for beginners.
❄️ One Of The Coolest Things About Kale
Kale actually tastes better after frost.
I didn’t believe this at first until I experienced it myself.
After cold weather hits, the leaves become sweeter and less bitter.
It’s one of the few crops that genuinely seems happier when temperatures drop.
There’s something satisfying about harvesting fresh food after freezing nights and realizing the plant actually improved because of the cold.
🌱 Final Thoughts
Kale quietly changed the way I garden.
Not because it was flashy.
But because it proved growing food doesn’t have to be complicated.
Sometimes an old recycled jug, decent soil, and a handful of seeds are enough to start growing real food.
And honestly…
That feels a lot closer to how gardening is supposed to feel.
Simple.
Natural.
Rooted. 🌱
How to Grow Indeterminate Tomatoes (and Actually Keep Up With Them!)
🌱 How to Grow Indeterminate Tomatoes (and Actually Keep Up With Them!)
Rooted Field Note #27
Sun Button Body Butter
A silky, chamomile-kissed body butter inspired by the little “sun buttons” my son spotted in our garden — whipped with shea & mango butters, balanced with arrowroot for a soft, non-greasy finish.
Net Wt. 4 oz (113 g) • Ships from Wisconsin
Why “Sun Button”?
We were weeding the bed when my kiddo pointed at the chamomile — “Look, tiny sun buttons!” That bright, gentle image stuck. So we steep our blooms low & slow, then fold the golden infusion into a velvet whip that feels like sunshine on winter skin.
What you’ll feel ✨
Arrowroot keeps it breathable, not greasy.
A gentle hug for skin that needs soothing.
Shea + mango butters lock in hydration.
Inside the jar 🌿
- Shea Butter (unrefined)
- Mango Butter
- Olive Oil (with house-infused chamomile)
- Arrowroot Powder for slip
No preservatives. No petroleum. No synthetic fragrance.
How we make it
- Slow-infuse dried chamomile in olive oil.
- Melt butters gently, blend with infusion.
- Whip to cloud-light texture; finish with arrowroot.
- Poured in small batches, labeled by hand.
Loved by the Rooted Crew 💛
“Winter elbows? Gone.” • “Calm on contact.” • “It sinks in — no slick.”
Questions, answered 🌼
Is there fragrance?
No synthetic fragrance. Just a light, natural chamomile note from the infusion.
Greasy?
We add arrowroot for a soft, non-greasy finish that absorbs quickly.
How to use?
Massage a small amount into clean skin, especially after bathing or before bed.
Allergens / Safety
For external use only. Patch test first. Discontinue if irritation occurs. Keep away from eyes and children.
Ingredients: Shea Butter, Mango Butter, Olive Oil (Chamomile Infusion), Arrowroot Powder.
Made by: Sprouted Rooted Remedies • Wisconsin, USA
🪴 Why Indeterminate Tomatoes Are the Wild Teenagers of the Garden
If determinate tomatoes are the tidy kids who finish their homework and go to bed on time, indeterminate tomatoes are the teenagers who never stop growing and raid your fridge at midnight. 😅 They keep vining and flowering until frost — which is awesome for long harvests, but it means you’ll want a plan for support, pruning, and steady feeding.
When I first planted them in our backyard, I thought, “How big can they really get?” The answer: big enough to swallow your trellis whole if you’re not ready. Once you learn their rhythm, though, these tomato beasts become the most rewarding part of the garden. 🍅
❓ How Do You Support Indeterminate Tomatoes?
This is the #1 beginner panic moment: you plant a cute seedling, blink, and now it’s eight feet tall, laughing at a flimsy wire cage. Here’s what actually works in a backyard garden:
- Heavy-duty cages — skip the wobbly ones. Look for square, stackable, or welded options that anchor deep.
- Trellis panels — cattle panel between T-posts = rock-solid tomato highway. Zip ties are your friend.
- Single-stake method — one tall stake with soft ties as it grows. Minimal gear; pairs best with pruning.
Dad note: my kid tried to climb our cattle panel like a jungle gym. Verdict: indeterminate tomatoes are sturdier than most playgrounds. 😂
❓ Do You Prune Them?
Short answer: yes. Long answer: yes — but don’t overthink it. Pruning keeps airflow moving (less disease), makes harvest easier, and prevents your yard from turning into a tomato jungle.
- Pinch out suckers (the shoots in the leaf/stem “Y”).
- Remove leaves touching the soil to reduce splash-borne disease.
- Thin dense clumps of foliage that trap moisture.
👉 Check out this rooted pruning guide: “How to Prune a Tomato (Step-by-Step with Real-Life Photo Guide)”.
❓ Can You Grow Indeterminate Tomatoes in Containers?
Yes — but size matters. For indeterminates, think “small tree,” not “houseplant.”
- Minimum 10 gallons; 15–20 gallons is better for steady water and nutrients.
- Use high-quality potting mix (not heavy garden soil).
- Expect to water more often than in-ground plants.
Fabric grow bags help keep roots cooler and drain beautifully. At season’s end, they fold flat — tiny storage win.
❓ How Often Do You Fertilize?
I keep it super simple. At planting time, I work in MIgardener’s Fertilizer just once to give the seedlings a good kickstart. After that, I don’t rely on store-bought fertilizer anymore — it’s all about the teas. ☕🌱
Here’s what I rotate through every couple of weeks:
- Compost tea — homemade from finished compost; it’s like a vitamin boost for the soil life.
- Seaweed tea — packed with micronutrients; keeps plants strong and resilient.
- Comfrey tea — my secret weapon, loaded with potassium to keep the fruiting nonstop.
The cool part? I make all these teas myself from what I already have in the homestead. It’s cheap, sustainable, and the plants absolutely thrive on it. Honestly, the tomatoes taste even better when they’re raised on homemade goodness. 🍅💪
❓ Best Beginner-Friendly Indeterminate Varieties
These come up again and again from growers (and they’ve earned a permanent spot in my beds):
- Cherokee Purple — deep, smoky slicer with a cult following.
- Sun Gold — candy-sweet orange cherries kids (and adults) inhale.
- Early Girl — dependable early producer; forgiving in funky weather.
- Better Boy — classic backyard workhorse, heavy yields, balanced flavor.
❓ How Do You Prevent Leggy Plants & Disease?
Leggy seedlings: usually low light. If they’re already tall and floppy, plant them deep and sideways in a shallow trench — tomatoes root along buried stems like champs.
Disease prevention (simple backyard rules):
- Space 2–3 ft between plants for airflow.
- Prune lower leaves and crowded clusters.
- Mulch with straw/wood chips to stop soil splash and keep moisture even.
- Water at the base in the morning; avoid wetting leaves.
- Rotate beds yearly if possible.
❓ How Long Do Indeterminate Tomatoes Produce?
As long as the weather allows. They don’t clock out after one big flush — they keep flowering/fruiting until frost. In our Wisconsin backyard (Zone 5), that’s typically late July through first hard frost (often October). In warmer regions, you can harvest much longer.
Quick Start Checklist ✅
- Plant deep; bury 1/3–1/2 of the stem.
- Install real support on day one (cage/trellis/stake).
- Mulch and water at the base to keep leaves dry.
- Feed lightly but consistently every 2–3 weeks.
- Prune for airflow and sanity.
Wrap-Up
Indeterminate tomatoes will test your patience, climb higher than you planned, and occasionally humble your trellis — then repay you with armloads of fruit. Learn their rhythm and they’ll be the heart of your backyard harvest.
👉 Next time: the biggest pruning mistakes beginners make (and how I learned the hard way).
More for you:
Container Tomatoes Guide •
Organic Fertilizer 101 •
Hornworm Prevention
👉 Ready to Root Deeper Into Homesteading?
Learn how to grow food, craft natural remedies, and build a homestead life with people who actually get it.
Inside the Sprouted Rooted Remedies Skool, you’ll not only connect & learn — you can win prizes 🎁 and earn cash 💸 when you invite friends through our affiliate program.
Free for the first pioneers. Be part of The Rooted Crew. 🌻
How to Plant Chamomile Seeds the Easy Way (Beginner Jug Method That Actually Works)
How to Plant Chamomile Seeds the Easy Way (Beginner Jug Method That Actually Works)🌼
…No grow lights. No trays. No expensive setup. Just one jug and nature doing the work.
🗒️Rooted Field Note: 39
Most people overcomplicate starting chamomile from seed.
They assume they need grow lights, expensive trays, shelves full of supplies, timers, heating mats, and a spare room dedicated to seedlings.
And sure… those setups can work.
But sometimes the best gardening methods are the ones that feel almost too simple to be true.
That’s exactly how I planted my chamomile seeds this season.
No grow room.
No expensive setup.
No constant babysitting.
I used an old gallon water jug, some soil, and let nature do the work.
And honestly?
It worked beautifully.
If you’ve been wondering how to plant chamomile seeds without spending money or stressing yourself out, this may be one of the easiest methods you’ll ever try.
🌱 Why More Gardeners Are Growing Chamomile
Chamomile is one of those plants that gives back more than it asks for.
It’s beautiful in the garden.
It attracts pollinators.
It can be dried for tea.
It smells wonderful.
And it brings a calm, peaceful feeling to the growing space that’s hard to explain until you’ve experienced it yourself.
Some plants feed the body.
Chamomile feels like it feeds the spirit too.
That’s why I wanted more of it this year.
So instead of making the process complicated…
I grabbed an empty gallon jug.
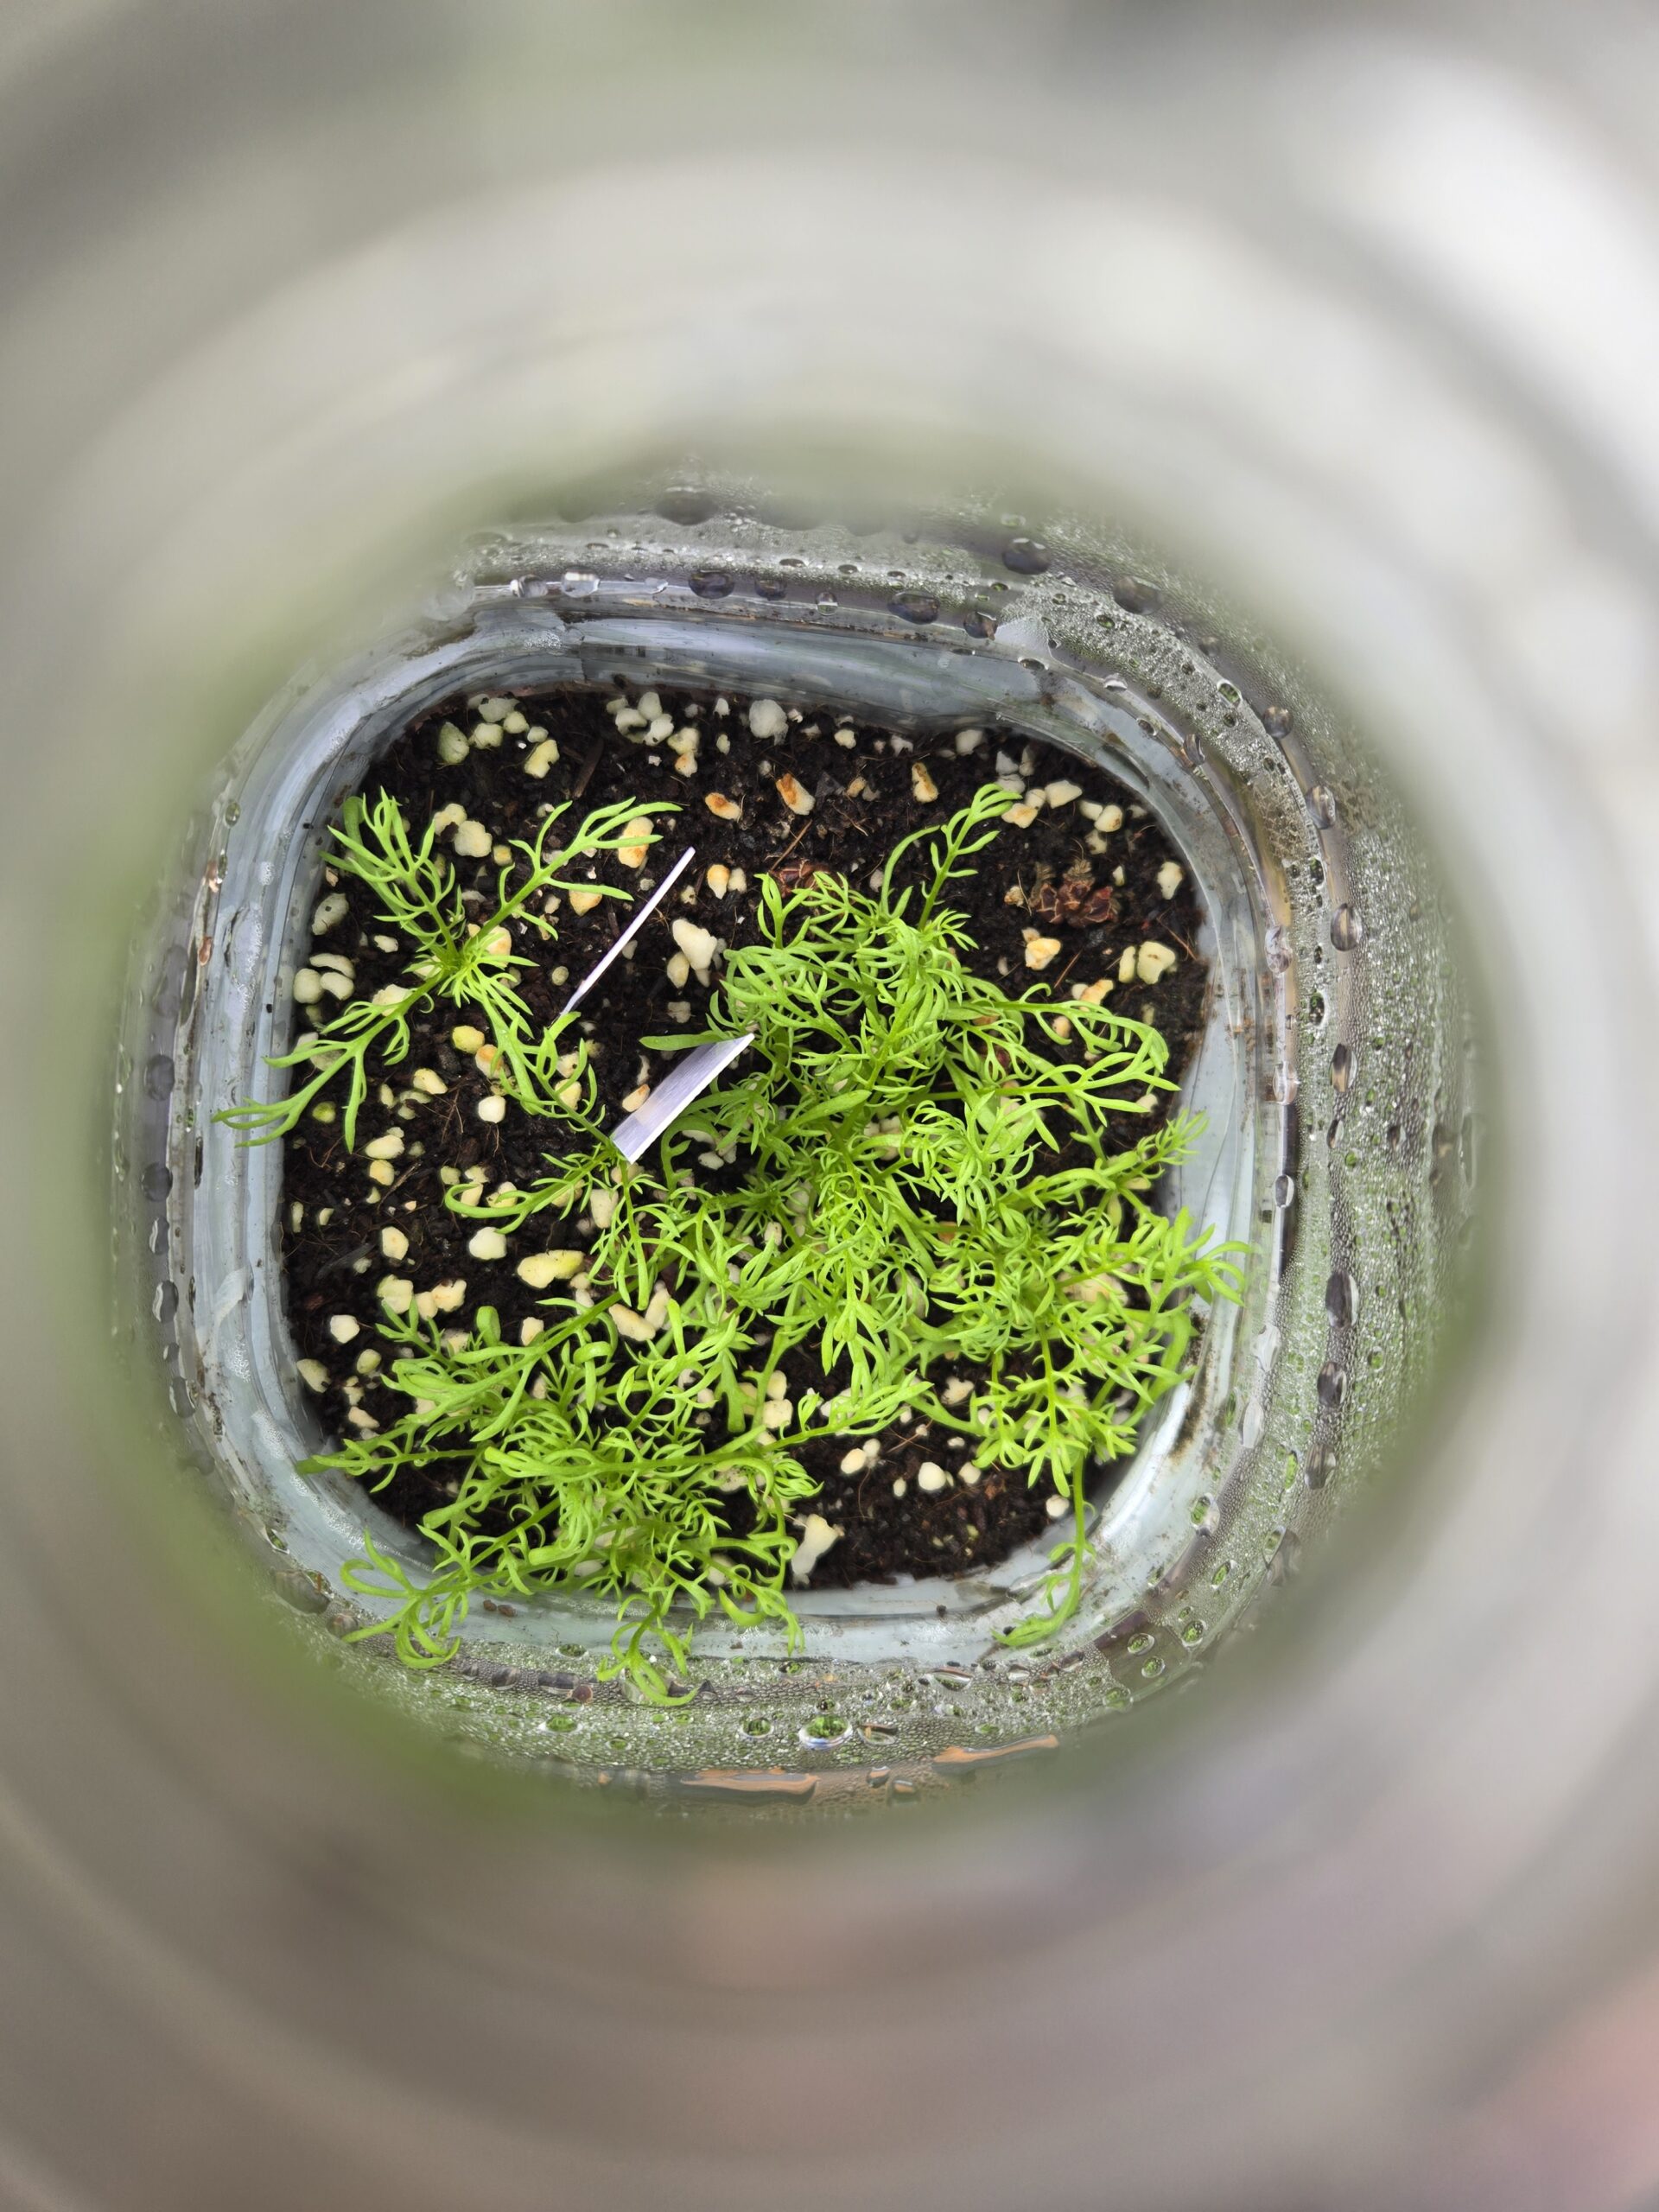
My chamomile seeds started the easy way — in an old gallon jug outdoors.
🥛 The Gallon Jug Method (One of the Easiest Ways to Start Seeds)
If you’ve never tried this method before, it’s beginner gold.
Here’s exactly what I did:
Step 1: Cut Open the Jug
I took a clean gallon water jug and cut it almost all the way around, leaving one side attached like a hinge.
This allows it to open and close easily.
Step 2: Add Soil
I filled the bottom with moist seed-starting mix.
Not soaking wet.
Just lightly damp.
Step 3: Sow the Seeds
Chamomile seeds are tiny, so I sprinkled them gently across the surface.
Then I lightly pressed them into the top of the soil.
Step 4: Close It Up
I taped the jug closed.
Then I left the cap off the top for airflow.
Step 5: Put It Outside
That’s it.
I placed it outdoors and let the weather do the rest.
No grow lights.
No moving trays around the house.
No daily stress.
🌞 Why This Method Works So Well
The gallon jug acts like a miniature greenhouse.
During the day:
☀️ Sun warms the inside
At night:
❄️ Cool temperatures help harden seedlings naturally
When it rains or snows:
💧 Moisture and humidity regulate conditions
The plastic protects young seedlings from wind and rough weather while still exposing them to natural seasonal changes.
That means when your plants sprout, they’re often sturdier and more ready for real garden life than soft indoor seedlings.
Less stress for you.
Better transition for them.
⚠️ The Biggest Mistake People Make With Chamomile Seeds
Most beginners bury chamomile seeds too deep.
That simple mistake can stop germination entirely.
Chamomile seeds prefer light to germinate.
So instead of planting them deep like beans or peas…
Simply press them onto the surface of the soil.
That tiny detail can save weeks of frustration.
Sometimes success in gardening comes from small adjustments, not giant changes.
🌱 How Long Chamomile Seeds Take to Germinate
Chamomile usually germinates in 7 to 14 days, depending on temperature and moisture.
In outdoor jug setups, timing can vary because nature decides the schedule.
That’s one of the hidden benefits of this method:
The seeds wake up when conditions are truly right.
Not when we force them.
And every time I see those first little green sprouts inside an old plastic jug…
It feels like magic.
Tiny life growing inside something most people would have thrown away.
That never gets old.
🌼 German Chamomile vs Roman Chamomile (Which Should You Grow?)
Not all chamomile is the same.
German Chamomile
Best choice for:
🍵 Tea
🌼 Lots of blooms
🌱 Fast annual growth
This is the classic tea chamomile most people want.
Roman Chamomile
Best choice for:
🌿 Ground cover
🌸 Low-growing beauty
🌱 Perennial option in some climates
If your dream is harvesting flowers for homemade tea…
German chamomile is usually the better pick.
🧪 Want Better Germination Rates? Soil Matters More Than People Think
Many people assume bad sprouts mean bad seeds.
Usually it’s the growing medium.
Too dense = poor airflow
Too wet = rot
Too dry = stalled germination
That’s exactly why we built the Seedling Mix Calculator inside our gardening tools.
It helps you quickly build a stronger seed-starting mix using ingredients like:
✔ Coco coir or peat
✔ Perlite
✔ Worm castings
No guessing.
No wasting bags of materials.
No random YouTube recipes.
👉 Use the tool here: Seed Mix Calculator
If you want healthier starts this season, it saves a lot of trial and error.
🌱 What Happens After Sprouting Matters Even More
Many beginners succeed at germination…
Then lose the plants afterward.
Usually because of:
❌ Transplanting too early
❌ Roots overcrowding containers
❌ Poor outdoor timing
❌ Weak soil prep
❌ Watering mistakes
This is where many people get frustrated and quit.
But it doesn’t have to be hard when you know what to watch for.
🌻 Grow With Us Inside the Skool Community
If you’re tired of figuring everything out alone…
Come join us inside the Skool community.
This is where growers help growers.
Inside, we share:
🌱 What we’re planting right now
🌱 Seasonal timing tips
🌱 What’s actually working
🌱 Honest failures too
🌱 Beginner-friendly support
🌱 Gardening tools & calculators
🌱 Motivation to keep going
Because sometimes what people need isn’t more random information…
They need the right people around them.
👉 Join the community here: https://www.skool.com/garden-4952/about
Whether you’re starting your first seed or building a serious garden, you’re welcome here.
🌿 Where to Plant Chamomile After Transplanting
Once seedlings are ready, chamomile generally likes:
☀️ Full sun to partial sun
🌱 Well-drained soil
💧 Moderate watering
🌬️ Good airflow
I love planting it near vegetable beds, herb gardens, walkways, or anywhere I want flowers with purpose.
It looks beautiful and earns its space.
🛒 Helpful Tools That Make Growing Easier
You don’t need much.
But these help:
🌱 Chamomile seeds
🌱 Spray mister
🌱 Garden snips
🌱 Drying rack for flowers
🌱 Airtight jars for tea storage
🌱 Soil calculators and planning tools
Simple tools beat complicated systems.
🌼 Final Truth
You do not need a fancy setup to grow something beautiful.
Sometimes all you need is:
An old water jug
A little soil
A handful of seeds
And the right people to learn beside
Start with one seed.
Then keep going.
We’ll help with the rest.
👉 Use the tools: Seed Soil Mix
👉 Join the Skool community: https://www.skool.com/garden-4952/about
🌱 One More Thought
Gardening gets easier when you stop trying to know everything before starting.
Plant first.
Learn as you grow.
That’s how real gardens are built.
Growing Calendula for Beginners: The Simple Method That Actually Worked
Growing Calendula for Beginners: The Simple Method That Actually Worked🌼
…Bright blooms, bees, herbal uses, and one of the easiest flowers I’ve ever grown.
🗒️Rooted Field Note: 38
Most people overcomplicate gardening.
Fancy lights. Expensive trays. Complicated systems.
Meanwhile… one of the best flowers in my garden got its start in an old gallon jug sitting outside.
That flower is calendula.
And if you’ve never grown anything before, this might be one of the smartest places to begin.
Because calendula gives back far more than it asks for.
Bright blooms.
Bees love it.
Petals for salves.
Tea blends.
Skin care.
Homemade gifts.
Color in the garden.
All from one humble seed.
🥛 How I Started Calendula Early
This season, I used the same method I rely on for a lot of hardy plants:
The milk jug method.
Some people call it winter sowing. I call it simple.
I took an empty gallon water jug, cut it around the middle, poked drainage holes in the bottom, and filled it with seed-starting mix.
Then I sprinkled in calendula seeds, lightly covered them with soil, watered everything in, taped the jug shut, and set it outside.
That’s it.
No grow lights.
No heat mats.
No trays taking over the kitchen table.
No babysitting seedlings every day.
The jug acts like a tiny greenhouse—catching sunlight, holding moisture, and protecting young plants from rough weather.
Nature handles more than people realize.
🌱 Why Calendula Earns Its Space
Some flowers are pretty.
Some plants are useful.
Calendula is both.
That earns space in my garden every year.
🌼 Bright orange and golden blooms
🐝 Pollinators notice it fast
🧴 Great for infused oils and salves
🍵 Petals can be dried for tea blends
🌿 Beginner friendly and forgiving
✂️ Blooms longer when harvested often
The first year I grew calendula, I didn’t really know what I was doing.
It still thrived.
That told me everything I needed to know.
📍 Where to Plant Calendula
Once seedlings are sturdy and weather settles down, I transplant them into the garden.
Calendula likes full sun, but if your summers get intense, a little afternoon shade can help.
I love planting it near vegetables.
The bees find it quickly, and the whole space feels more alive.
That matters more than people think.
A productive garden should also feel good to walk through.
💧 What I’ve Learned Growing Calendula
Calendula doesn’t need perfection.
It needs a fair shot.
Give it:
- Decent soil
- Sunlight
- Water when dry
- Room to breathe
Deadhead old blooms for more flowers.
Harvest often if you want petals.
And don’t overthink it.
A lot of people struggle because they complicate easy things.
Calendula rewards relaxed gardeners.
🧠 If You’re New, Use the Tools
When I first started gardening, I wasted time guessing everything.
When to plant.
What soil to use.
What comes next.
Why something failed.
That’s exactly why I built the tools I wish I had back then.
Inside our growing system, you can use:
🗓️ Planting Timeline Calculator
🪴 Seed Starting Mix Calculator
🌱 Bed Planning Tools – coming soon
📍 Frost Date Resources
🧴 Herbal & Salve Tools
Because guessing gets expensive in gardening.
🌿 Why I Built The Rooted Community
A lot of people want to grow something.
But they’re doing it alone.

That’s the hard part nobody talks about.
Seeds are easy to buy.
Encouragement is harder to find.
Real answers are harder to find.
Motivation after failure is harder to find.
That’s why I built The Rooted community.
Inside, people are learning together.
Sharing progress.
Asking questions.
Showing wins.
Showing failures.
Building real gardens and better lives.
No fake perfection.
Just real people growing forward.
🔥 If I Were Starting Calendula Today
I’d do exactly what I did this season.
Grab a gallon jug.
Add soil.
Drop in seeds.
Set it outside.
Then let nature do more of the work than most people realize.
Simple methods win more often than complicated ones.
🌼 Final Thought
Growing calendula isn’t just about flowers.
It’s about creating something useful, beautiful, and alive from a tiny seed.
It’s proof that small beginnings become real things.
And if you’re tired of figuring it all out alone…
You don’t have to anymore.
🌱 Come grow with us inside The Rooted.
🔗 Helpful Next Stops
👉 Try the Planting Timeline Tool
👉 Use the Seed Starting Mix Calculator
👉 Join The Rooted Community
👉 Learn How to Make Calendula Salves & Oils