Uncategorized
Unlock Unlimited Herbs & Veggies: Master Stem Cutting Propagation Indoors
How to Clone Your Favorite Food Plants Indoors Using Stem Cuttings 🌱🏡
📋Rooted Field Note: 03
The first time I heard about cloning plants from a stem cutting, I honestly thought it sounded like some gardening wizardry straight from a sci-fi movie. Cloning plants? It sounded complicated and futuristic. But guess what—it’s actually super simple, budget-friendly, and an amazing way to fill your indoor garden with more of your favorite edible plants.
If you’re just dipping your toes into the world of gardening or looking to grow your indoor food collection, you’re in exactly the right spot. I’ll guide you through cloning plants step-by-step using stem cuttings. Stick with me—it’s easy, rewarding, and genuinely fun. Let’s jump right in!
Why Use Stem Cuttings?
Cloning plants through stem cuttings simply means you’re making an exact replica of the original plant. The new plants will carry the exact same tasty qualities and strength of their parent. Got a basil plant that makes perfect pesto? Your new plants will have those delicious traits too. It’s an awesome method for expanding your indoor garden without constantly buying new plants or seeds.
What You’ll Need
Before we dive into the details, gather these basic items:
- Healthy indoor plants (think basil, mint, rosemary, oregano, tomatoes, peppers)
- Clean, sharp scissors or pruning shears (sanitized with rubbing alcohol)
- Small cups or jars for rooting in water
- Small pots or containers with drainage holes
- Organic, fast-draining potting soil
- Optional: rooting hormone or cinnamon powder
- Labels (this might seem extra, but you’ll thank me later!)
Your Step-by-Step Guide to Stem Cutting Propagation
Ready? Here’s your simple blueprint:
Step 1: Choosing the Best Stem 🌿
Look for a strong, healthy stem without flowers. For softer herbs like basil or mint, choose a flexible green stem. For woody herbs such as rosemary or oregano, opt for semi-woody stems. For vegetables like tomatoes or peppers, select vigorous, young stems without buds or fruits.
Step 2: Making the Cut ✂️
Take your clean scissors and snip off about 3 to 6 inches of stem, just below a leaf node (that’s where leaves branch off). Aim to cut at a 45-degree angle—this helps the stem absorb more water and root better. Immediately after cutting, remove the leaves from the lower half of the stem, leaving only 2-4 leaves on top. This helps the plant focus on root development rather than maintaining extra leaves.
Step 3: Rooting Your Stem Cutting 💧
Choose one of these easy rooting methods:
Water Method:
- Place your cutting into a jar of clean water, making sure no leaves are underwater. Set it in indirect sunlight, like on your kitchen counter. Change the water every few days to keep things fresh.
Soil Method:
- Dip the cut end in rooting hormone or cinnamon powder (totally optional but beneficial). Plant the stem directly into moist potting soil, burying at least one node. Cover lightly with a plastic bag to retain humidity.
Step 4: Be Patient—but Not for Long! ⏳
Roots typically appear:
- 1-2 weeks for herbs like basil, mint, or oregano
- 3-4 weeks for woody herbs like rosemary
- 3-4 weeks for veggies such as tomatoes or peppers
Ensure the cuttings stay warm (around 70°F), moist, and in indirect, bright sunlight. If rooting in soil, mist regularly to maintain moisture.
Caring for Your Clones 🌞
Once your stem cuttings have roots about 1-2 inches long, it’s time for their own pots:
- Use small pots with drainage holes filled with good-quality potting soil.
- Carefully transplant your rooted cuttings, gently pressing soil around them.
- Water thoroughly and place them in bright, indirect light.
- Gradually introduce your new plants to stronger indoor lighting over the next week.
Use the seedling 👇checklist to reintroduce your cuttings back to sunlight
🌱 Get Your Printable Seedling ChecklistCommon Mistakes and Simple Solutions 🚫
Here are quick fixes for common problems:
- Rotting stems: Remove lower leaves and avoid letting leaves sit underwater or in the soil.
- Slow or no roots: Double-check temperature and lighting—bright, indirect light and warmth are key. Avoid drafts and cold windows.
- Wilted or dry leaves: Maintain high humidity by regular misting or using humidity covers.
Troubleshooting Quick Tips 🛠️
Having trouble with your stem cuttings?
- Make sure they’re getting 12-16 hours of indirect light.
- Adjust humidity levels by misting or using covers.
- Ensure soil moisture is consistent—not too wet, not too dry.
Quick Checklist for Success ✅
Here’s a handy checklist to keep you on track:
- Choose healthy plants
- Use sanitized scissors
- Cut below leaf nodes at 45 degrees
- Strip lower leaves
- Root in water or moist soil
- Provide indirect bright light
- Keep moisture consistent
- Transplant when roots reach 1-2 inches
Wrapping Up and Growing Together 🌱✨
I vividly remember rooting my first stem cutting—it felt almost magical seeing those tiny roots appear. Every time I clone a plant now, it deepens my connection with nature and fills my home with lush, edible greenery.
Stem cutting propagation is more than just expanding your indoor garden. It’s about the joy of gardening, saving money, and having fresh herbs and veggies always within reach. Give it a try—you’ll be amazed at how easily and beautifully your indoor garden flourishes.
Happy growing, and enjoy every moment! 🌿💚
Propagation Magic: Multiply Your Garden Without Spending a Dime
Propagation Magic: Multiply Your Garden Without Spending a Dime 🌱✨
📋Rooted Field Note: 02
There’s a profound sense of fulfillment that comes from cultivating your own food — but growing your own plants from other plants? That feels like homesteader alchemy 🧙♂️. I didn’t know what propagation even meant when I first started, but once I learned that I could turn one basil plant into five, or grow a whole fig tree from a stick… let’s just say I got hooked.
Whether you’re a beginner trying to stretch a grocery-store herb into something more useful, or you’re dreaming of fruit trees dotting your future homestead (like me), learning how to propagate is a skill that pays off in spades. Literally.
This guide covers all the main methods — seeds, cuttings, layering, division, grafting, and budding — but don’t worry, I’m not handing you a college botany lecture. Just real-life, beginner-friendly info with a splash of dirt, some hard-earned lessons, and a lot of excitement.
1. Seed Propagation – Nature’s Starter Pack 🌱
This is the most obvious and often the first method we try. Plant a seed, watch it grow. But even here, a few tweaks can make all the difference.
If you’ve started seeds indoors before, you know the heartbreak of watching them stretch out all leggy or dampen off and die. That’s why I mix up my own light soil blend (peat, perlite, vermiculite) and use a humidity dome — or honestly, just a clear salad container from takeout — and a heat mat if it’s chilly. I also label everything now after mixing up my peppers and tomatoes one too many times.
Pro tip: Many fruit trees (like apples, pears, or peaches) need cold stratification — meaning they need to chill out for a while (literally in the fridge) before they’ll sprout. I keep a baggie of moist sand with seeds in the back of the fridge all winter, and plant them when spring starts whispering through the window.
Good plants to start with: Tomatoes, peppers, lettuce, cucumbers, melons, sunflowers, and yes — even trees from your kitchen scraps (hello, avocado pits).
2. Cuttings – Cloning Made Simple ✂️✨
This one still feels like a party trick 🎉. Take a piece of a plant, stick it in some moist soil or water, and bam — roots! You just made a copy of a plant for free.
When I first learned this, I went a little wild with my mint and basil. Now I use it with figs, rosemary, and even tomatoes (yep, those little side suckers root fast!).
Here’s the quick version:
- Cut a healthy 4–6″ stem just below a node (that’s where the leaves meet the stem).
- Strip the lower leaves.
- Dip it in rooting hormone (optional but helpful — I use a cinnamon + honey blend sometimes).
- Stick it in moist perlite, vermiculite, or just a light potting mix.
- Cover loosely with a clear lid or bag to keep humidity high.
Perfect for: Basil, mint, rosemary, sage, fig, tomato suckers, grapes, blueberries, and more.
Tip: Root cuttings in a bright spot with indirect light — not in the blazing sun. Mist if they look sad.
3. Layering – Let It Root While Still Attached 🌿🧷
This one is like giving your plant training wheels. It keeps the branch attached to the mother plant while it grows roots. Great for shy rooters like blackberries, raspberries, or even older shrubs.
I did this by accident once — a raspberry cane flopped over, touched the ground, and rooted itself! Now I use it on purpose:
- Bend a low branch to the soil.
- Nick or lightly scrape the underside where it touches dirt.
- Bury that section in soil or a pot.
- Pin it down with a rock or wire.
- Wait a few weeks to a few months.
- Once it roots, snip it from the main plant and transplant.
Good for: Berries, vines, tomatoes, rosemary, even avocado or citrus using air layering (wrap a moist moss ball around a slit in the bark and wait for roots).
This is the method if you’re short on plant material or nervous about losing a cutting. You’ve got a safety net.
4. Division – Share the Clump Love ❤️✂️
Got a plant that grows in clumps or sends out baby offshoots? Time to divide and conquer. This is how I keep my chives from turning into a tangled mess — and how I multiplied my comfrey patch in one afternoon.
Dig up the mother plant, separate into chunks (each with roots + shoots), and replant.
Perfect for: Chives, mint, lemon balm, rhubarb, asparagus, daylilies, irises, comfrey, walking onions, horseradish.
Bonus: this works like magic with comfrey Bocking 4. Once you have it, you can multiply it over and over again — fertilizer for life.
🌿 Notify me when comfrey is available!
We’ll email you as soon as it’s back in stock. 🌿
➡️ Occasional homestead tips & early access to natural offers. No spam.
5. Grafting – Where Science Meets Garden Wizardry 🧪✨🌳
Okay, this one might feel advanced — but don’t skip it. Grafting lets you take a stick of a variety you love (like your grandma’s old apple tree) and graft it onto a hardy rootstock.
You’ll need a sharp knife, some grafting tape or parafilm, and a little patience. But it’s absolutely doable.
Basic steps:
- Make aligned cuts on both the rootstock and the scion.
- Line up the cambium layers (that green ring just under the bark).
- Tape it up tight.
- Wait for the graft to take and leaf out.
I’m currently experimenting with grafting multiple apples onto one dwarf rootstock. Imagine one tree giving you Honeycrisp, Fuji, and Gala! This is how orchard nerds (like me) dream.
Best for: Apples, pears, peaches, plums, cherries, citrus, grapes.
6. Budding – Tiny Bud, Big Potential 🌱💡
Budding is like grafting, but instead of a whole twig, you just use one bud. It’s often done in summer, and it’s the sneaky way most store-bought fruit trees are created.
You slip a single bud from your chosen variety under the bark of a compatible rootstock, tape it up, and let it rest. Come spring, that little bud grows into a brand-new tree.
It’s advanced, but totally worth learning — especially if you dream of a micro-orchard one day.
Why This Matters for Homesteaders 🏡🌾
Propagation isn’t just about saving money — though that’s a nice perk. It’s about sustainability, empowerment, and growing your own resilient food system.
If you’re building a homestead (like I am), knowing how to propagate means:
- You can share plants with neighbors.
- Build out your orchard and garden without buying more.
- Create backups of favorite varieties.
- Turn one comfrey plant into a small business (seriously — I sell root cuttings!).
Whether you’re working with a sunny windowsill, a rented backyard, or the dream of land on the horizon — this is a skill that scales with you.
Let’s Grow This Together! 🌼✊
I’ll be sharing more how-tos, printable guides, and maybe even some propagation bundles soon — tools, cuttings, and mini courses for anyone wanting to dive deeper.
Until then, drop a comment or sign up below if you’re on this journey too. Let’s root something beautiful — and edible — together.
Messy hands welcome. Dirt under fingernails encouraged.✋️
.cs-modal-box input[type="submit"] {
width: 100%; background-color: #4A5C3C; color: #fff;
padding: 12px; border: none; border-radius: 30px;
font-size: 15px; font-weight: bold; cursor: pointer;
}
.cs-modal-box p.privacy {
font-size: 11px; color: #666; margin-top: 10px;
}
🌱 Hardening Off Seedlings: The Simple Step That Saved My Garden (and My Sanity) 😅
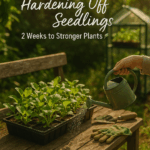
Hardening Off Seedlings: The Simple 7-Day Method for Stronger, Healthier Plants
🗒️Rooted Field Note: 01
If you’ve ever lovingly grown seedlings indoors—only to move them outside and watch them wilt, burn, or collapse overnight—you’re not alone.
Grab My Free Hardening Off Seedlings Checklist
Know exactly what to do each day so your plants don’t wilt or burn.
I’ve done it too.
I used to think once seedlings had a few leaves, they were ready for the garden. I’d carry them outside with excitement… and by the next afternoon they looked shocked, droopy, and offended by my decisions.
That’s when I learned the importance of hardening off seedlings.
It sounds fancy, but it’s simply the process of helping young plants slowly adjust to outdoor sun, wind, and temperature changes before transplanting.
And once I started doing it properly, everything changed.
🌱 Stronger stems
🌱 Less transplant shock
🌱 Faster growth
🌱 Better survival rates
🌱 A calmer gardener
What Is Hardening Off Seedlings?
Hardening off seedlings means gradually introducing indoor-grown plants to outdoor conditions over several days.
Seedlings started inside live a comfortable life:
Stable temperatures
No wind
Filtered light
Gentle watering
No harsh weather
Then we suddenly place them outside in full sun and breeze like tiny green gladiators.
It’s too much, too fast.
Hardening off gives them time to adapt.
Think of it like training for a marathon instead of sprinting off the couch.
Why Hardening Off Seedlings Matters
Skipping this step often leads to:
❌ Wilted leaves
❌ Sunscald
❌ Broken stems
❌ Slow growth
❌ Transplant shock
❌ Dead plants and personal regret
Even if they survive, stressed seedlings usually take longer to recover.
A few extra days of preparation saves weeks of setback.
My Easy 7-Day Hardening Off Seedlings Schedule
Here’s the simple routine I use every spring.
Day 1
Place seedlings outdoors in full shade for 1–2 hours.
Day 2
Shade again for 2–3 hours.
Day 3
Morning sun for 1 hour, then shade.
Day 4
Morning sun for 2–3 hours.
Day 5
Half-day outdoors with gentle sunlight.
Day 6
Most of the day outside. Bring in if nights are cold.
Day 7
Outside full day. Ready for transplanting soon.
Want this as a printable you can keep by your plants?
Important Tips for Hardening Off Seedlings
1. Start with Calm Weather
Avoid windy days, storms, or sudden cold snaps if possible.
2. Water Before Exposure
Dry seedlings stress faster in sun and wind.
3. Watch Closely
If leaves bleach, curl, or collapse, reduce exposure and slow down.
4. Bring Them In If Needed
Especially for tomatoes, peppers, basil, and other warm-weather crops.
5. Rotate Trays
Helps prevent leaning and uneven growth.
Best Seedlings to Harden Off Carefully
Some plants are tougher than others.
Give extra care to:
🍅 Tomatoes
🌶️ Peppers
🍆 Eggplant
🌿 Basil
🥒 Cucumbers
🌼 Zinnias
🌸 Petunias
Cool-weather crops like kale, broccoli, cabbage, and lettuce often adjust faster.
My Biggest Hardening Off Seedlings Mistake
I once skipped the process entirely because I was “busy.”
By the next day:
Tomato stems flopped sideways
Pepper leaves looked scorched
Basil acted personally betrayed
Lesson learned.
Now I never rush this step.
Want My Free Printable Hardening Off Seedlings Checklist?
I made a simple printable guide you can keep by the door or greenhouse so you know exactly what to do each day.
✅ 7-day schedule
✅ Common mistakes to avoid
✅ What to do during cold nights
✅ Best timing tips for transplant success
Grab the free hardening-off guide to make spring planting easier.
👉 Get My Free Hardening Off Seedlings Guide
Final Thoughts
Gardening teaches patience in funny ways.
Sometimes success doesn’t come from doing more—it comes from slowing down and letting plants adjust.
Hardening off seedlings is one of those quiet little steps that makes a huge difference.
Take a week now, and your garden will thank you all season long.
🌿