🪴 How to Prune a Tomato (Step-by-Step with Real-Life Photo Guide)
🗒️Rooted Field Note: 27
🧑🌾 The Honest Truth About Tomato Pruning
I didn’t always prune my tomatoes. For a long time, I just let them sprawl. But once I saw what sucker propagation and single-stem pruning could do? Everything changed.
Now? I get cleaner plants, fewer diseases, and an entire second round of tomato plants from what most folks toss in the compost.
So if you’re wondering how to prune a tomato or looking for a real step-by-step photo guide on how to prune tomato plants, you’re about to see exactly what I do—dirt, roots, and all.
I didn’t create this guide because I planned everything perfectly. Truth is, I started pruning late — June 16 to be exact — way past the “ideal” time most gardeners talk about. But I wanted to show what’s still possible, even if you’re behind or working with what you’ve got. These photos and this process weren’t staged — they’re real-time, real-garden moments from my homestead. It’s proof that with a sharp snip and a little sand, you can turn tomato chaos into calm… and even multiply your harvest along the way.
✂️ Why I Prune My Tomato Plants
- Less leaf mess = more airflow
- Energy goes into fruit, not jungle vines
- Cutting off low leaves helps prevent blight
- Suckers? I root ‘em. Free plants.
🔍 Step-by-Step: How I Prune Tomatoes (with Photos)
✅ Step 1: Find the Main Stem
This is your plant’s backbone. You’re training it to go up, not sideways. That’s the one we stake and protect.
✅ KEEP: This is your main stem
-
The stem marked with the green check is your main leader — the vine you’ll be training upward.
-
This is the one you’ll support with a stake, cage, or string.
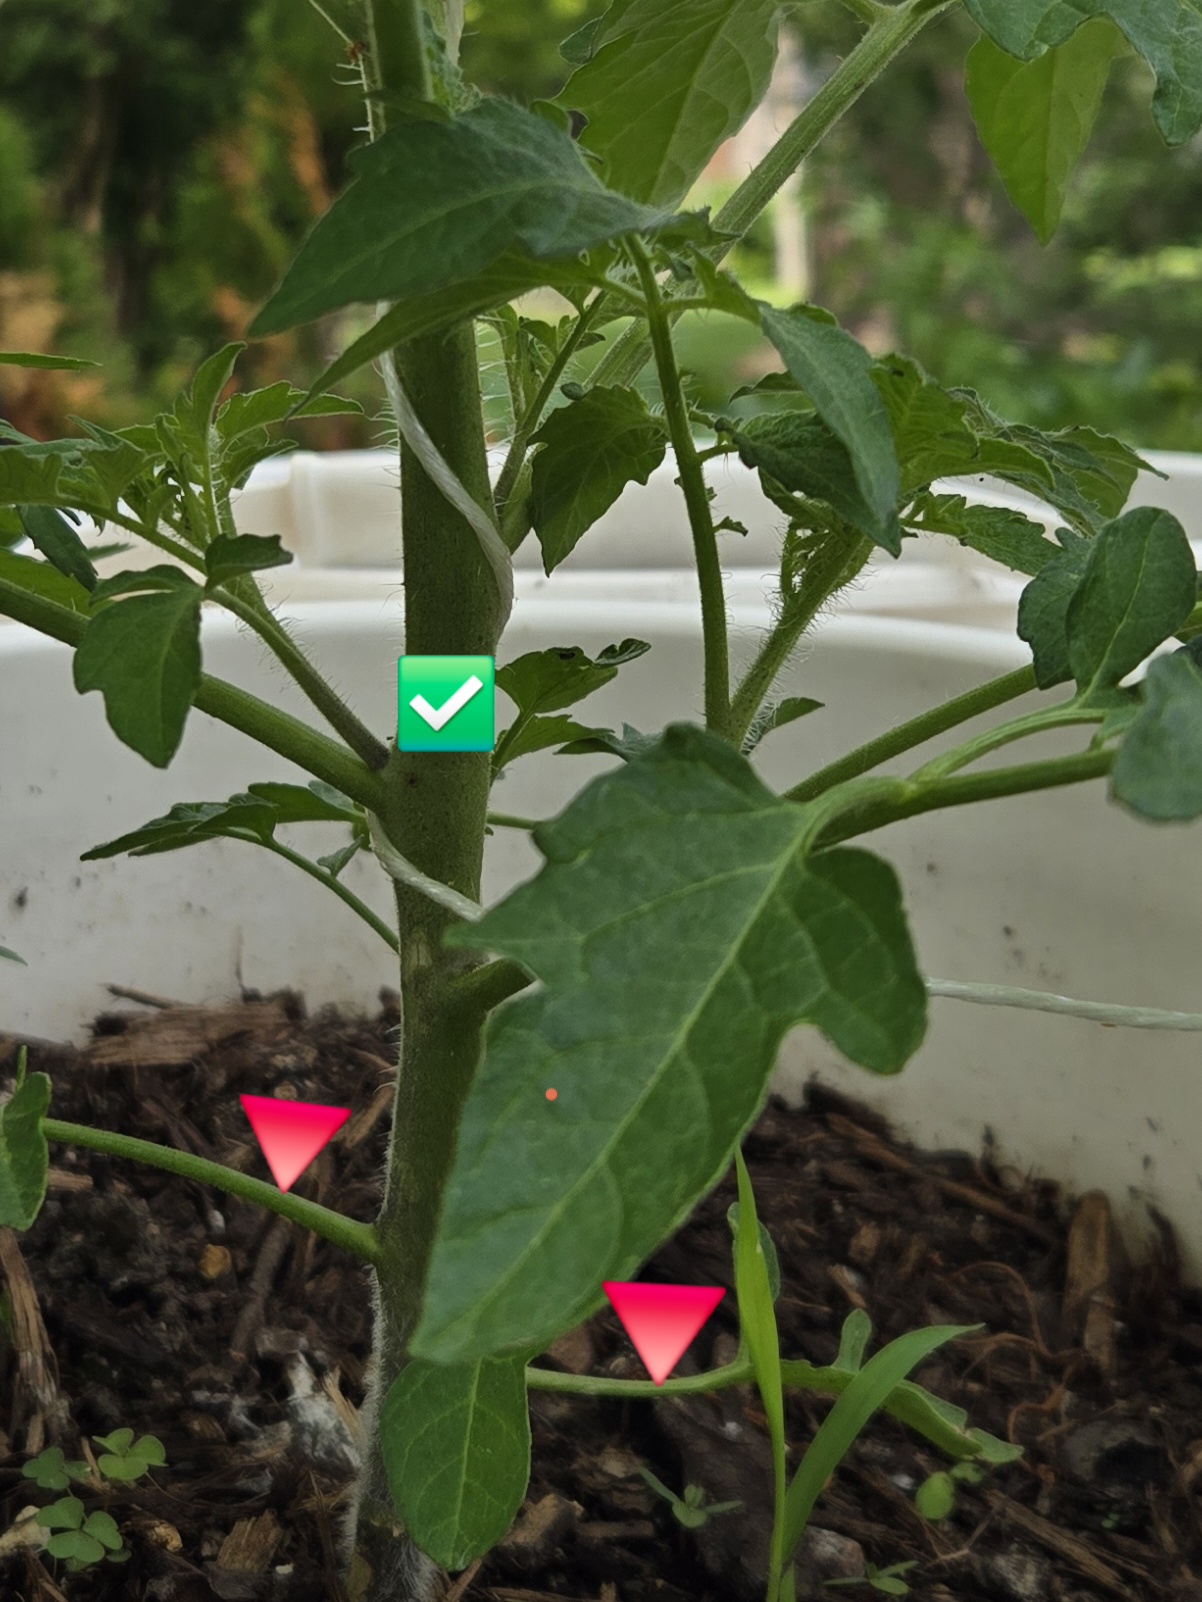
This is the central leader — the one we support and train. All pruning decisions start here.
🔻 REMOVE: Lower Leaves
-
The red triangle markers point to lower leaves that are close to or touching the soil.
-
These should be pruned off to:
-
Prevent soil-borne diseases (like early blight or fungal infections)
-
Improve airflow around the base
-
Focus the plant’s energy upward toward fruiting
-
✂️ Use clean pruners or gently pinch them off. You can prune them now if the plant is well-established and healthy.
✨ Additional Tip:
-
After removing those lower leaves, consider adding a layer of straw mulch around the base to prevent soil from splashing up during watering.
❌ Step 2: Remove Suckers
Suckers pop out of the V between the main stem and a branch. Tiny ones? Pinch. Big ones? Snip and root.
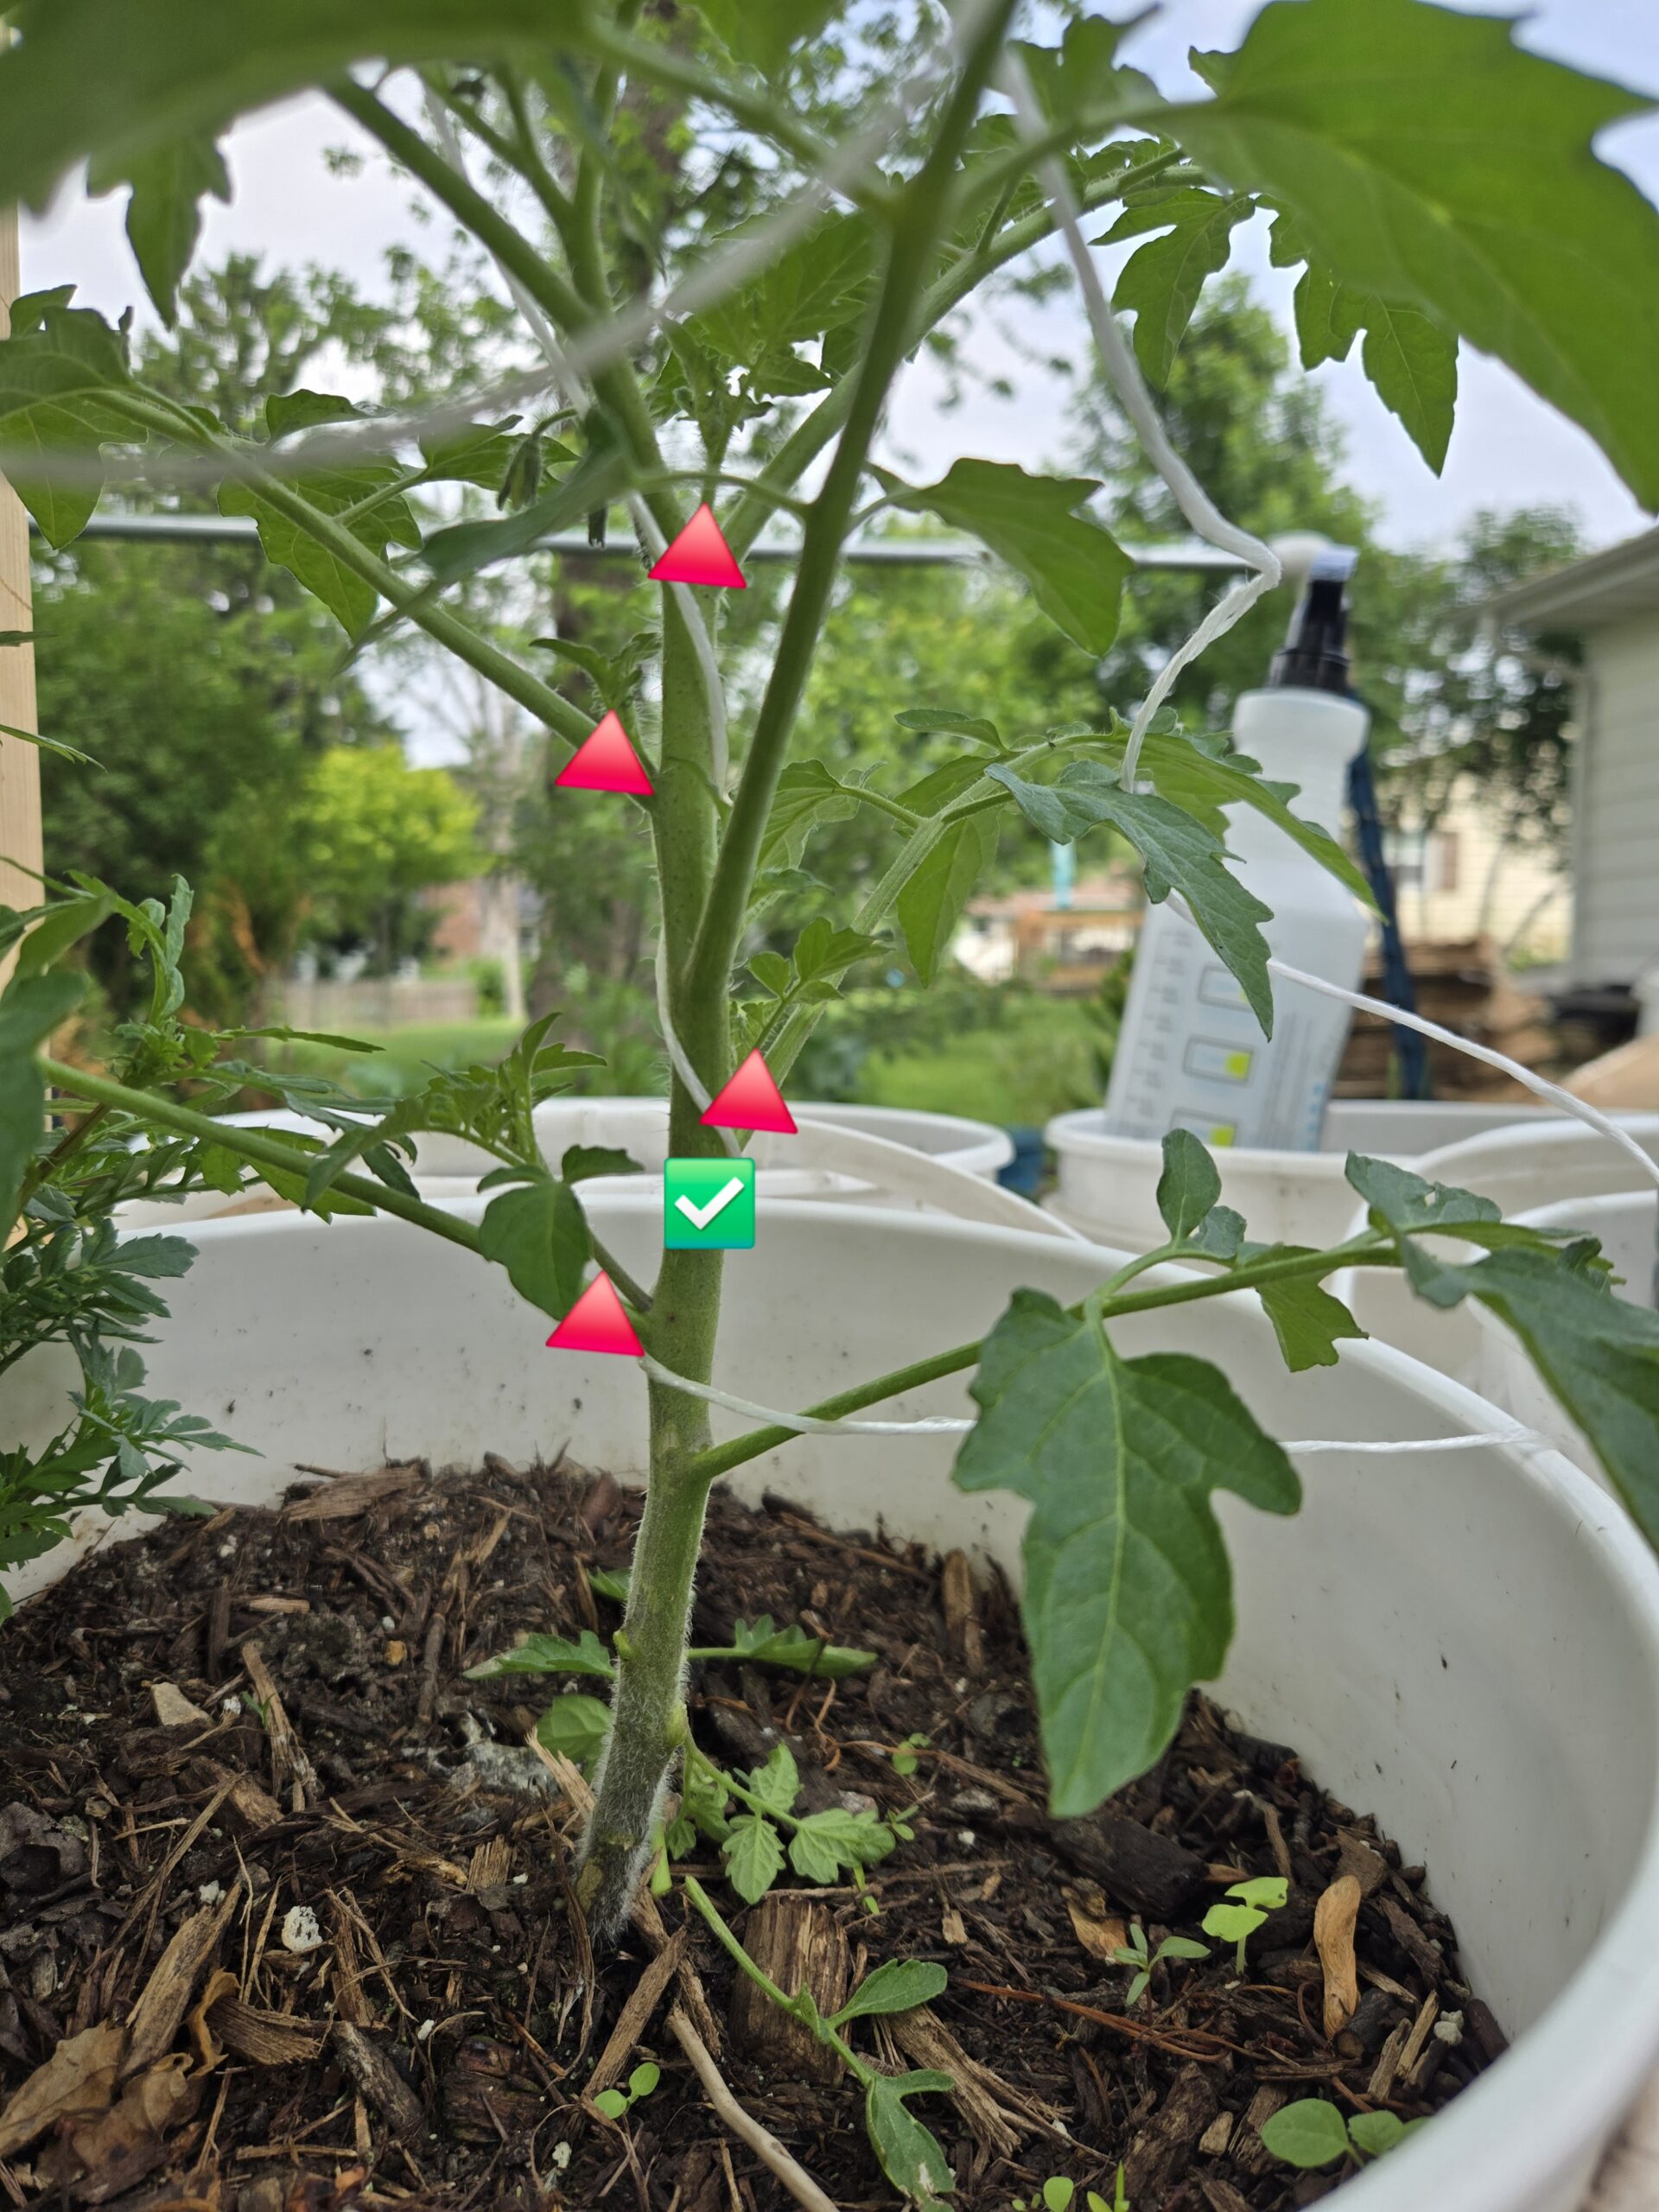
Suckers grow in the “V” between a leaf and the main stem — and they’re the key to keeping your tomato plant under control (or multiplying it!).
✅ KEEP: Central Main Stem
🔻 REMOVE: Bottom Leaves & Suckers
Each red triangle 🔻 points to something that should be removed:
-
Suckers (mid-point V’s):
-
A couple red triangles point to small shoots growing in the “armpits” (leaf crotches) between the main stem and a leaf stem.
-
These will grow into full branches and compete for nutrients unless you’re doing a multi-stem method.
-
For single-stem pruning, these should be pinched or snipped off.
-
✨ Optional Tip:
-
Now that the lower section is cleared, add a thick mulch layer (like straw or wood chips) to further protect from disease and maintain soil moisture.
-
Tie the main stem gently to the string or stake to guide its upward growth.
🌱 From Trash to Tomato: How I Root Suckers
🛠 Step 3: Quick Dip in Water
Freshly Snipped Sucker
-
This is a healthy sucker taken from the plant — perfect for propagation.
-
You can turn it into a whole new plant.
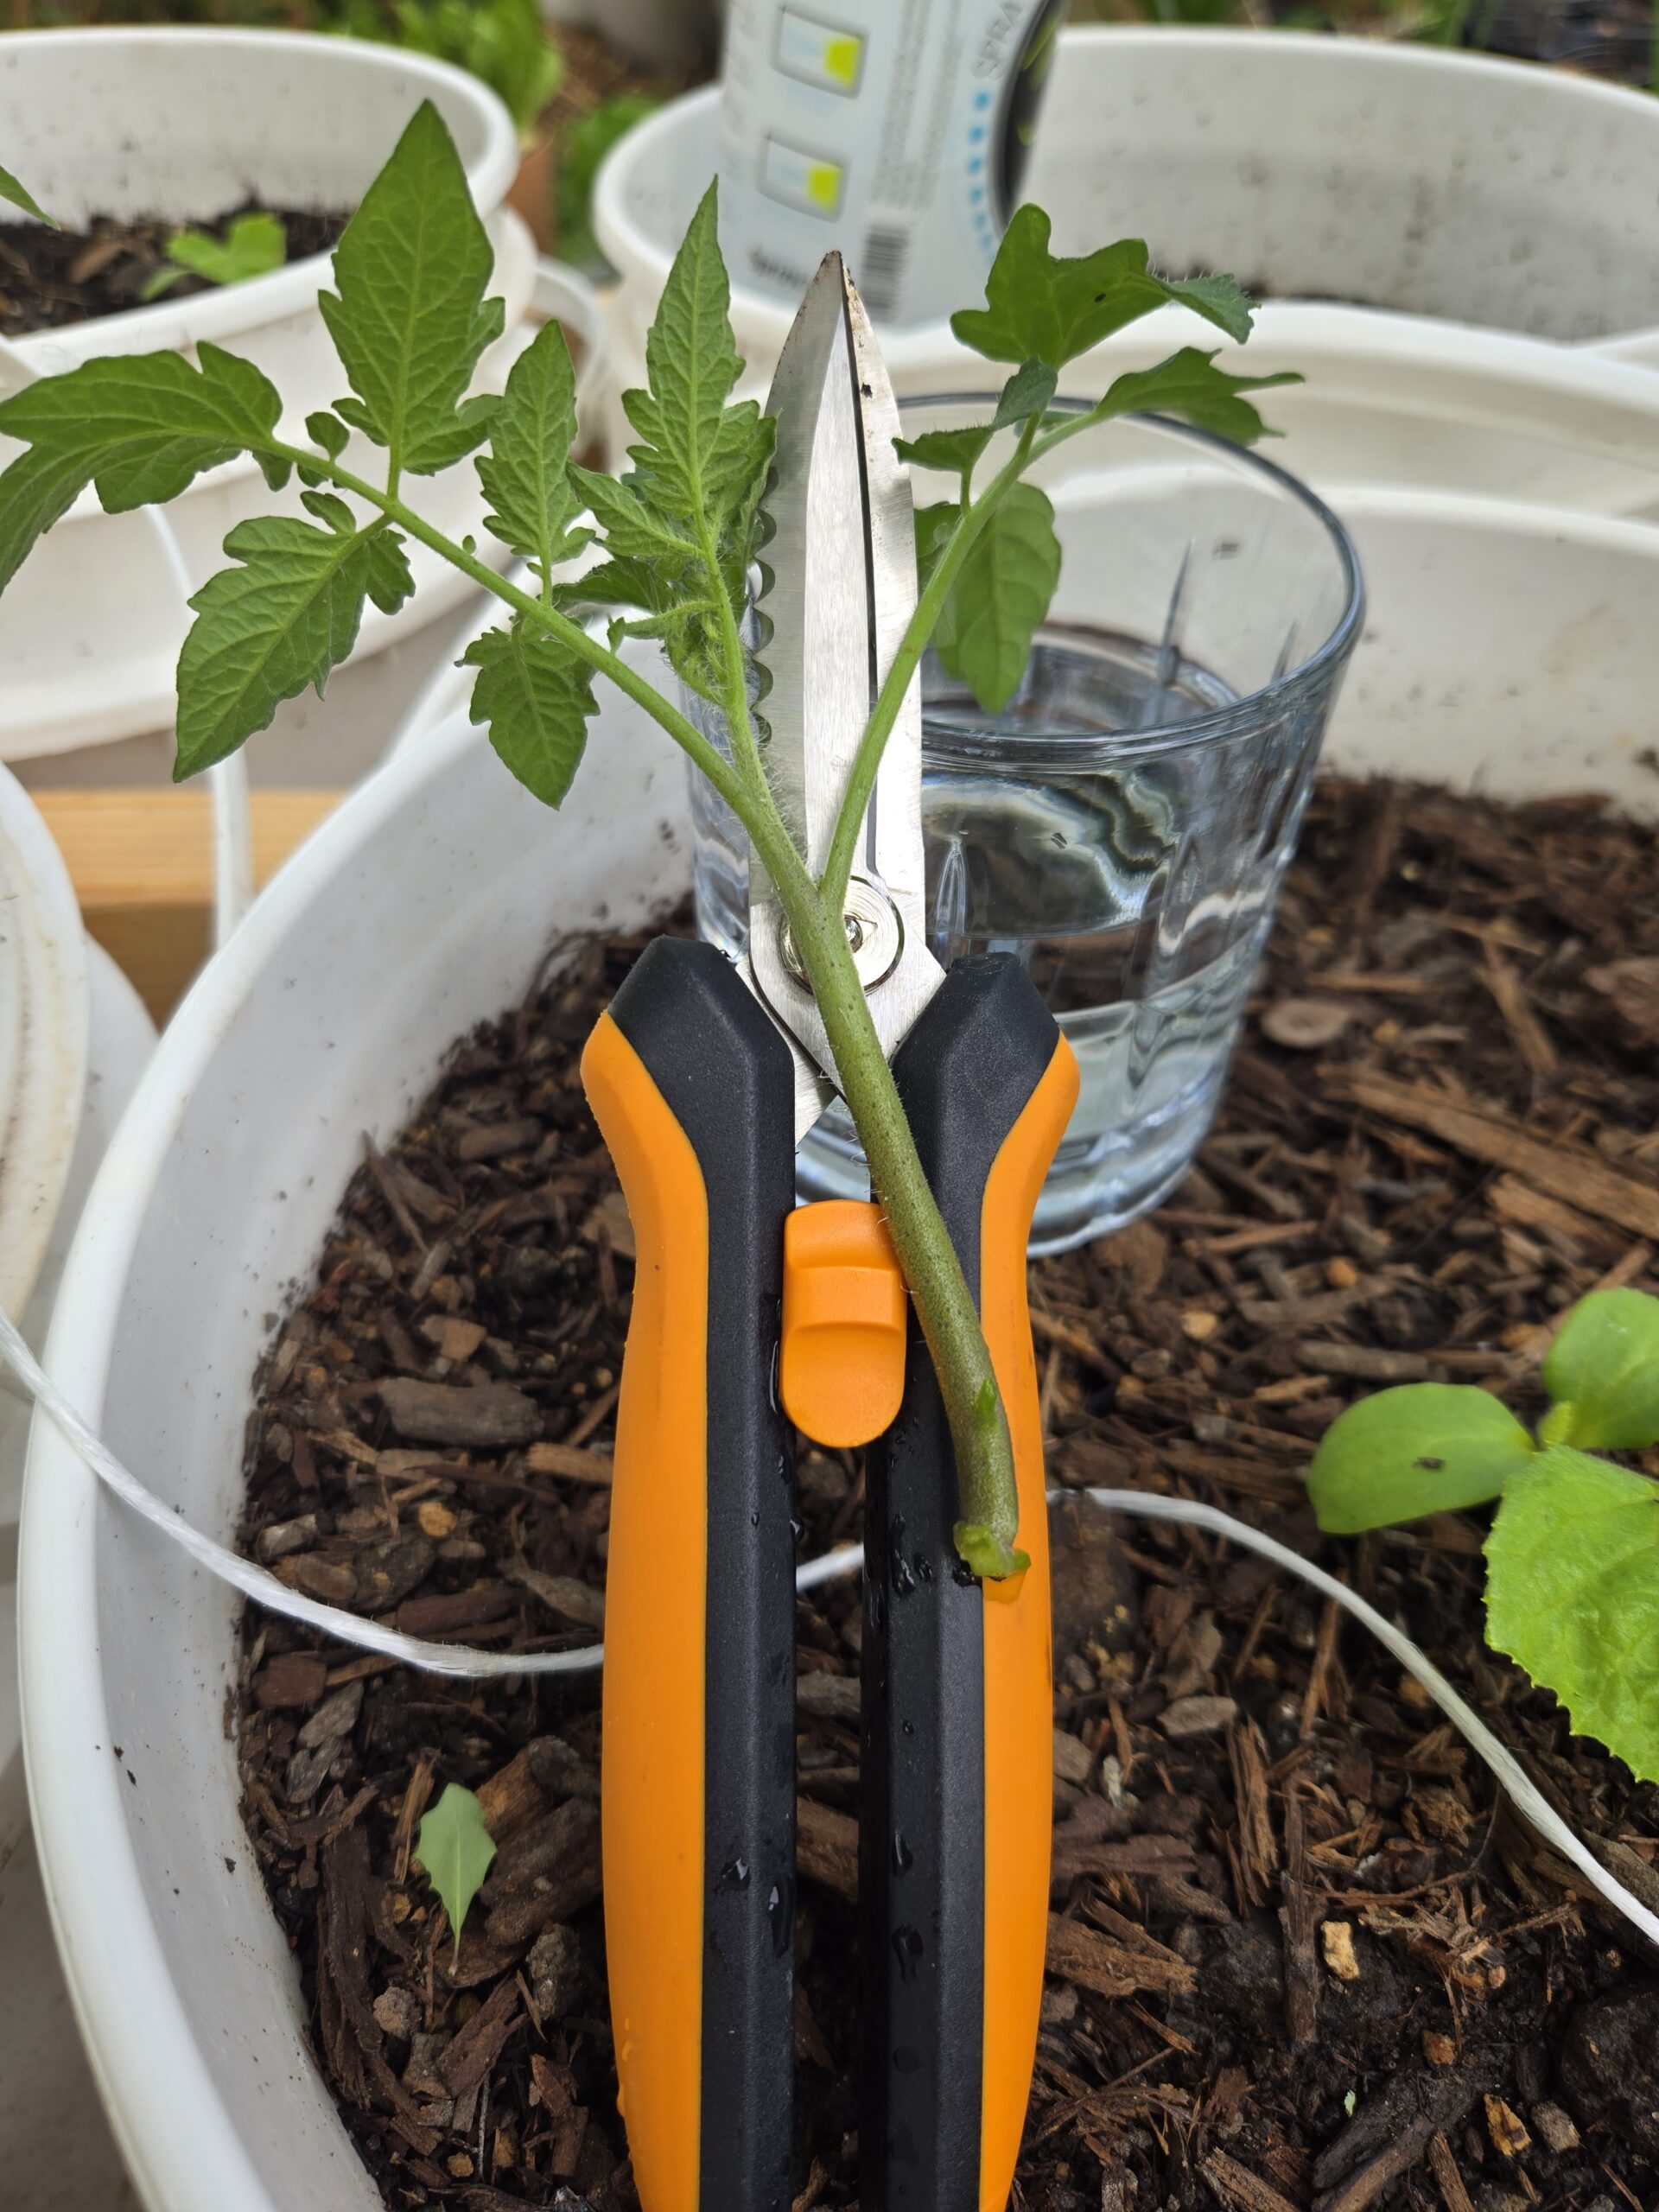
Keep them hydrated until you plant in sand
🌿 Step 4: Stick ‘Em in Sand
I use plain sand in a tray. No hormone powder. No drama. Just moisture and shade.
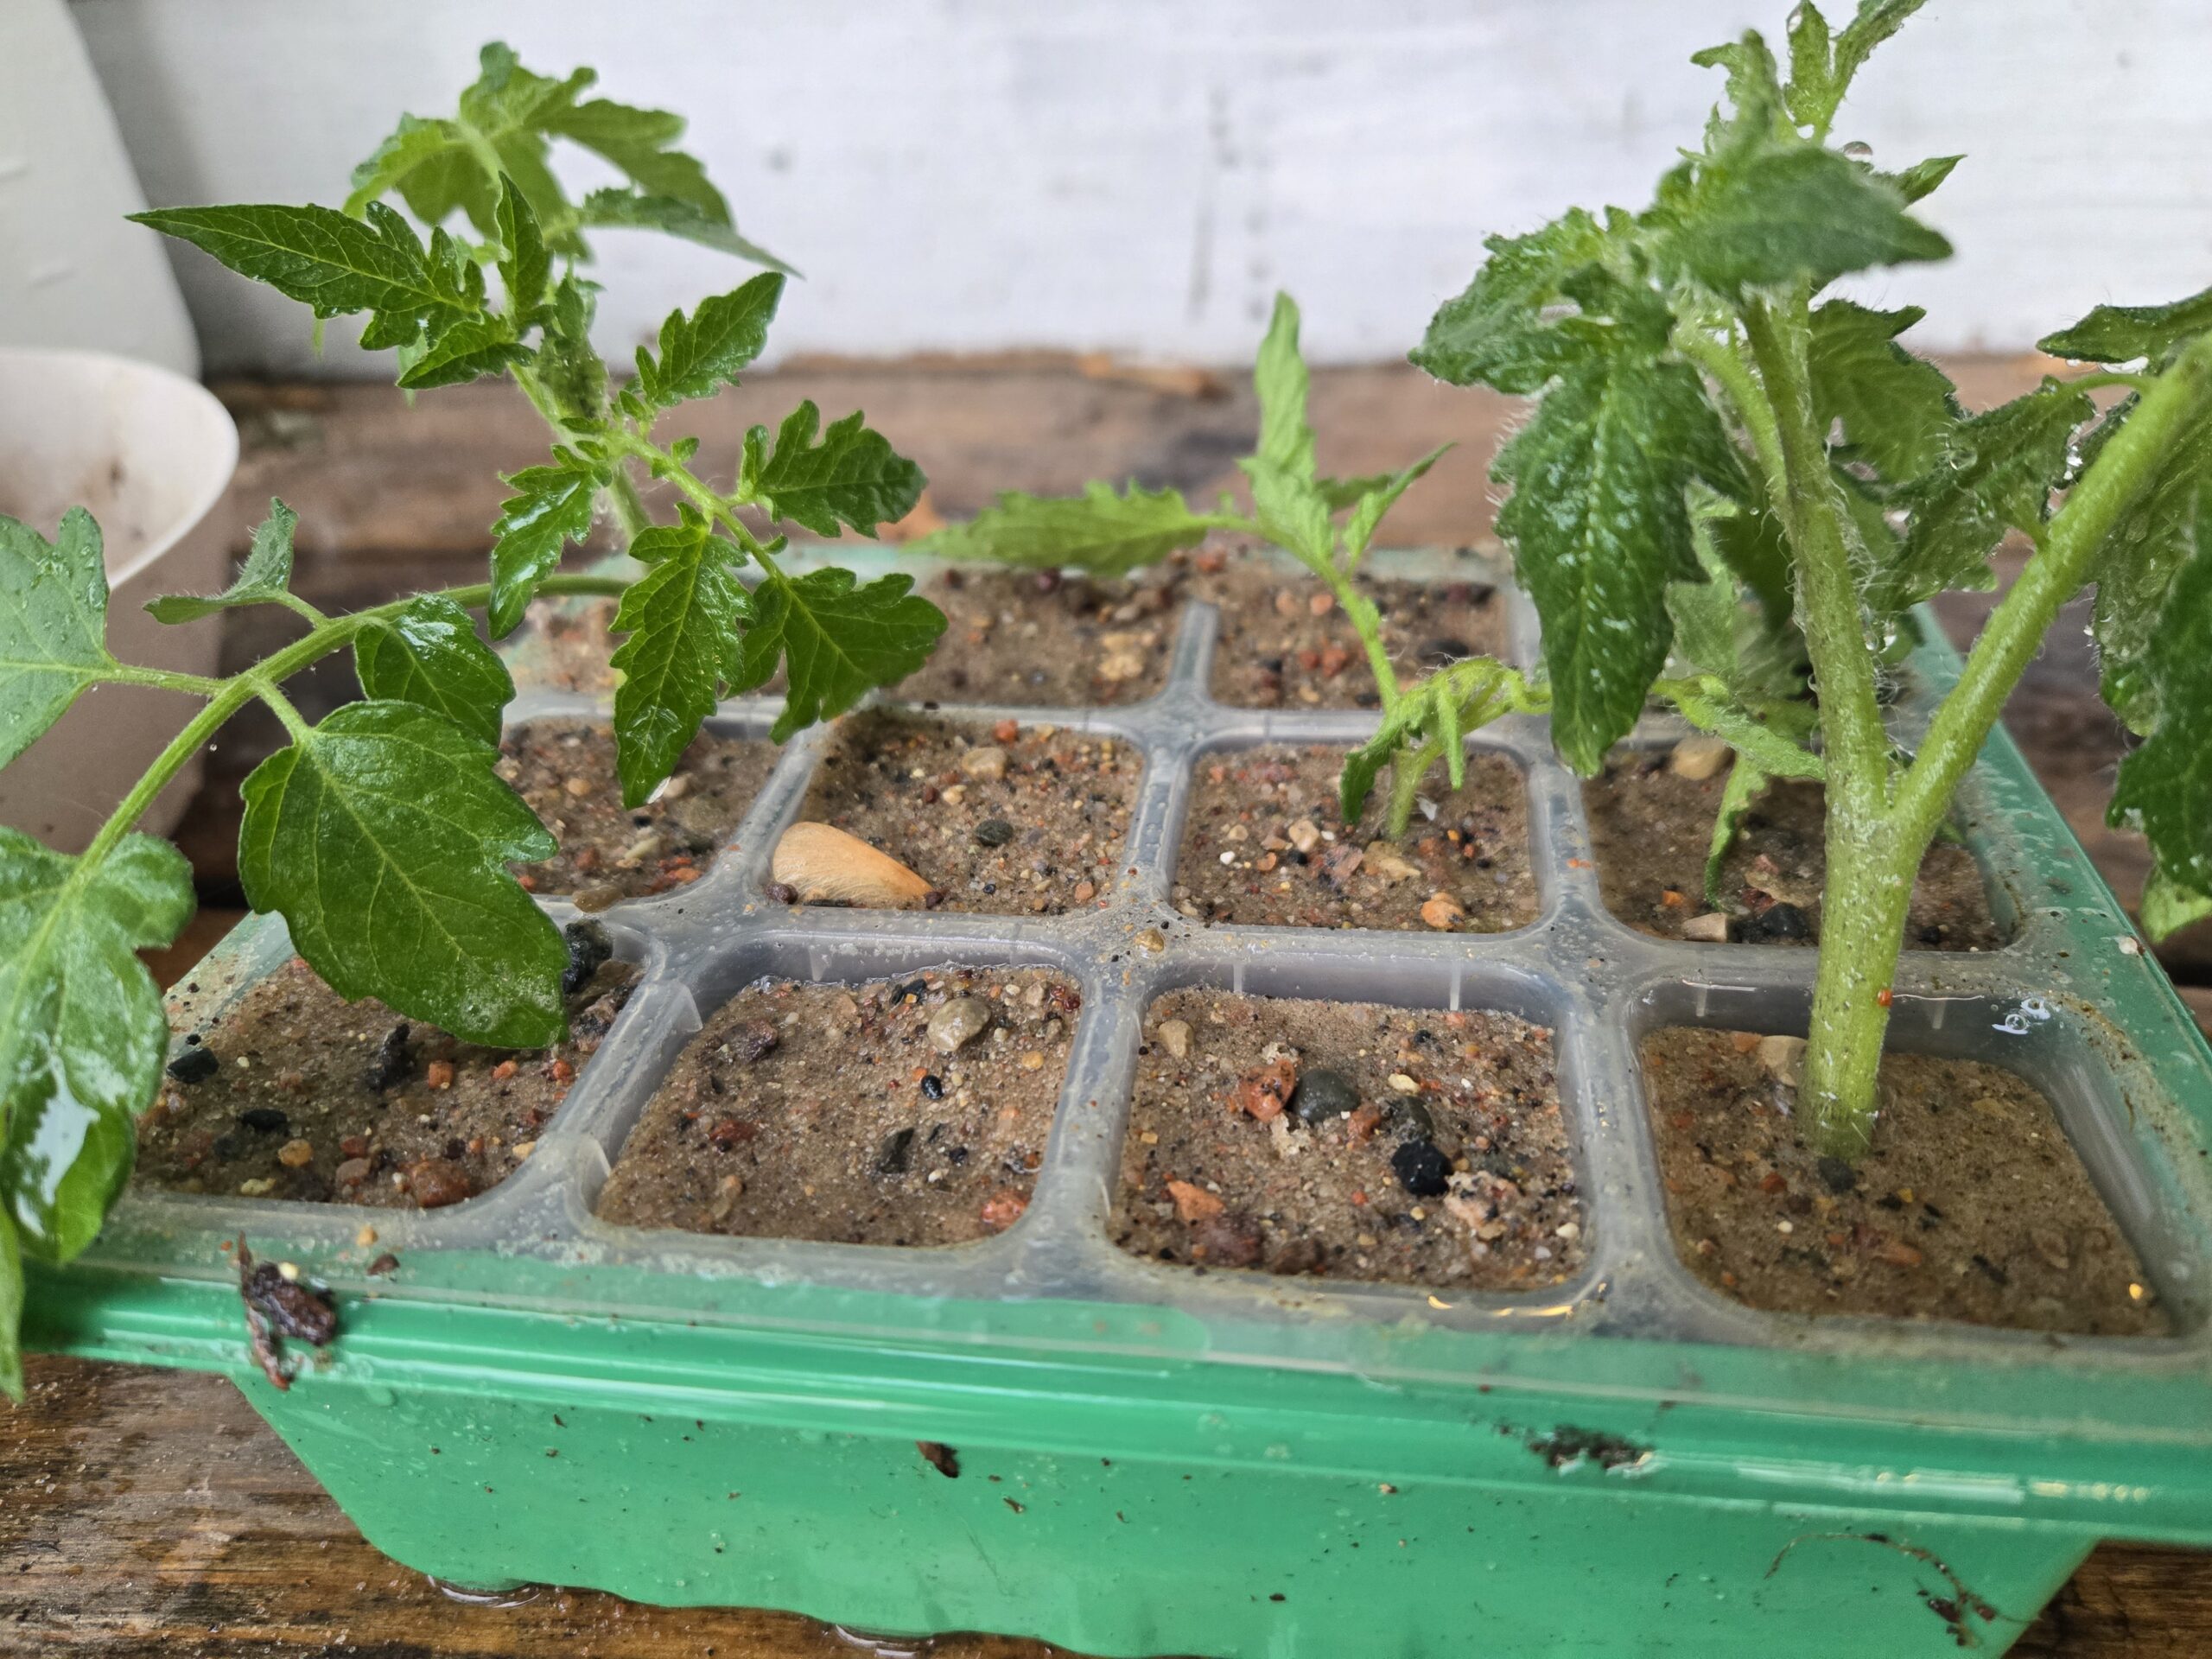
Simple propagation method, no hormone needed.
After snipping and briefly holding your sucker in water:
-
- Plant it directly into moist sand, as shown here.
- Press the sand around the stem to give support.
- Set your container somewhere shaded or lightly filtered — direct sun too early can wilt your cutting.
- Water gently to keep the sand moist but not soaked.
- Within 1–2 weeks, check for resistance when you gently tug — a sign roots are forming.
🌿 Bonus: Using sand instead of potting mix reduces rot and speeds up root development.
📦 Step 5: Transplant Time
Once roots show? I pull ‘em gently and plant them deep. This time, I used a bed I hadn’t touched in years — the soil was compacted and full of weeds. I grabbed my Radius garden fork and worked through it to loosen things up without flipping it over completely. No digging. Just lift and wiggle
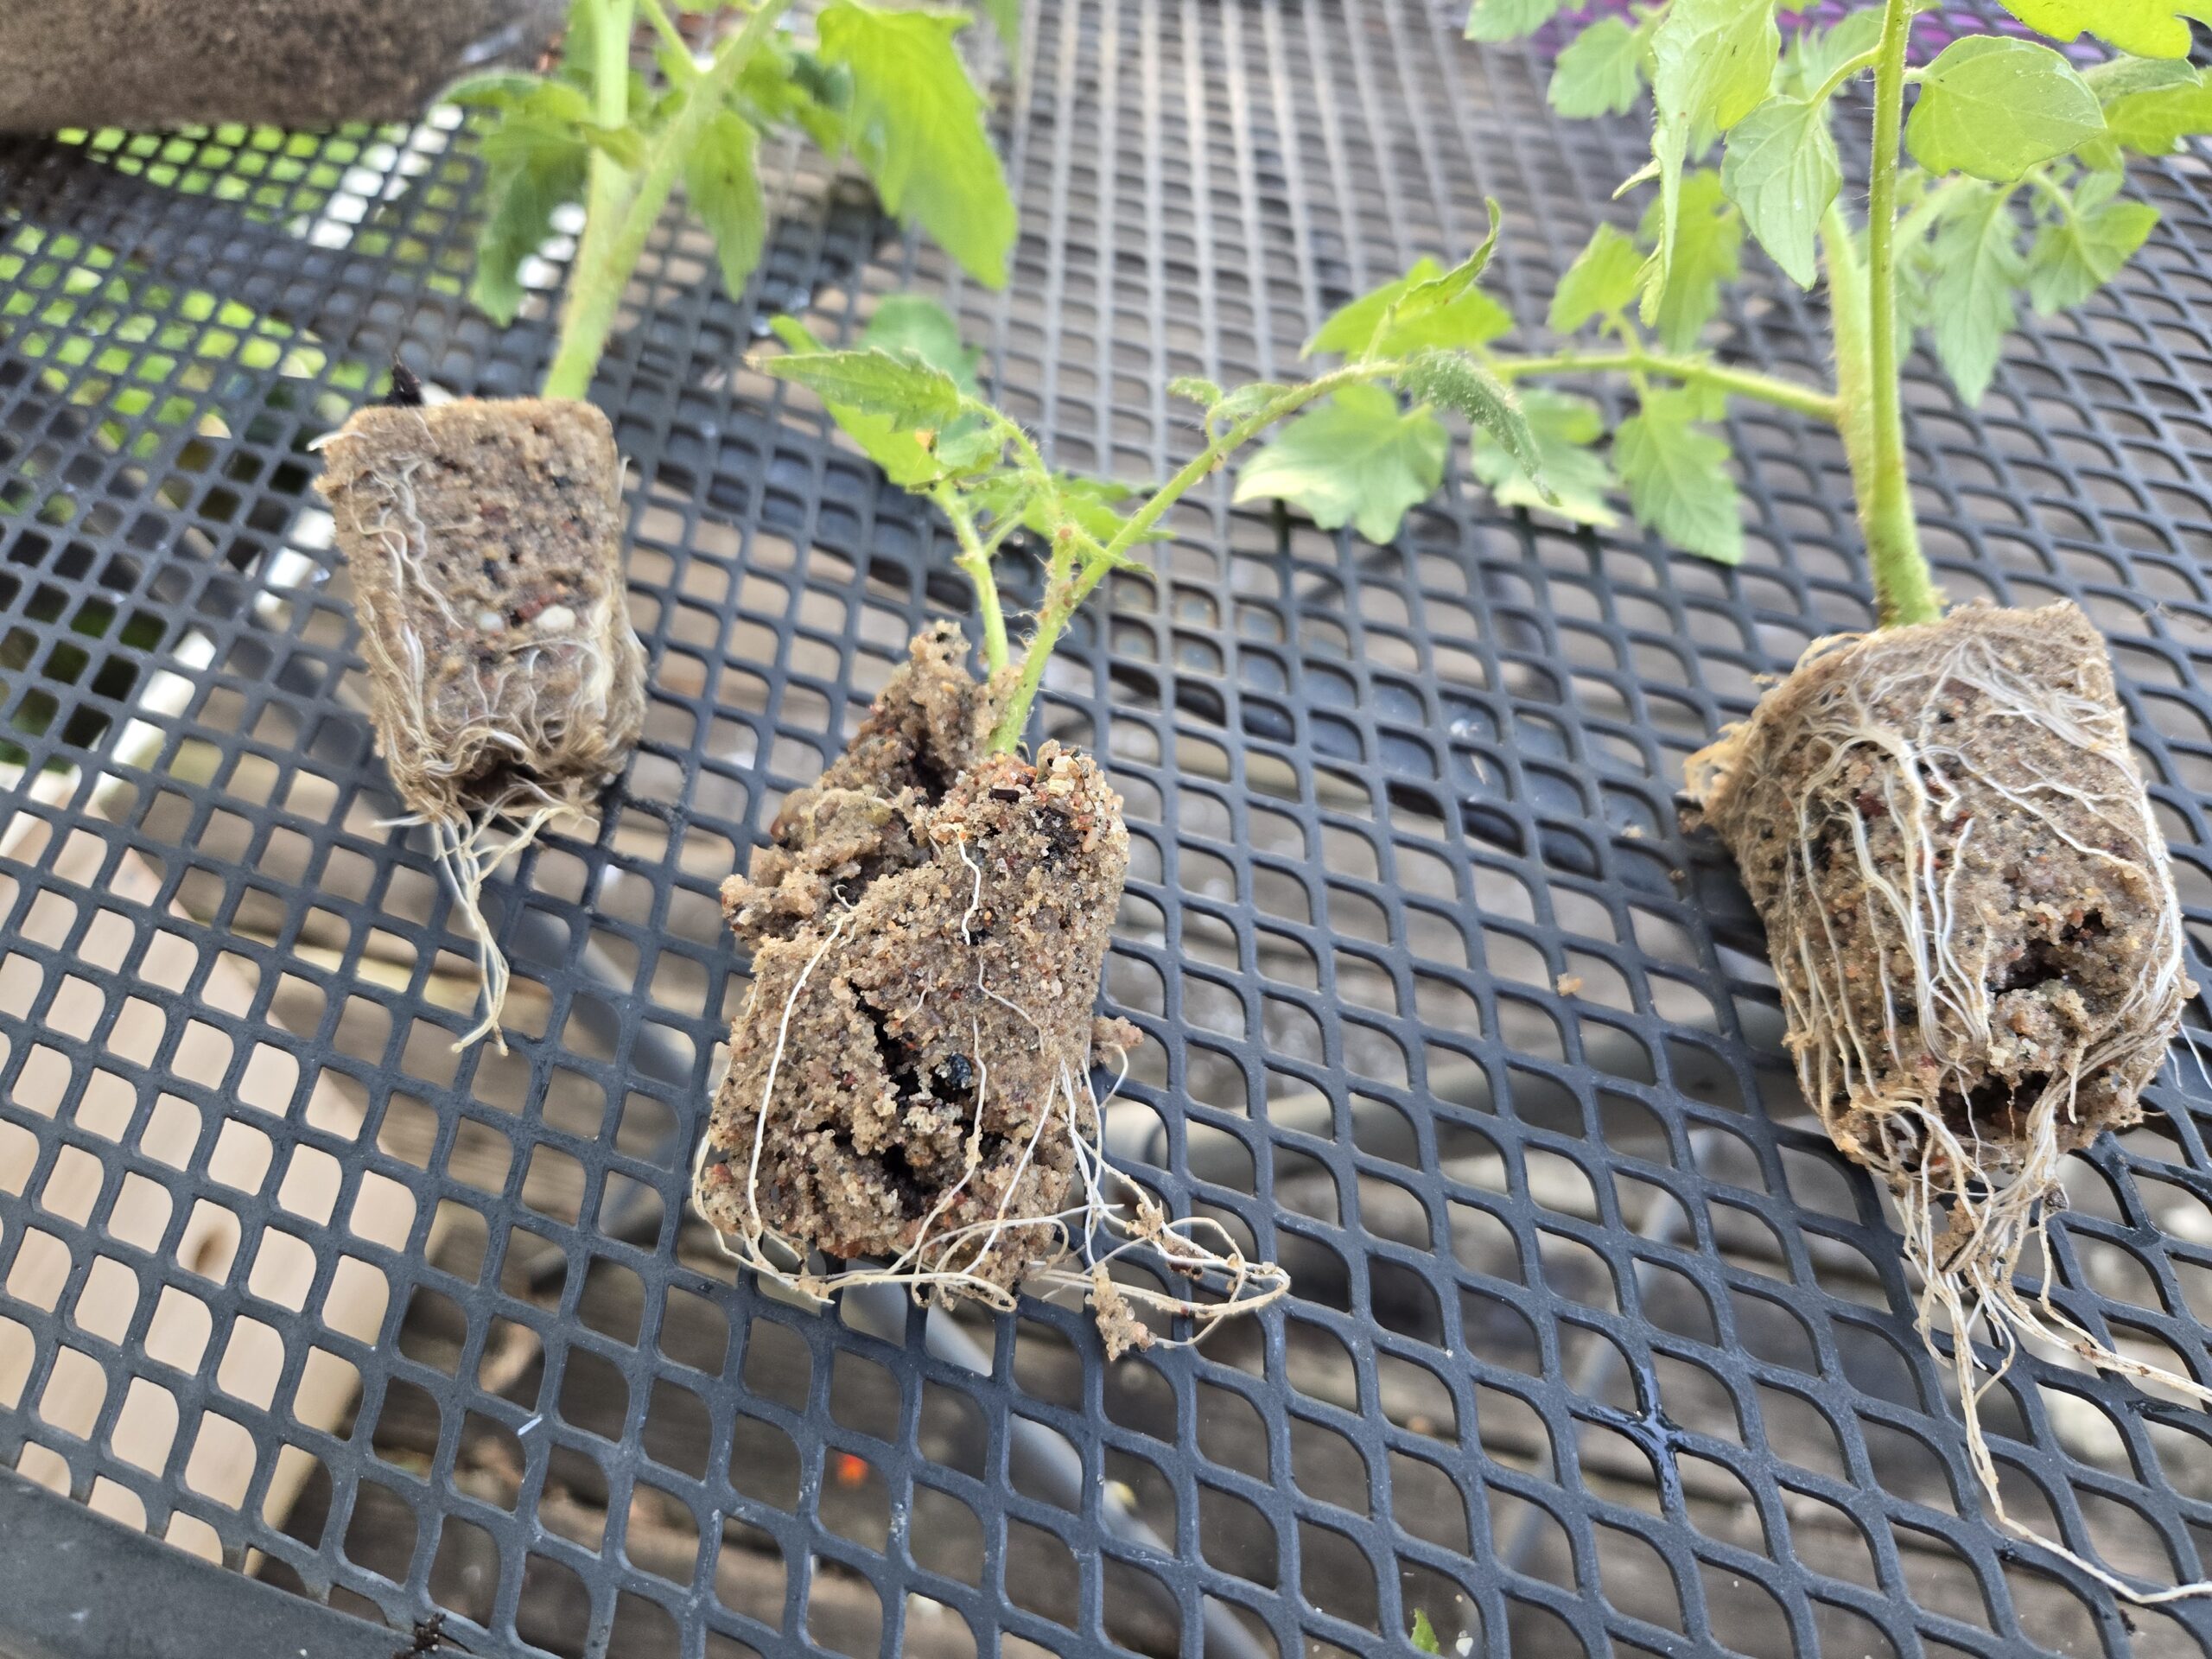
These tomato suckers rooted cleanly in moist sand — no soil, no hormones — and are now ready for transplanting. You can see the strong white roots forming around the base.
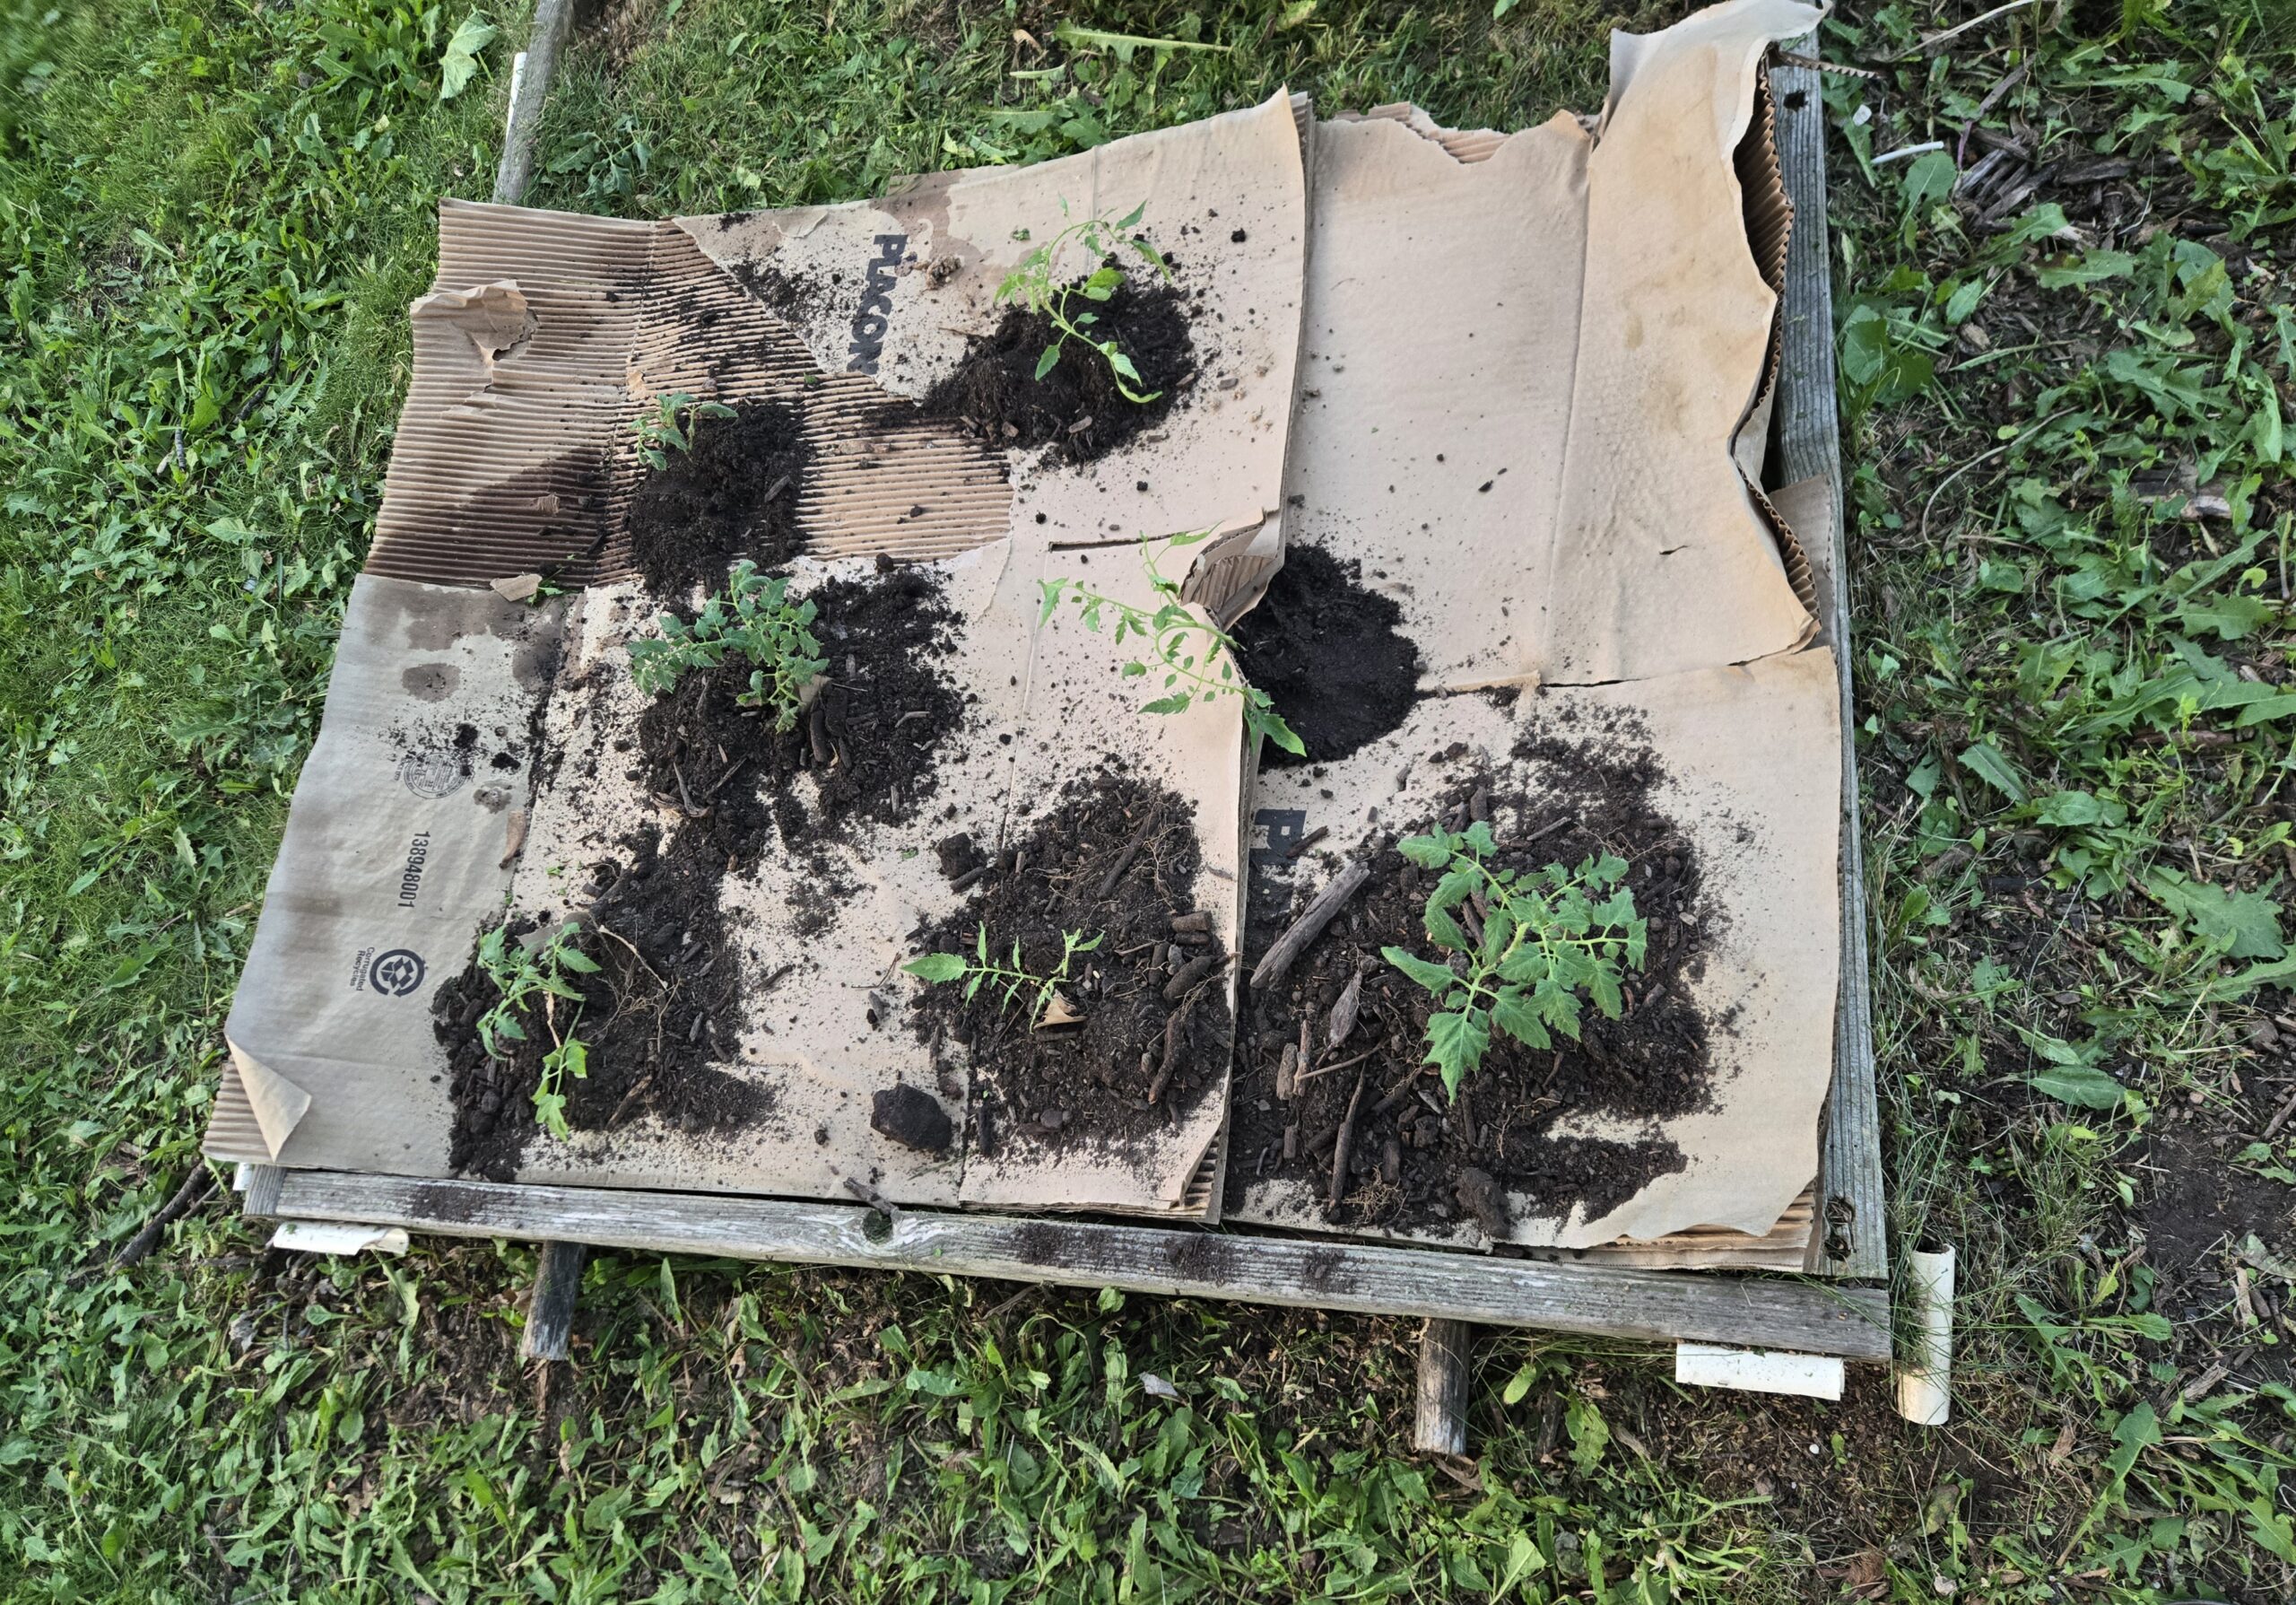
A no-dig bed makes it easy to tuck them right in.
After laying the cardboard down, I followed up with a thick layer of bark mulch. It holds moisture and keeps the weeds down while those new roots settle in.
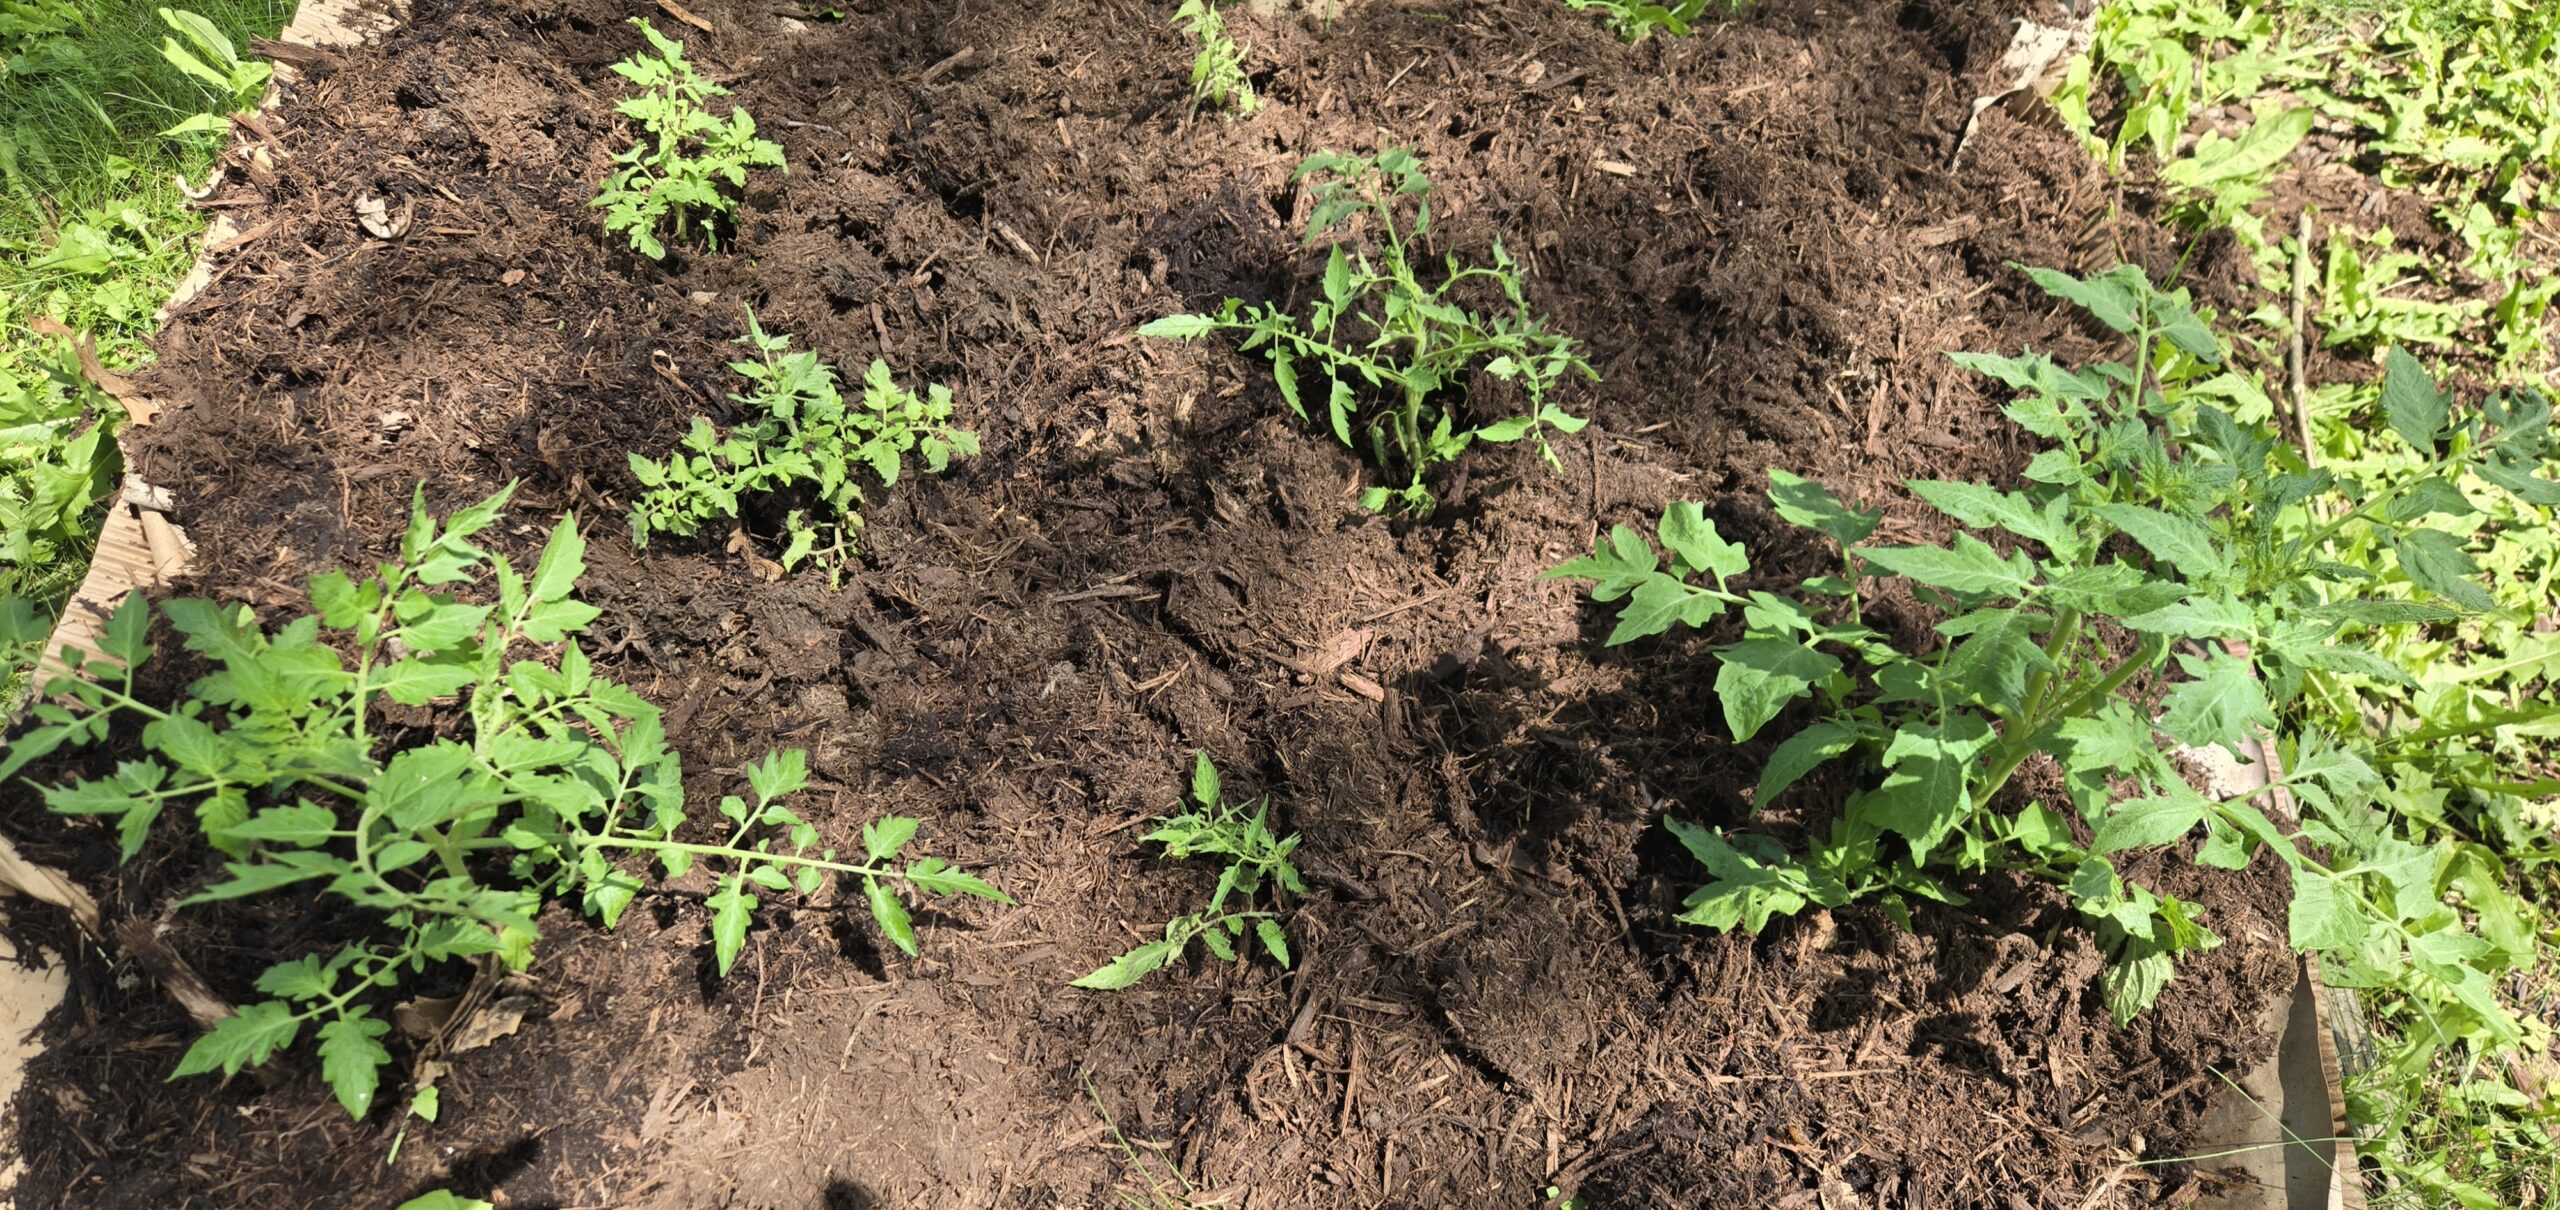
After loosening the soil, I laid down cardboard and covered it with bark mulch to suppress weeds and lock in moisture.
⚒️ Stuff I Actually Use:
-
-
- Radius Garden Fork — aerates soil without disturbing life
- Sharp garden snips — clean cuts without squishing stems
- Basic trays for sand rooting
-
🍅 Final Update: Sept 22
These were suckers. Planted in a no-dig bed. Not watered. Barely touched.
Now they’re fruiting. I honestly forgot about them. Nature didn’t.
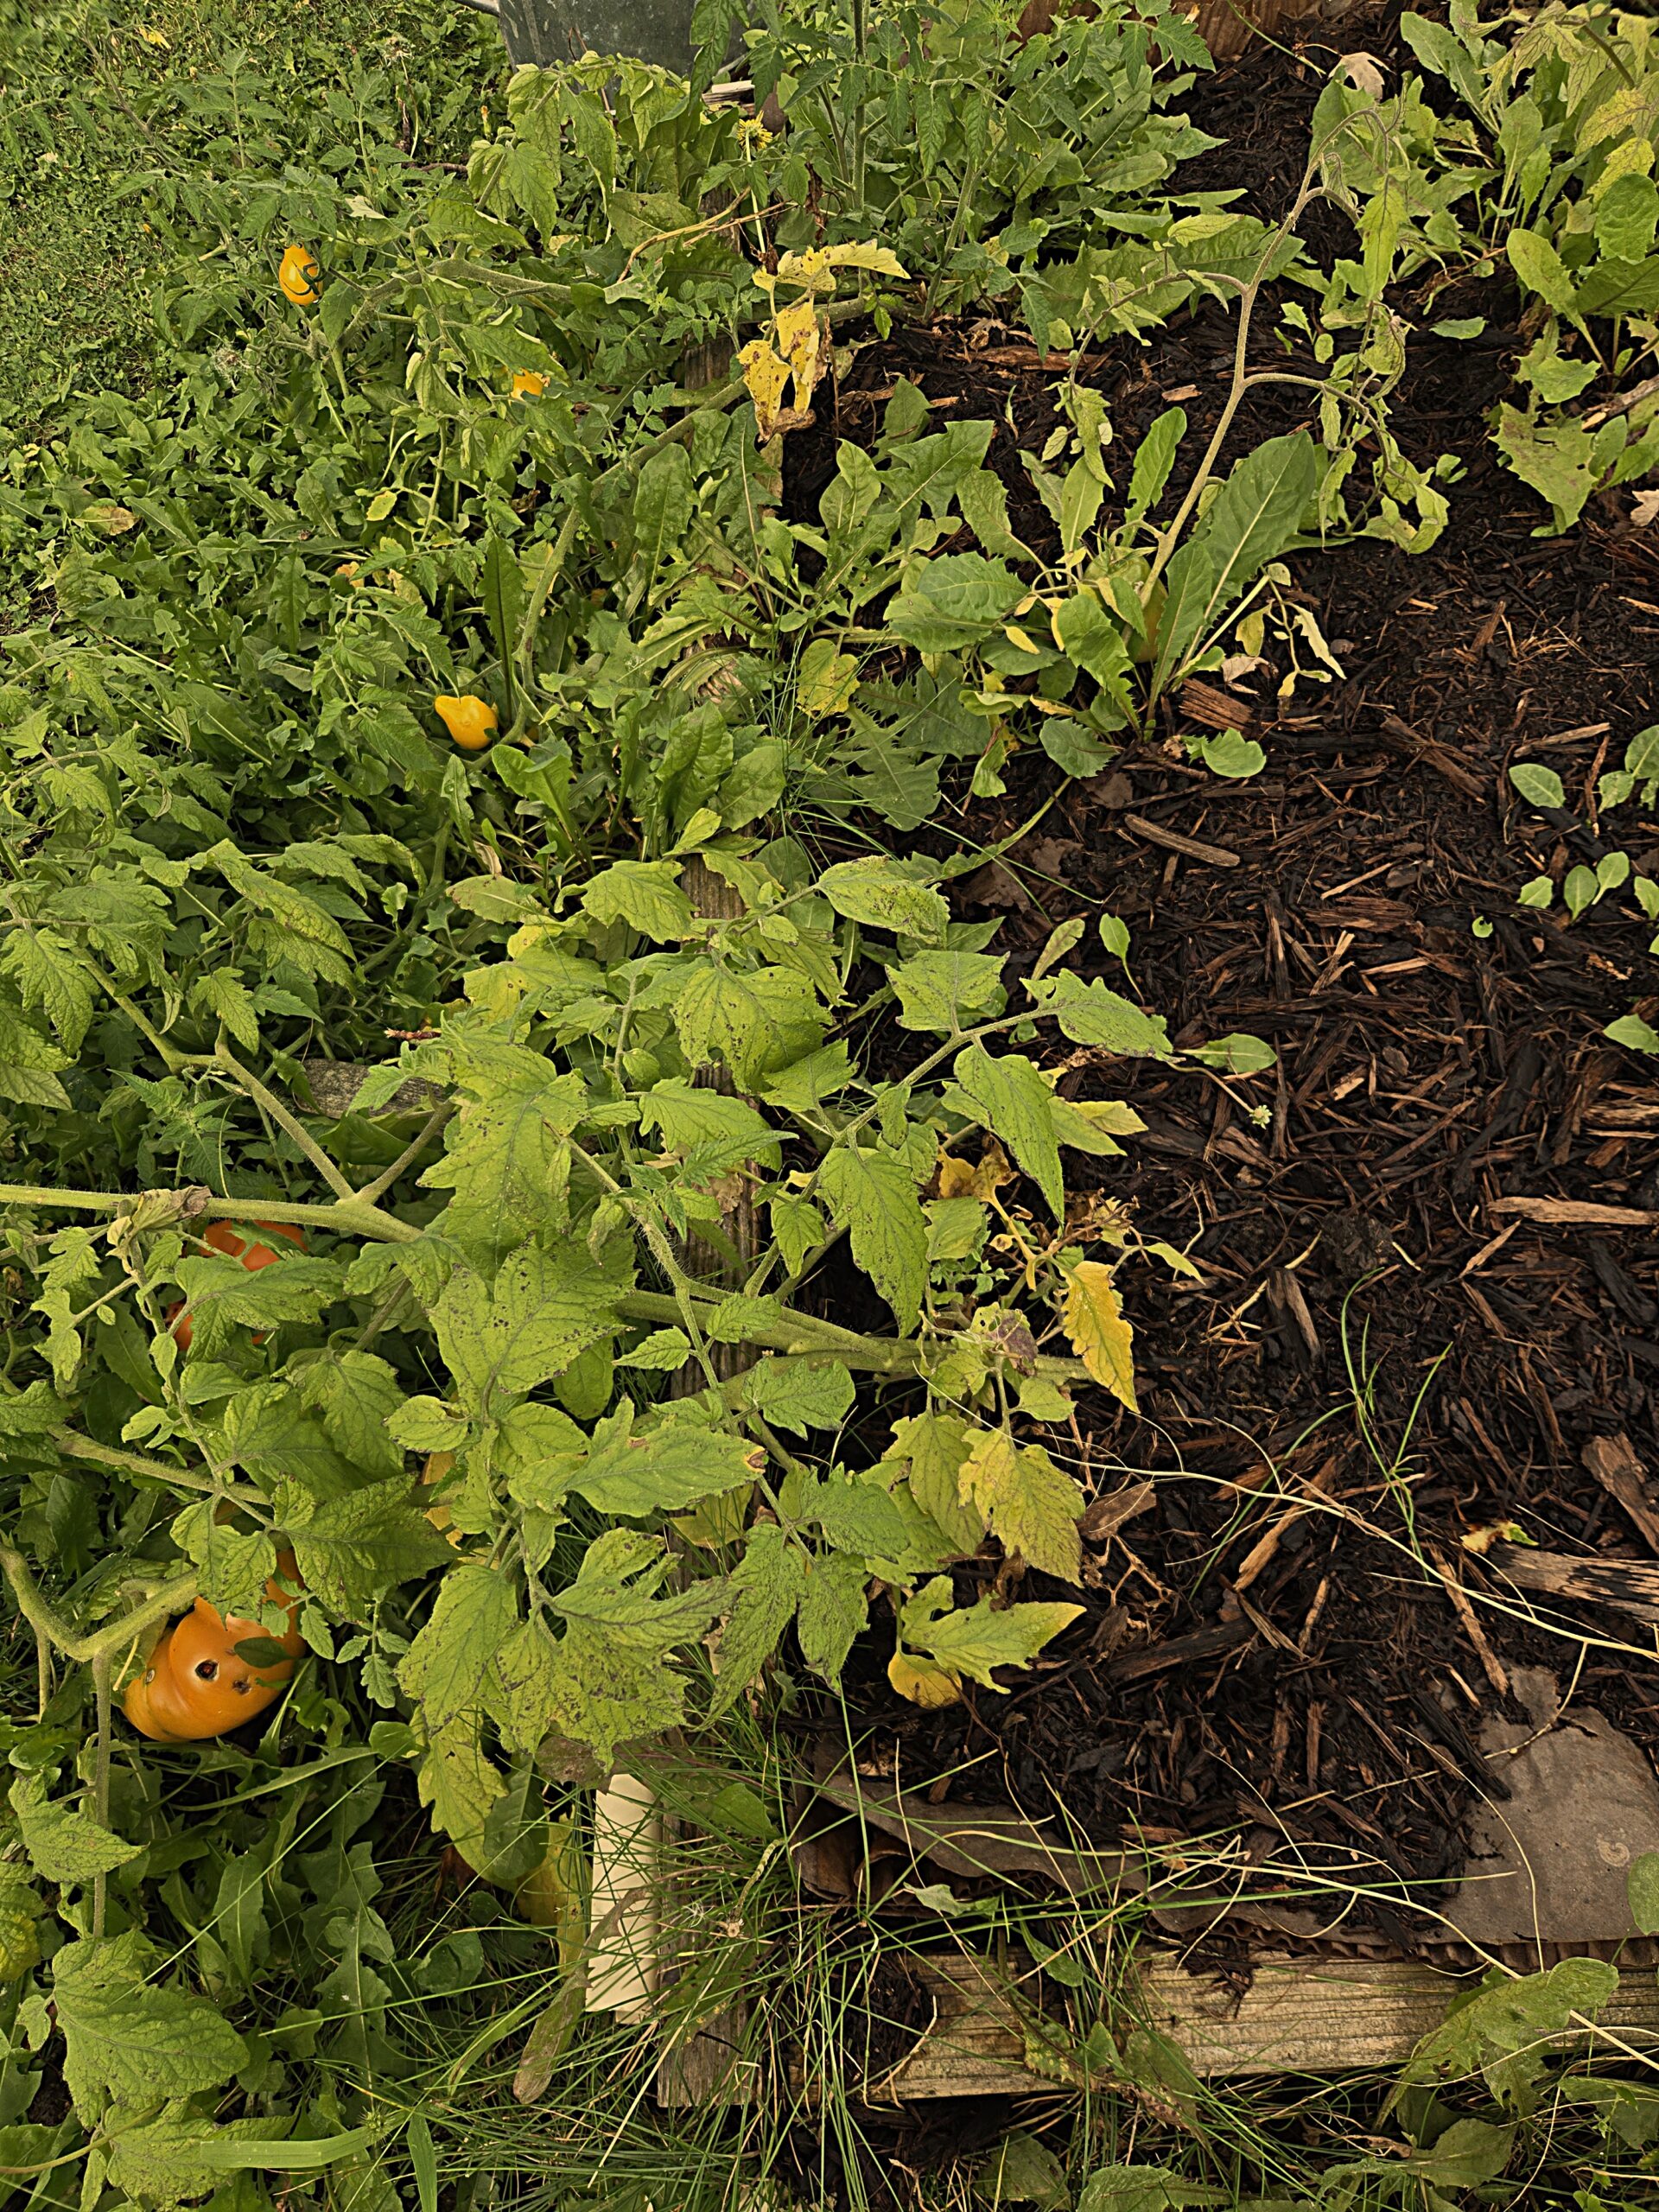
They weren’t babied. But they grew.
“They weren’t babied. But they rooted deep and did what tomatoes do — they grew.”
⚡ The Recap:
-
-
- Snip the suckers
- Root ‘em in sand
- Plant ‘em deep
- Let ‘em grow wild
-
It’s free propagation. It works. And it still feels like a little tomato miracle machine every time.
🌿 Come share your sucker stories
The Rooted are waiting. Let’s talk tomatoes, compost wins, and garden fails in the forum:
👉Enter the Sprouting Homestead Forum »