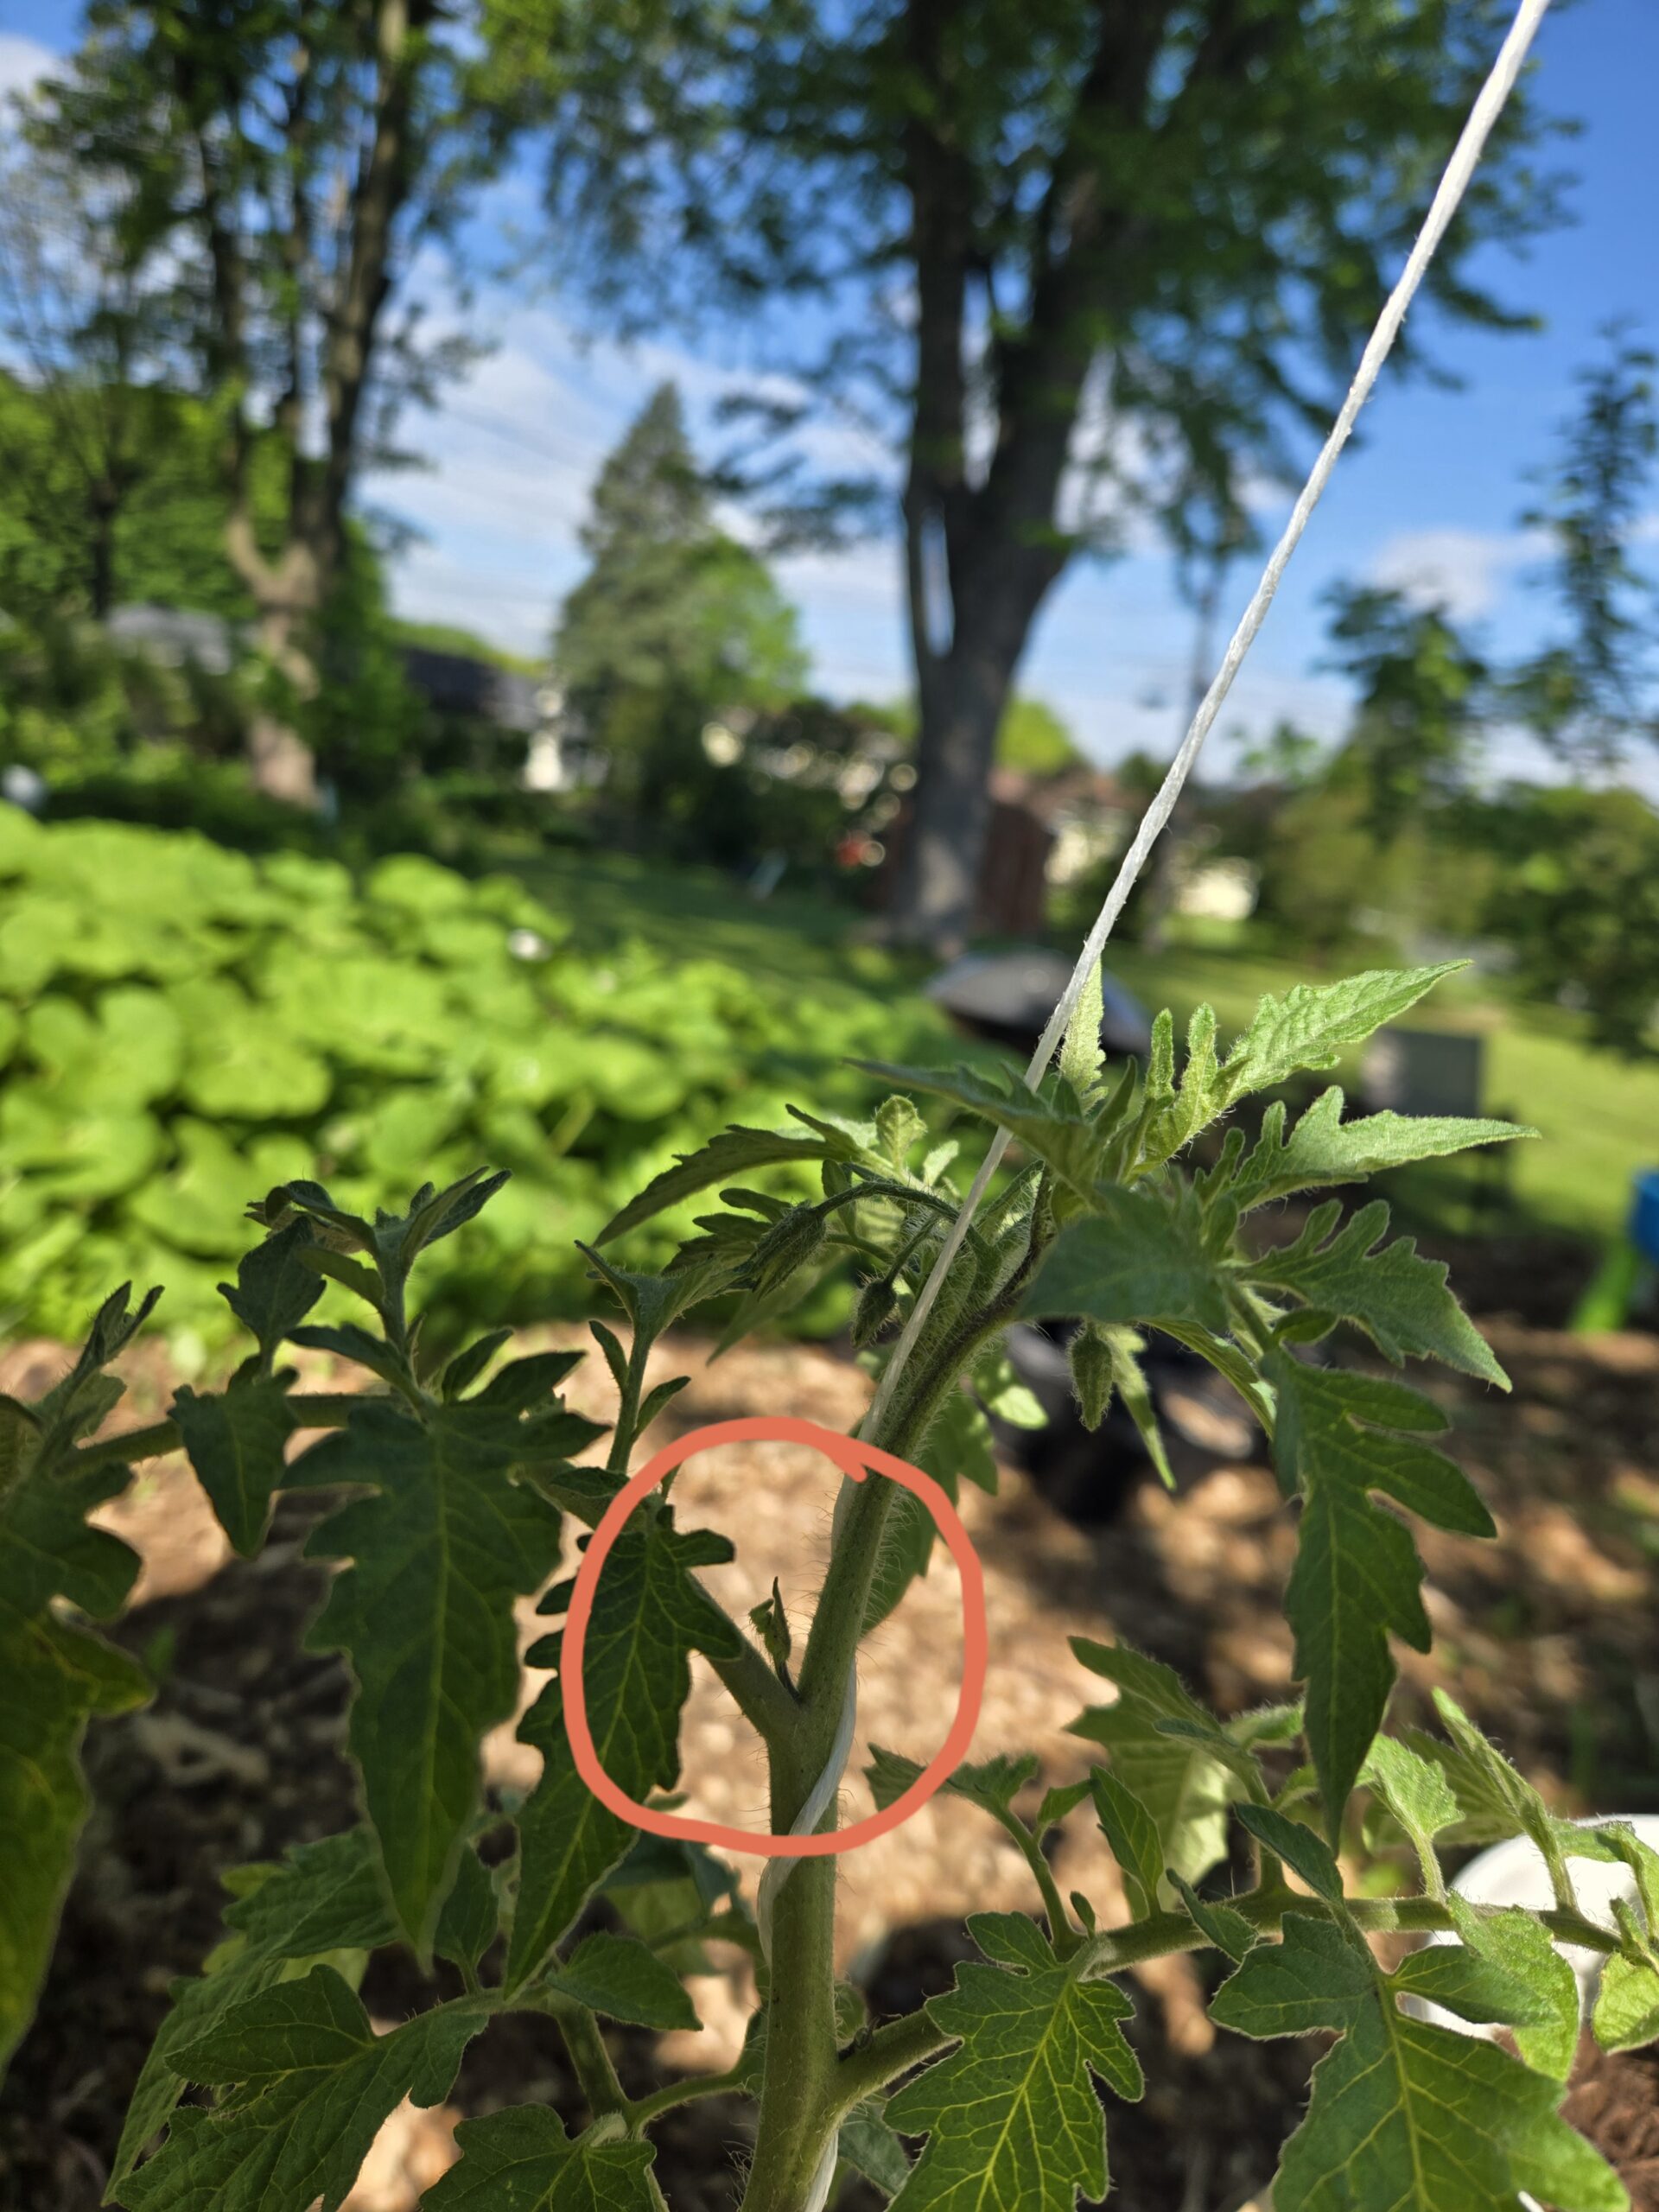
This photo highlights the correct spot to cut a tomato sucker for propagation. The red circle marks the sucker emerging between the main stem and a branch. Use clean shears and remove lower leaves to prepare for rooting.
🌱 Unlock Endless Tomato Plants: How to Clone Tomatoes from Suckers! 🍅
📋Rooted Field Note: 04
Ever wish you could multiply your favorite tomato plants without spending a penny? Well, friend, that’s exactly why I’m here today—to share an incredibly useful gardening trick: propagating tomatoes from suckers! This method is not only cost-effective but also simple enough for even beginner gardeners. The best part? You’ll create healthy clones of your beloved plants quickly and efficiently.
What Are Tomato Suckers? 🤔
Tomato suckers are small shoots that grow in the angle between the stem and branches of your tomato plant. Typically, gardeners remove these to boost the plant’s fruit production, as leaving too many suckers can divert energy away from growing larger fruits. However, these seemingly unwanted shoots are perfect for creating entirely new tomato plants, offering you a straightforward way to increase your harvest without extra cost.
Why Propagate from Suckers? 🌟
- Free Tomato Plants: Propagating from suckers allows you to multiply your plants without purchasing seeds or new seedlings.
- Genetically Identical Clones: If you have a tomato variety you love, sucker propagation ensures the new plants will produce the same tasty tomatoes.
- Rapid Growth: Tomato cuttings root quickly, often producing new roots in just 7-14 days.
- Extended Harvest: Rooted suckers can be transplanted later in the season, offering continuous fruit production into late summer or fall.
Ready to get started? Here’s exactly how to do it step by step.
Step-by-Step Guide to Cloning Tomatoes from Suckers 🌿✂️
Step 1: Select the Right Sucker
Look for a healthy sucker about 4-6 inches in length without any blossoms or tiny fruits. Early morning is the best time for cutting because the plant is hydrated and less stressed, increasing your chances of success.
Step 2: Make a Clean Cut
To keep my plants healthy, I always begin by wiping my sharp shears with rubbing alcohol before making any cuts. Using rubbing alcohol will decrease the chances of diseases spreading between plants. When I’m ready to prune, I carefully trim the sucker close to the main stem, ensuring I don’t nick the surrounding plant tissue. Once the cut’s made, I pop the cutting straight into a jar of clean water or wrap it in a damp towel. This keeps it from drying out and gives it the best shot at rooting and thriving.
Step 3: Prepare Your Cutting
Remove all the lower leaves on the sucker, leaving only the top two or three small leaves. Removing leaves reduces water loss and helps the cutting concentrate on developing roots.
Step 4: Choose Your Rooting Method
Water Method:
- Place the cutting in a jar/container filled with room-temperature water, submerging the lower third of the stem.
- Keep the jar out of direct sunlight to avoid overheating or wilting.
- Change the water every 2-3 days to maintain oxygen levels and prevent rot.
- Expect roots to appear in about one week.
Soil Method:
- Fill a small pot or cup with moist, well-draining potting mix.
- Insert the sucker deep into the soil, burying the stem up to the remaining leaves.
- Keep the soil moist, but avoid waterlogging.
- Place in indirect sunlight, ensuring consistent humidity.
- Roots typically develop within two weeks.
Sand Method:
- Fill a small container with clean, coarse sand and moisten it thoroughly without making it soggy.
- Insert the prepared sucker deep into the sand, burying the stem to just below the remaining leaves.
- Maintain consistent moisture in the sand, and keep the container in indirect sunlight.
- Expect roots to develop within about 7-14 days.
Step 5: Transplant Your Rooted Sucker
Once your cutting has established strong roots (visible roots in water, firm resistance in soil, or roots visibly protruding from sand), transplant it carefully into its final growing location or a larger pot. Bury it deeply, ensuring the roots and part of the stem are underground, to encourage a strong root system.
Caring for Your Newly Rooted Tomato Plants 🌞💦
-
- Gradual Sunlight Exposure: Initially, your new plant should be placed in partial shade to prevent stress. Gradually increase its exposure to full sunlight over one week.
Get the sunlight👇exposure guide
- Consistent Watering: Maintain even moisture levels in the soil, especially during the initial weeks. Mulch can help retain moisture.
- Support Structures: Provide stakes or cages early to support the growing plant and encourage upward growth, particularly for indeterminate varieties.
Common Mistakes and How to Avoid Them 🚫
- Choosing Poor Quality Cuttings: Always start with healthy suckers from vigorous, disease-free plants.
- Leaving Too Many Leaves: Excess foliage drains resources needed for rooting.
- Immediate Full Sun Exposure: New cuttings must be acclimated slowly to sunlight to prevent wilting and stress.
- Overwatering or Underwatering: Maintain balanced moisture levels, as extremes can hinder rooting and growth.
My Proven Tips for Guaranteed Success 🌟
- Experimentation: Try rooting multiple suckers simultaneously, using water, soil, and sand methods to see which yields better results in your garden.
- Labeling: Clearly label your cuttings if propagating different tomato varieties to avoid confusion.
- Patience and Consistency: Handle cuttings gently and maintain consistent care routines for the best rooting success.
Final Thoughts: Enjoy the Benefits of Tomato Cloning! 🍅✨
Learning how to propagate tomatoes from suckers has been a total game-changer for me in the garden. It’s such a smart way to save money, expand the garden fast, and really get hands-on with the amazing regenerative power of plants. I hope this guide inspires you to give it a try and experience just how rewarding it can be. 💬 Got any tomato cloning tips or tricks? Add a comment below and share your wisdom to help fellow gardeners thrive! Happy gardening and enjoy your bountiful tomato harvests!